
In this medieval embroidery tutorial, I will show you how to recreate the lovely female face with the big braids as seen on this 15th-century chasuble. You will practice silk embroidery, padding and beading when recreating this lovely beaded stumpwork portrait of a female saint. Whilst working the medieval embroidery sample using the tutorial on this blog is perfectly possible, my Journeyman and Master Patrons will find a downloadable PDF on my Patreon site for easy reference.
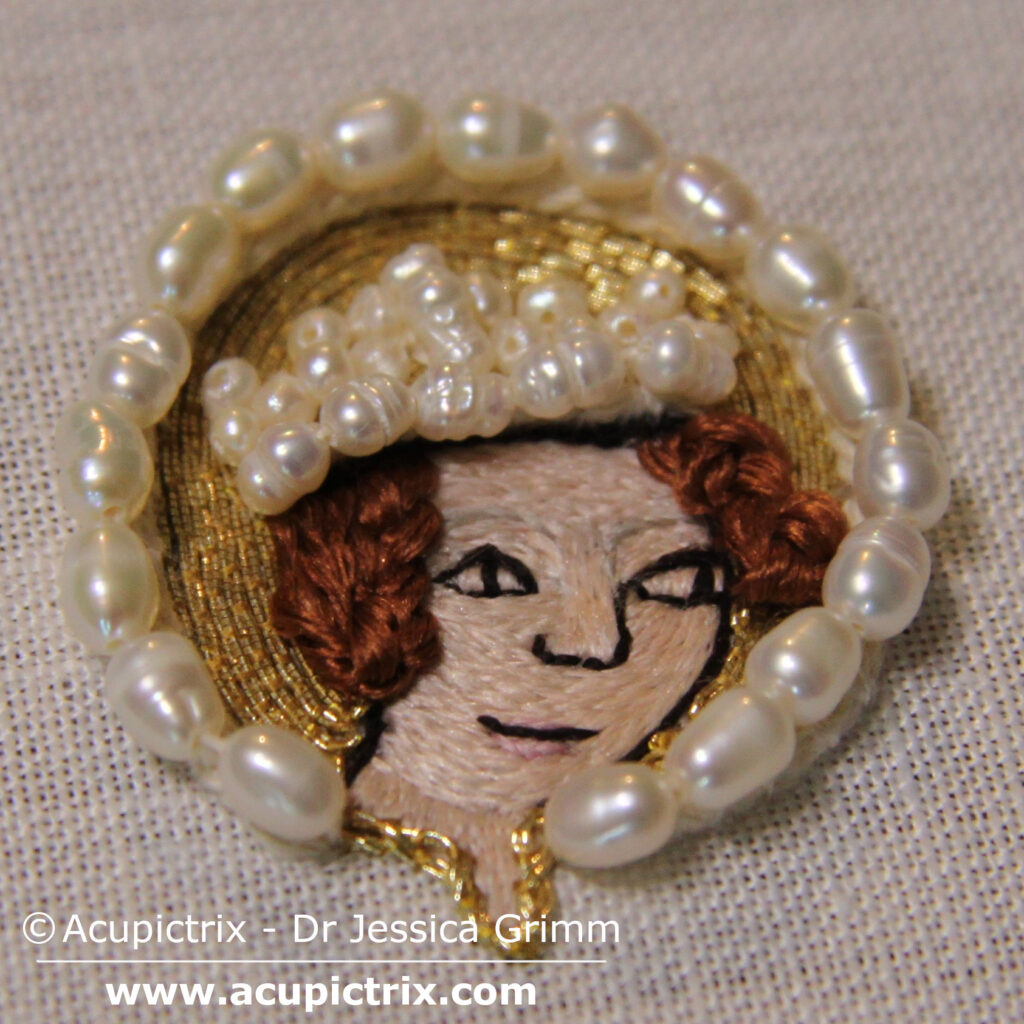
Ever since I saw the chasuble with the Franconian stumpwork embroidery in the
Bamberg Diocesan Museum, I wanted to try to recreate the face of the female saint with the braided hair and turn it into a medieval embroidery tutorial for the blog. From my pictures and the measurements in the literature, I was able to work out that the embroidery measured about 4.7 cm from the neckline to the top of the halo. And in this relatively small space, a lot is going on.
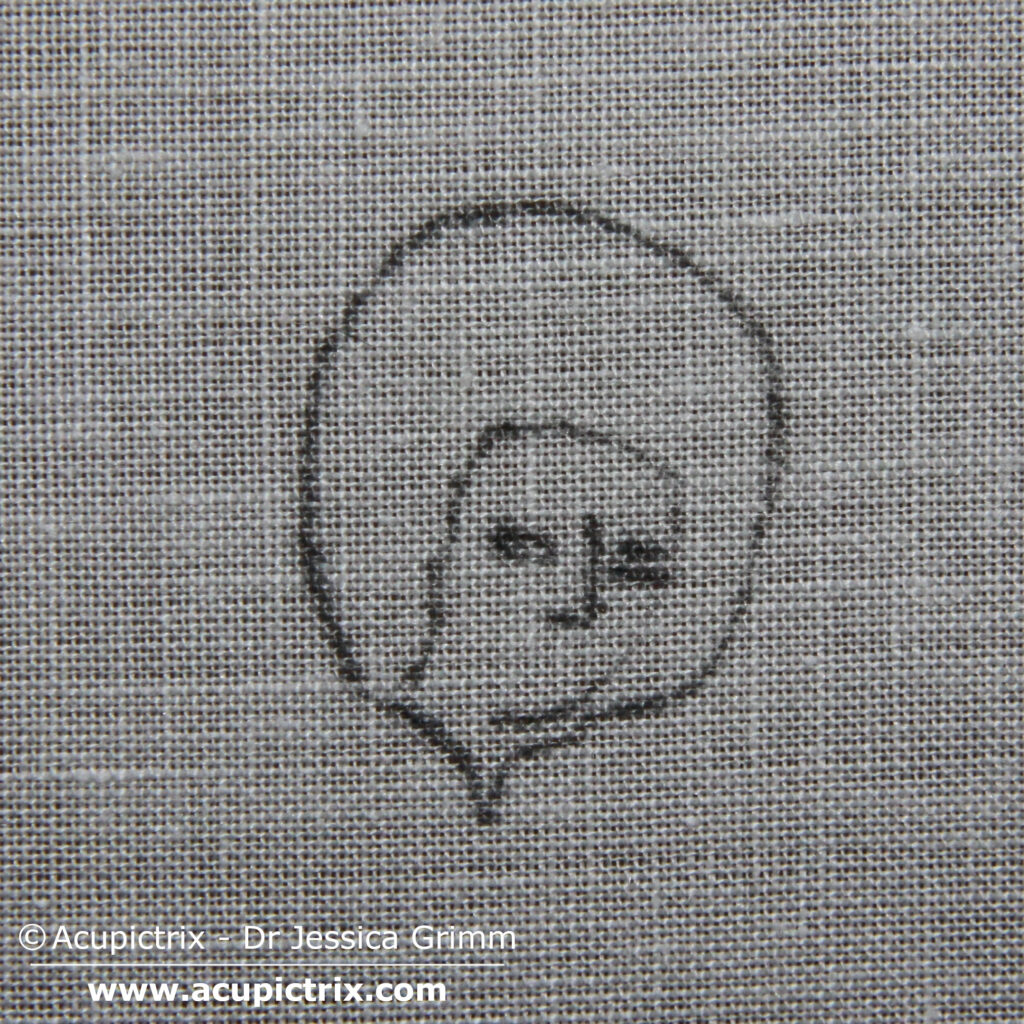
Luckily, we don’t need to transfer all the details of the intricate line drawing onto our embroidery fabric for this medieval embroidery tutorial. As this is medieval stumpwork, a lot of the embroidery is worked on top of previous embroidery. Your intricate drawing is no longer visible. You only need to transfer the inner line of the halo, the inner line of the neckline, the outline of the face (extend under the left braid a bit), the eyes and the nose. It should look something like the above picture on the right.
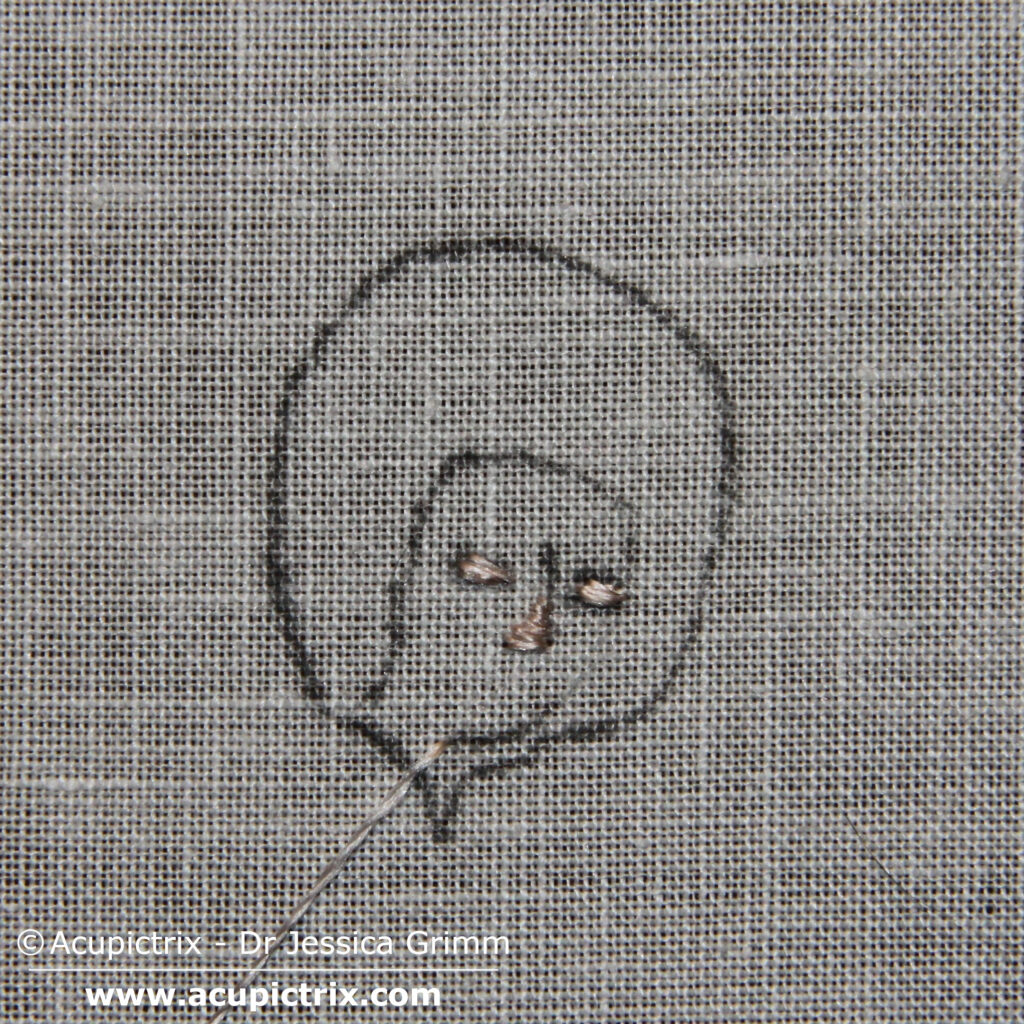
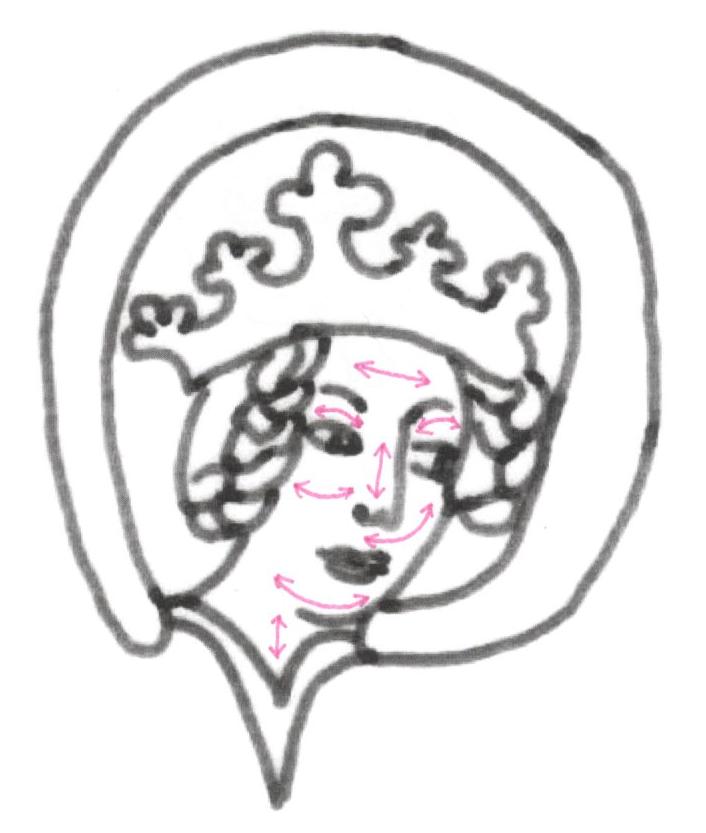
Parts of the face (eyes and nose) are padded. The subsequent split stitching has been worked over the top. We are thus going to start this medieval embroidery tutorial with some simple padding for the eyes and nose. As the stitches in the original run vertically, the padding stitches need to run horizontally. Use the same pink colour silk for the padding as you are going to use for the actual stitching. I am using Chinese flat silk. Add as many stitches as you need. Then, stitch the neck and the face in split stitch and satin stitch. The above picture shows you the stitch direction for the different parts of the face. Work the neck before you work the face. Use satin stitches for the eyes and the nose. The filled face should look something like the picture above.
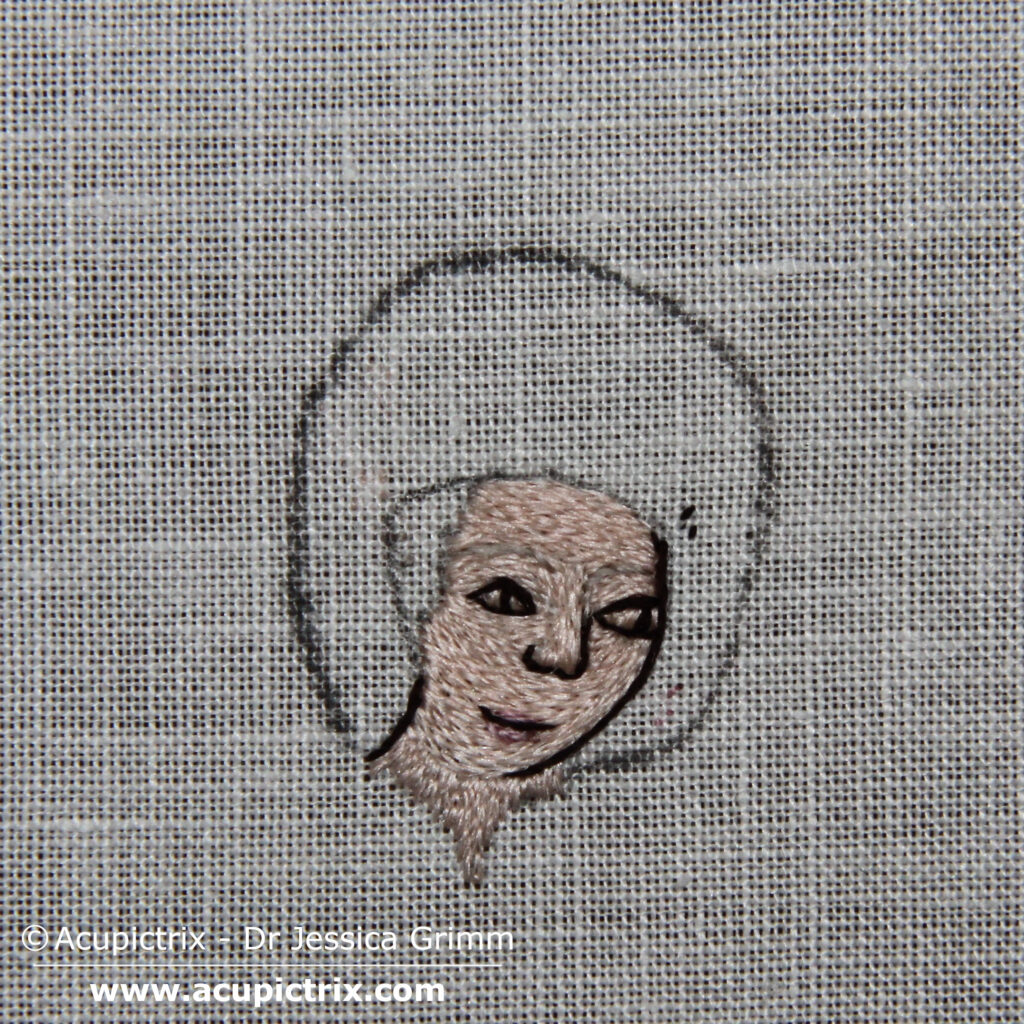
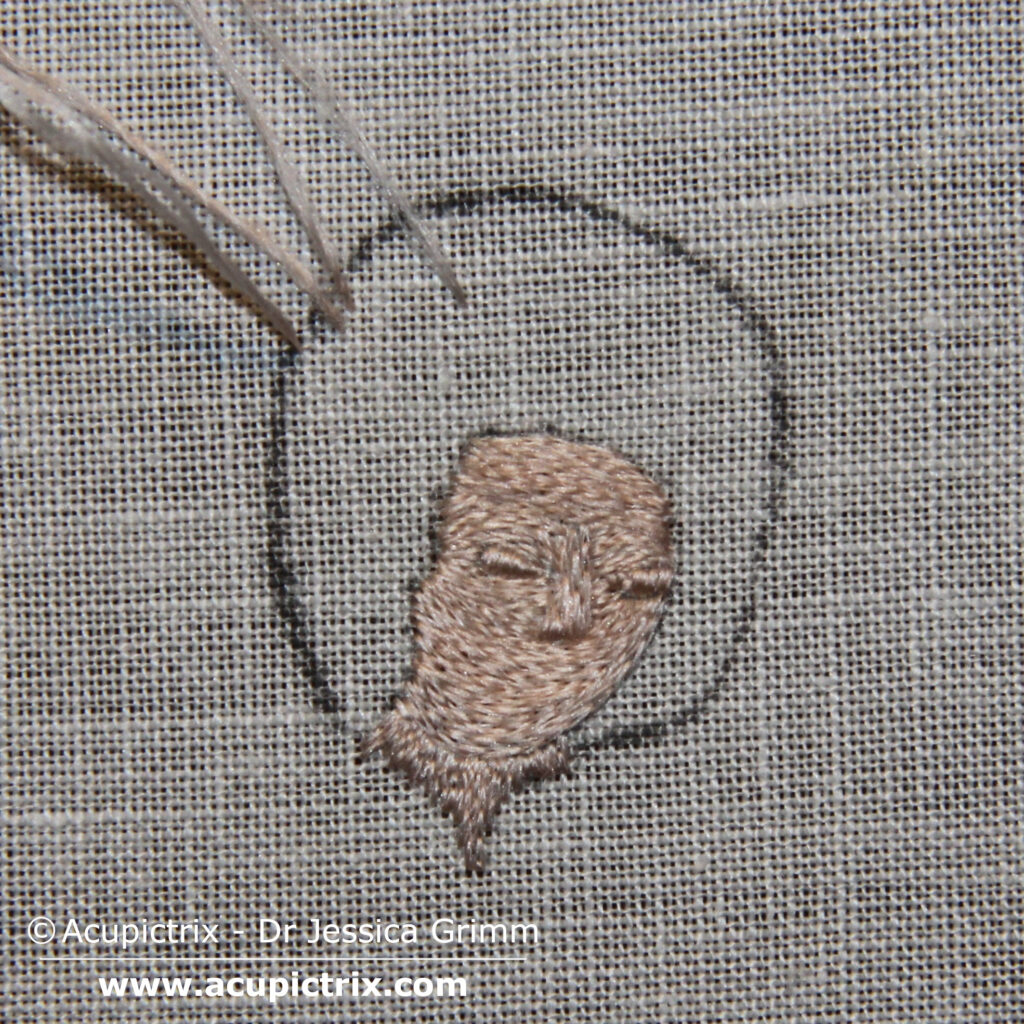
Add the facial details with some dark brown and dark pink silk. You can use satin stitch, split stitch and stem stitch for this. I also added a pencil line for the hair. Subsequently, fill the halo with couched gold thread. I used Stech 80/90, which is comparable to a Passing #4, and DeVere Yarns #6 colour ‘Chamoix’. Start from the outside and work in. Couch down a double gold thread with your silk. Use a bricking couching pattern. The ends of your gold threads can either be plunged or hidden under the braids or the padding thread on the edge of the halo.
It is now time to add those gorgeous braids. I am unsure of how these were made. They look like natural coloured braided padding thread (wool?). The remnants of brown we see can be a number of things. Were the padding threads wrapped with silk? Was silk couched over the padding threads? Or were the padding threads coated in a layer of paint?
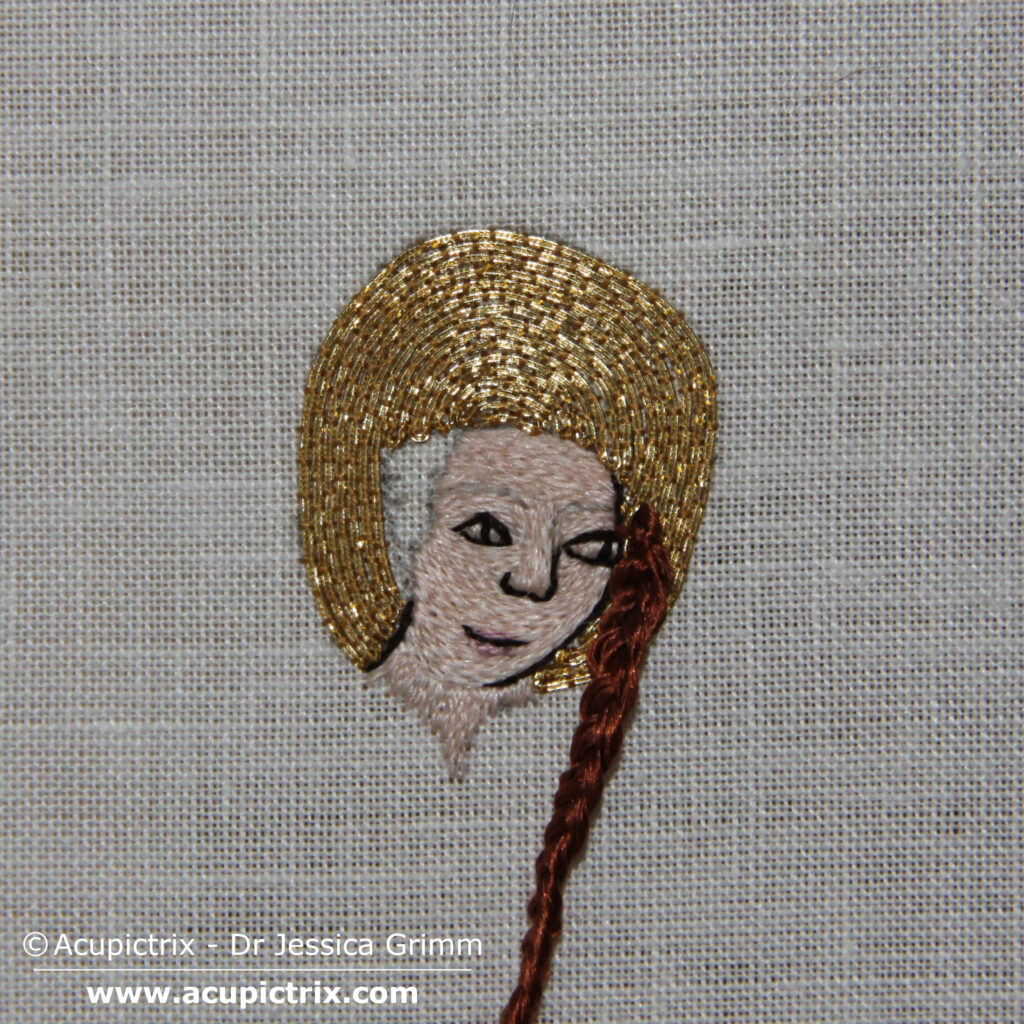

To make braids, I opted for a different approach. I took DeVere Yarns #60 colour ‘ brown’ and made a three strand braid with 9 threads. I then started with the braid on the right. Couching the lower end under, and the top end will hide under the padding for the crown. I then worked the other braid. I untwisted part of the braid and used it to stitch the flat part of the hair. The rest of the braid was then looped up and couched down under the padding for the crown. For the couching thread, I used DeVere Yarns #6 colour ‘Redwood’. Before cutting off the ends of the braids that go under the padding thread of the crown, I dabbed a little textile glue on them.
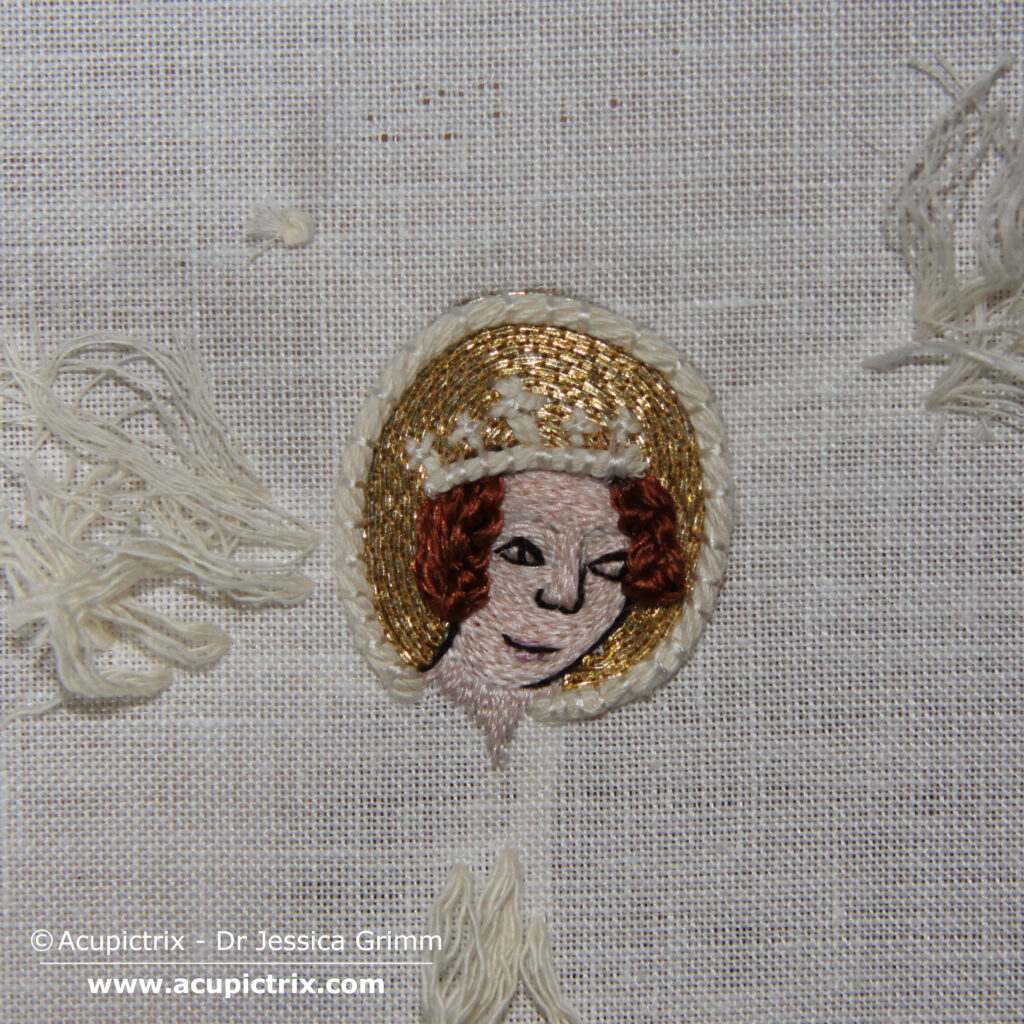
After the glue has dried, it is time to stitch in the padding for the pearls that form her crown and the edge of the halo. I am using three sizes of cotton padding thread for that. The original embroiderer built the whole thing up with one size thread. As you did when you attached the braids, you are stitching through your layer of couched gold. Note: I am plunging the ends of my padding threads but I just park them on top for the moment. There is so little space on the back and still so much delicate embroidery going on. Once that’s all done, I will secure the tails on the back.
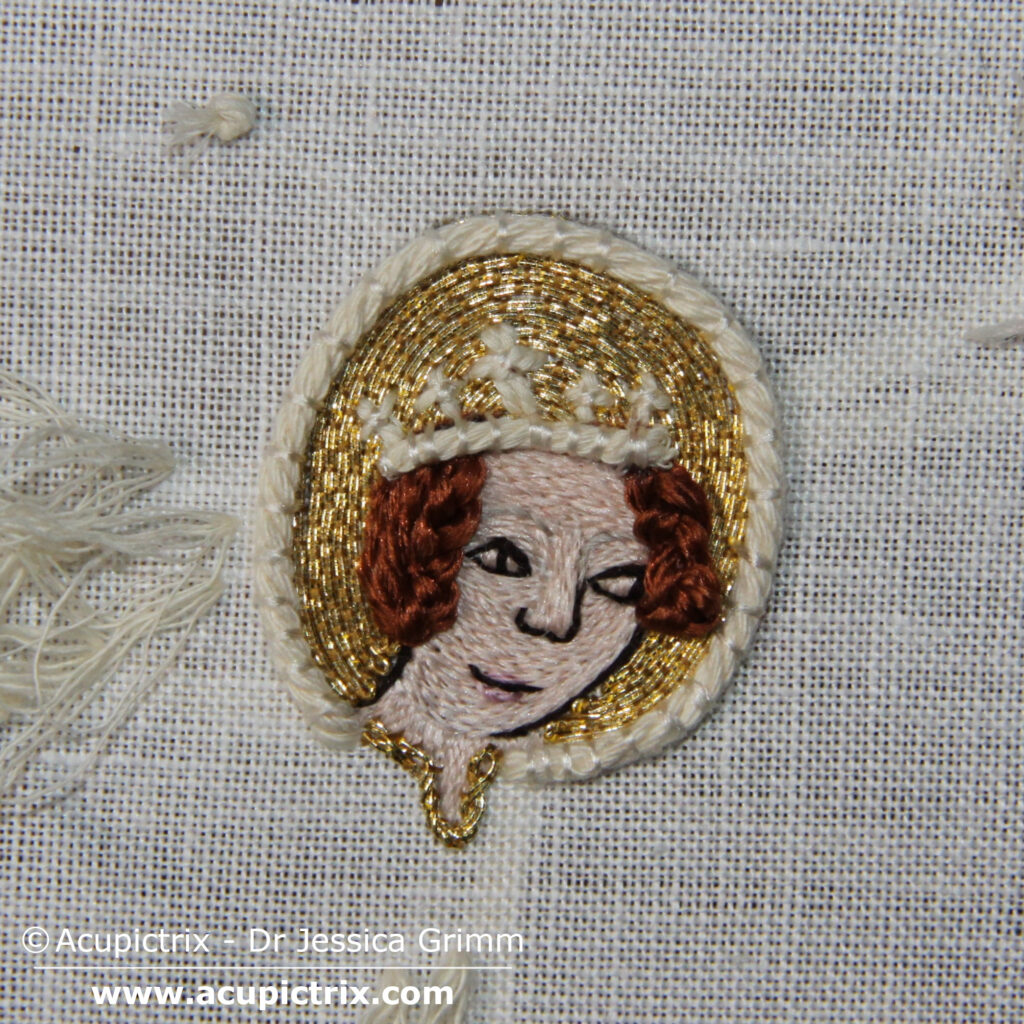
Before we attach the pearls, we need to stitch her collar. It consists of two gold threads folded in half and loosely twisted together. The loop of where you fold your pair of gold threads sits at the right hand side of the collar. The gold threads are couched down with the same thread as used for the halo.
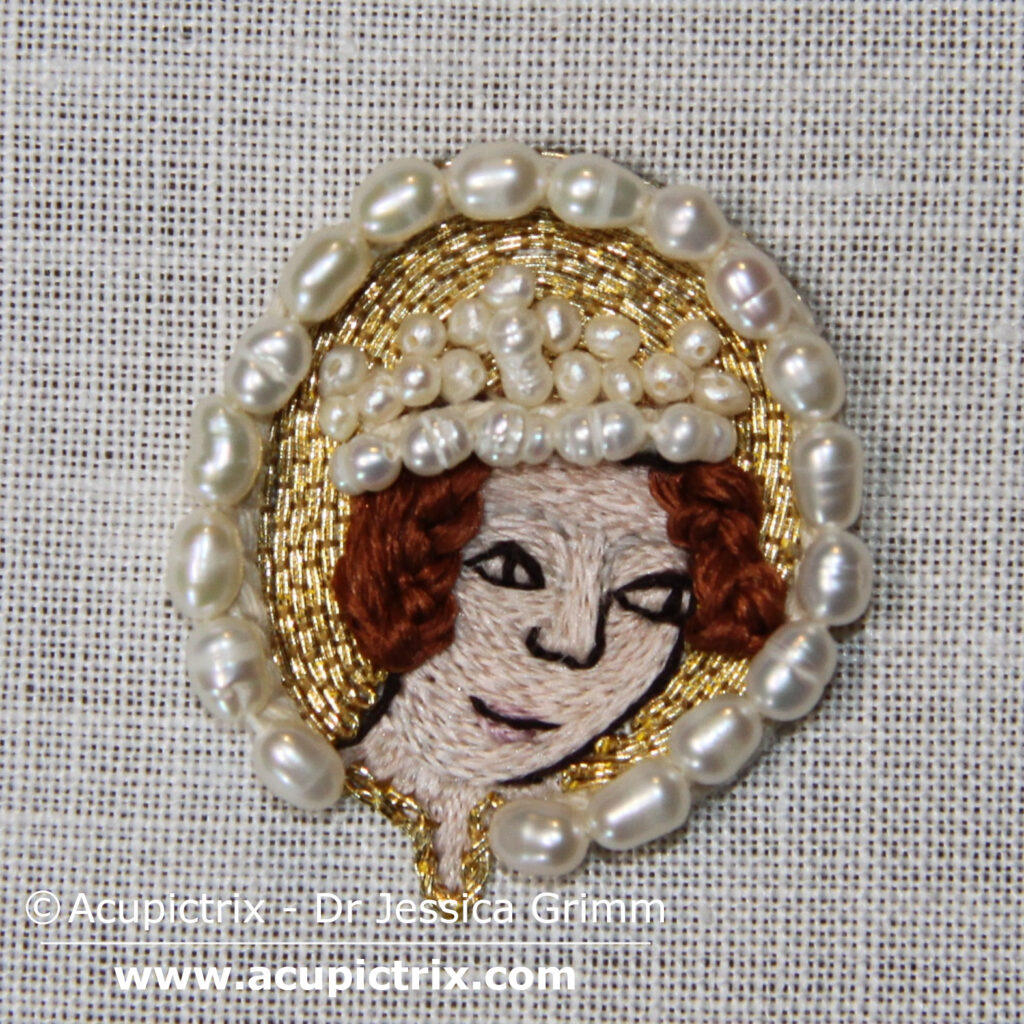
It is now time for the fun part: beading. The largest pearls go on the edge of the halo. The mid-sized pearls go on the bottom of the crown and the central tri-lobe. The smallest pearls go on the four smaller tri-lobes. You can use any kind of beads you like as fresh-water pearls can be hard to obtain. I’ve used white Chinese flat silk to attach my pearls. Also add a dark brown line along the bottom of her crown.
And that’s another finished medieval embroidery tutorial! As the padding of the halo edge is so massive in the original, I do believe that the original pearls would have been big too. This whole figure was once heavily encrusted in gold and pearls. The many steps involved in stitching the head remind us that this was once the high-end of embroidered luxury!
Didn’t expect to get to do hair dressing in this context. 😃