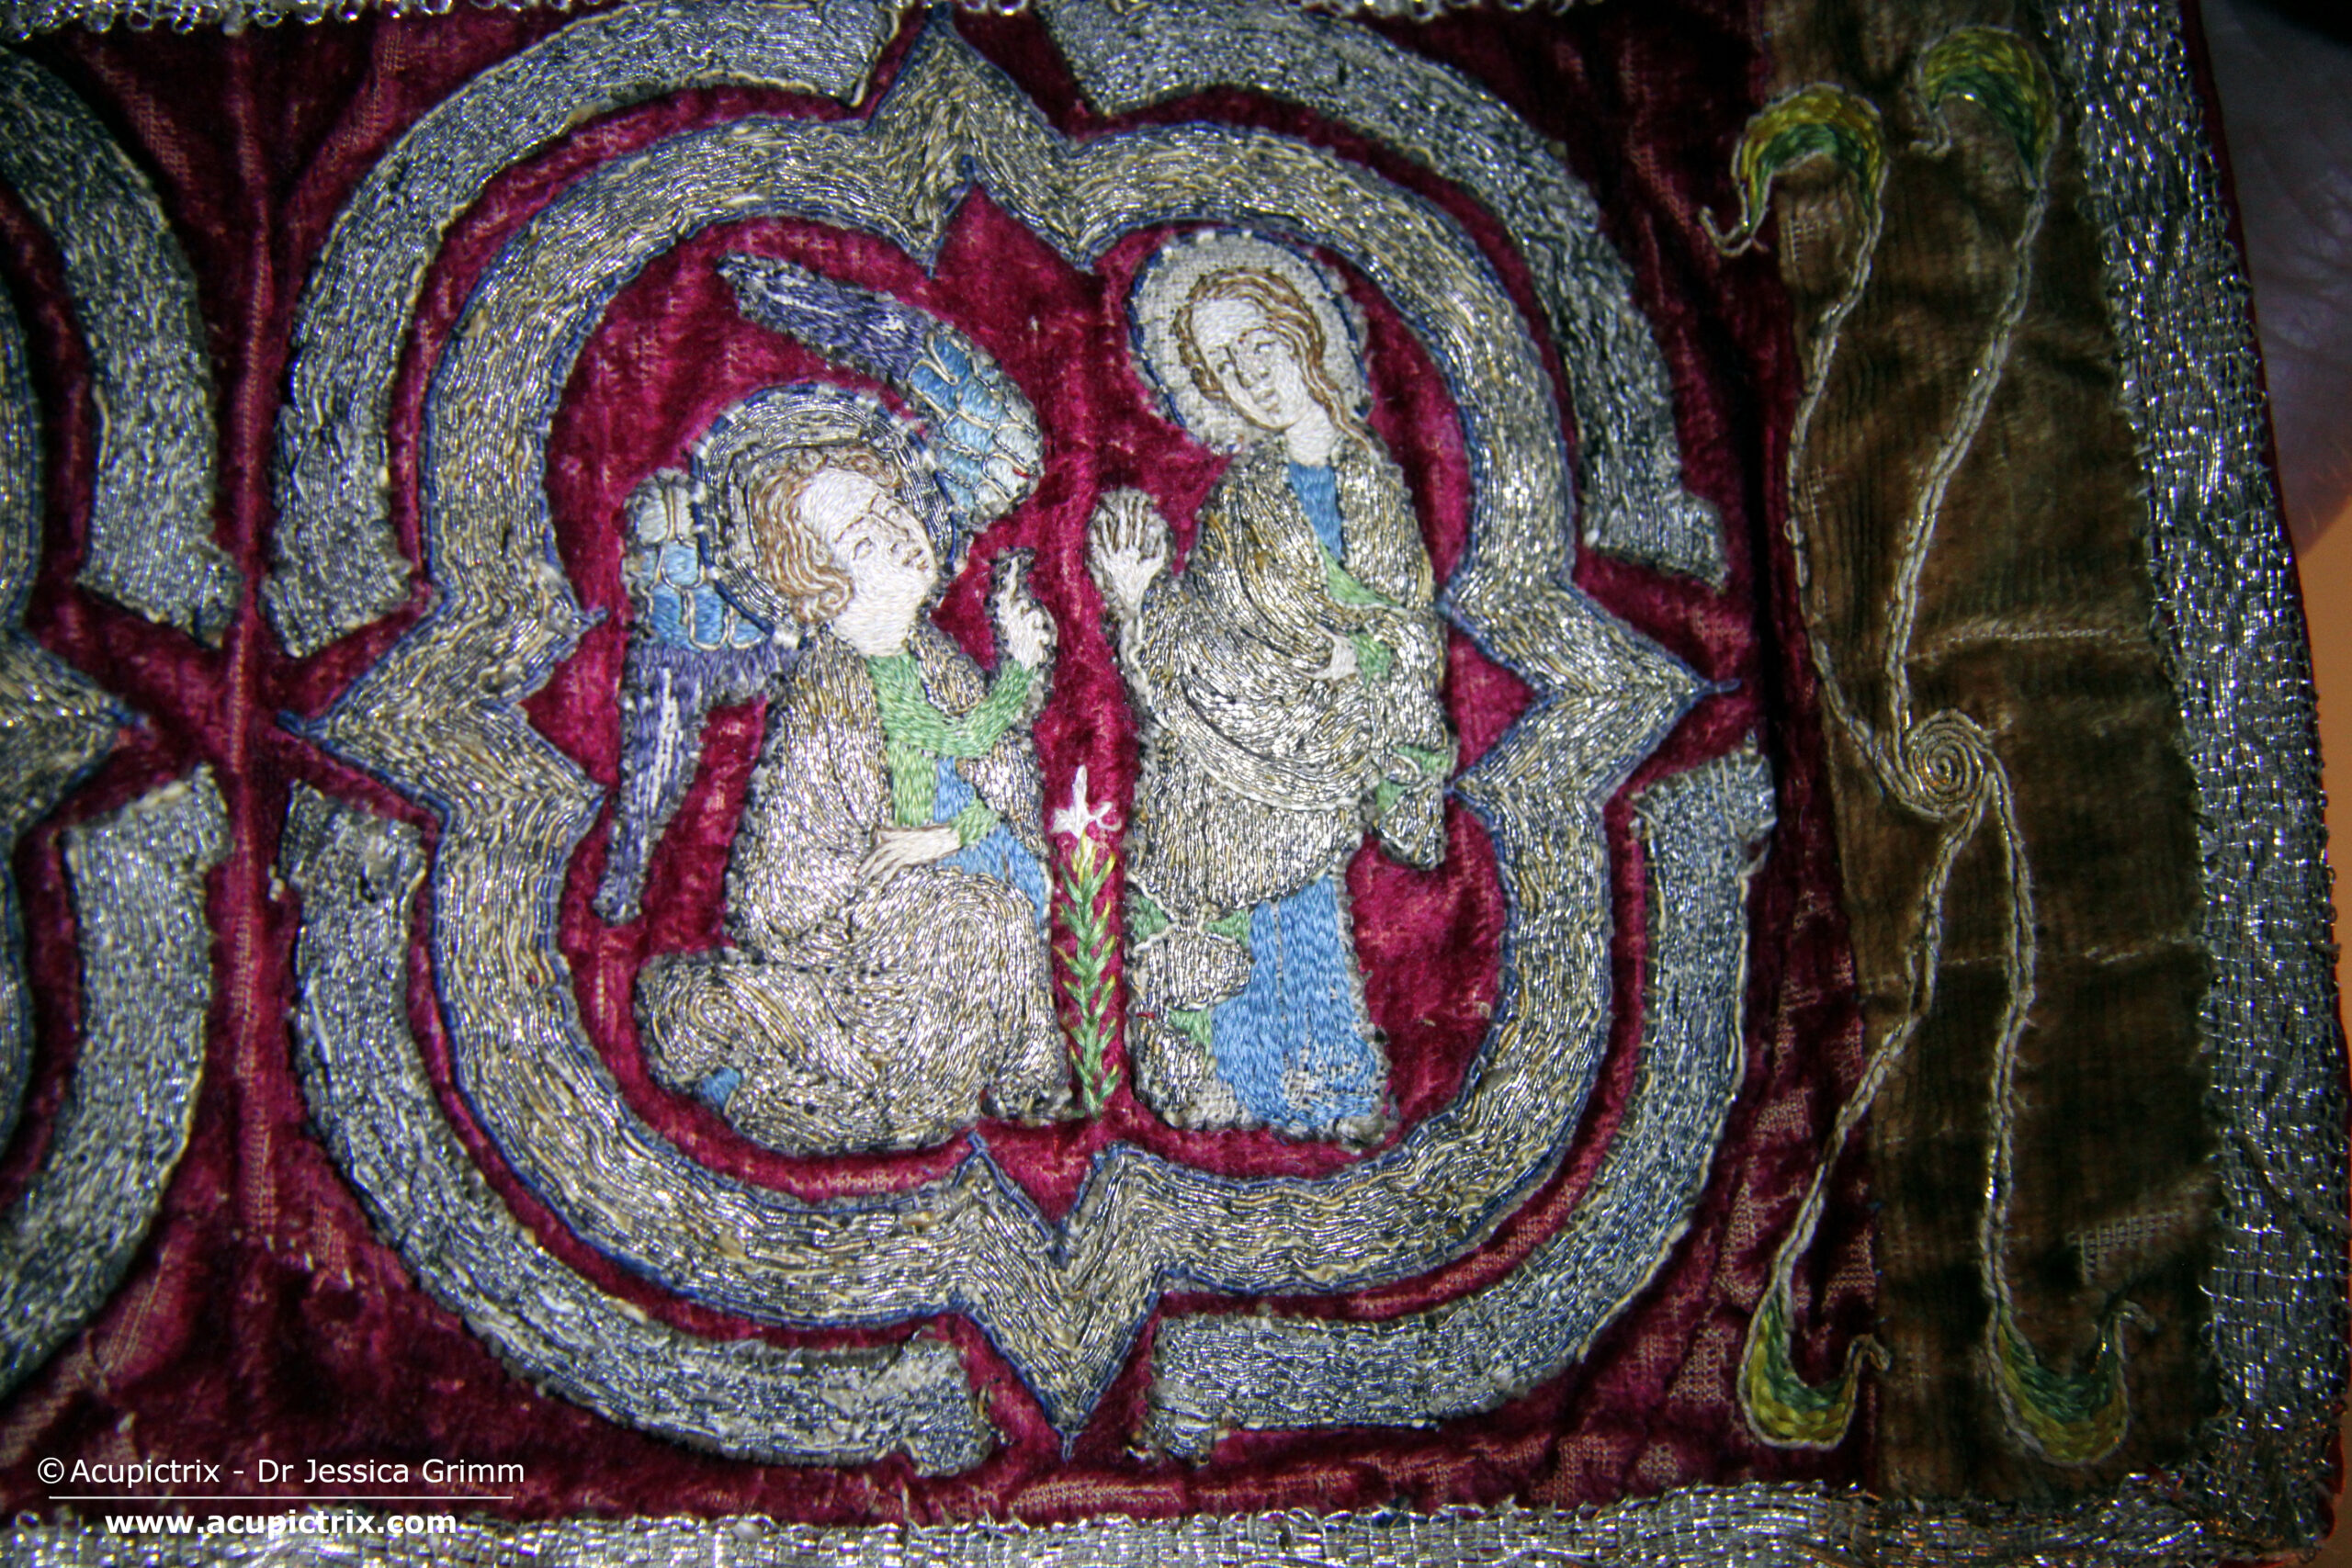
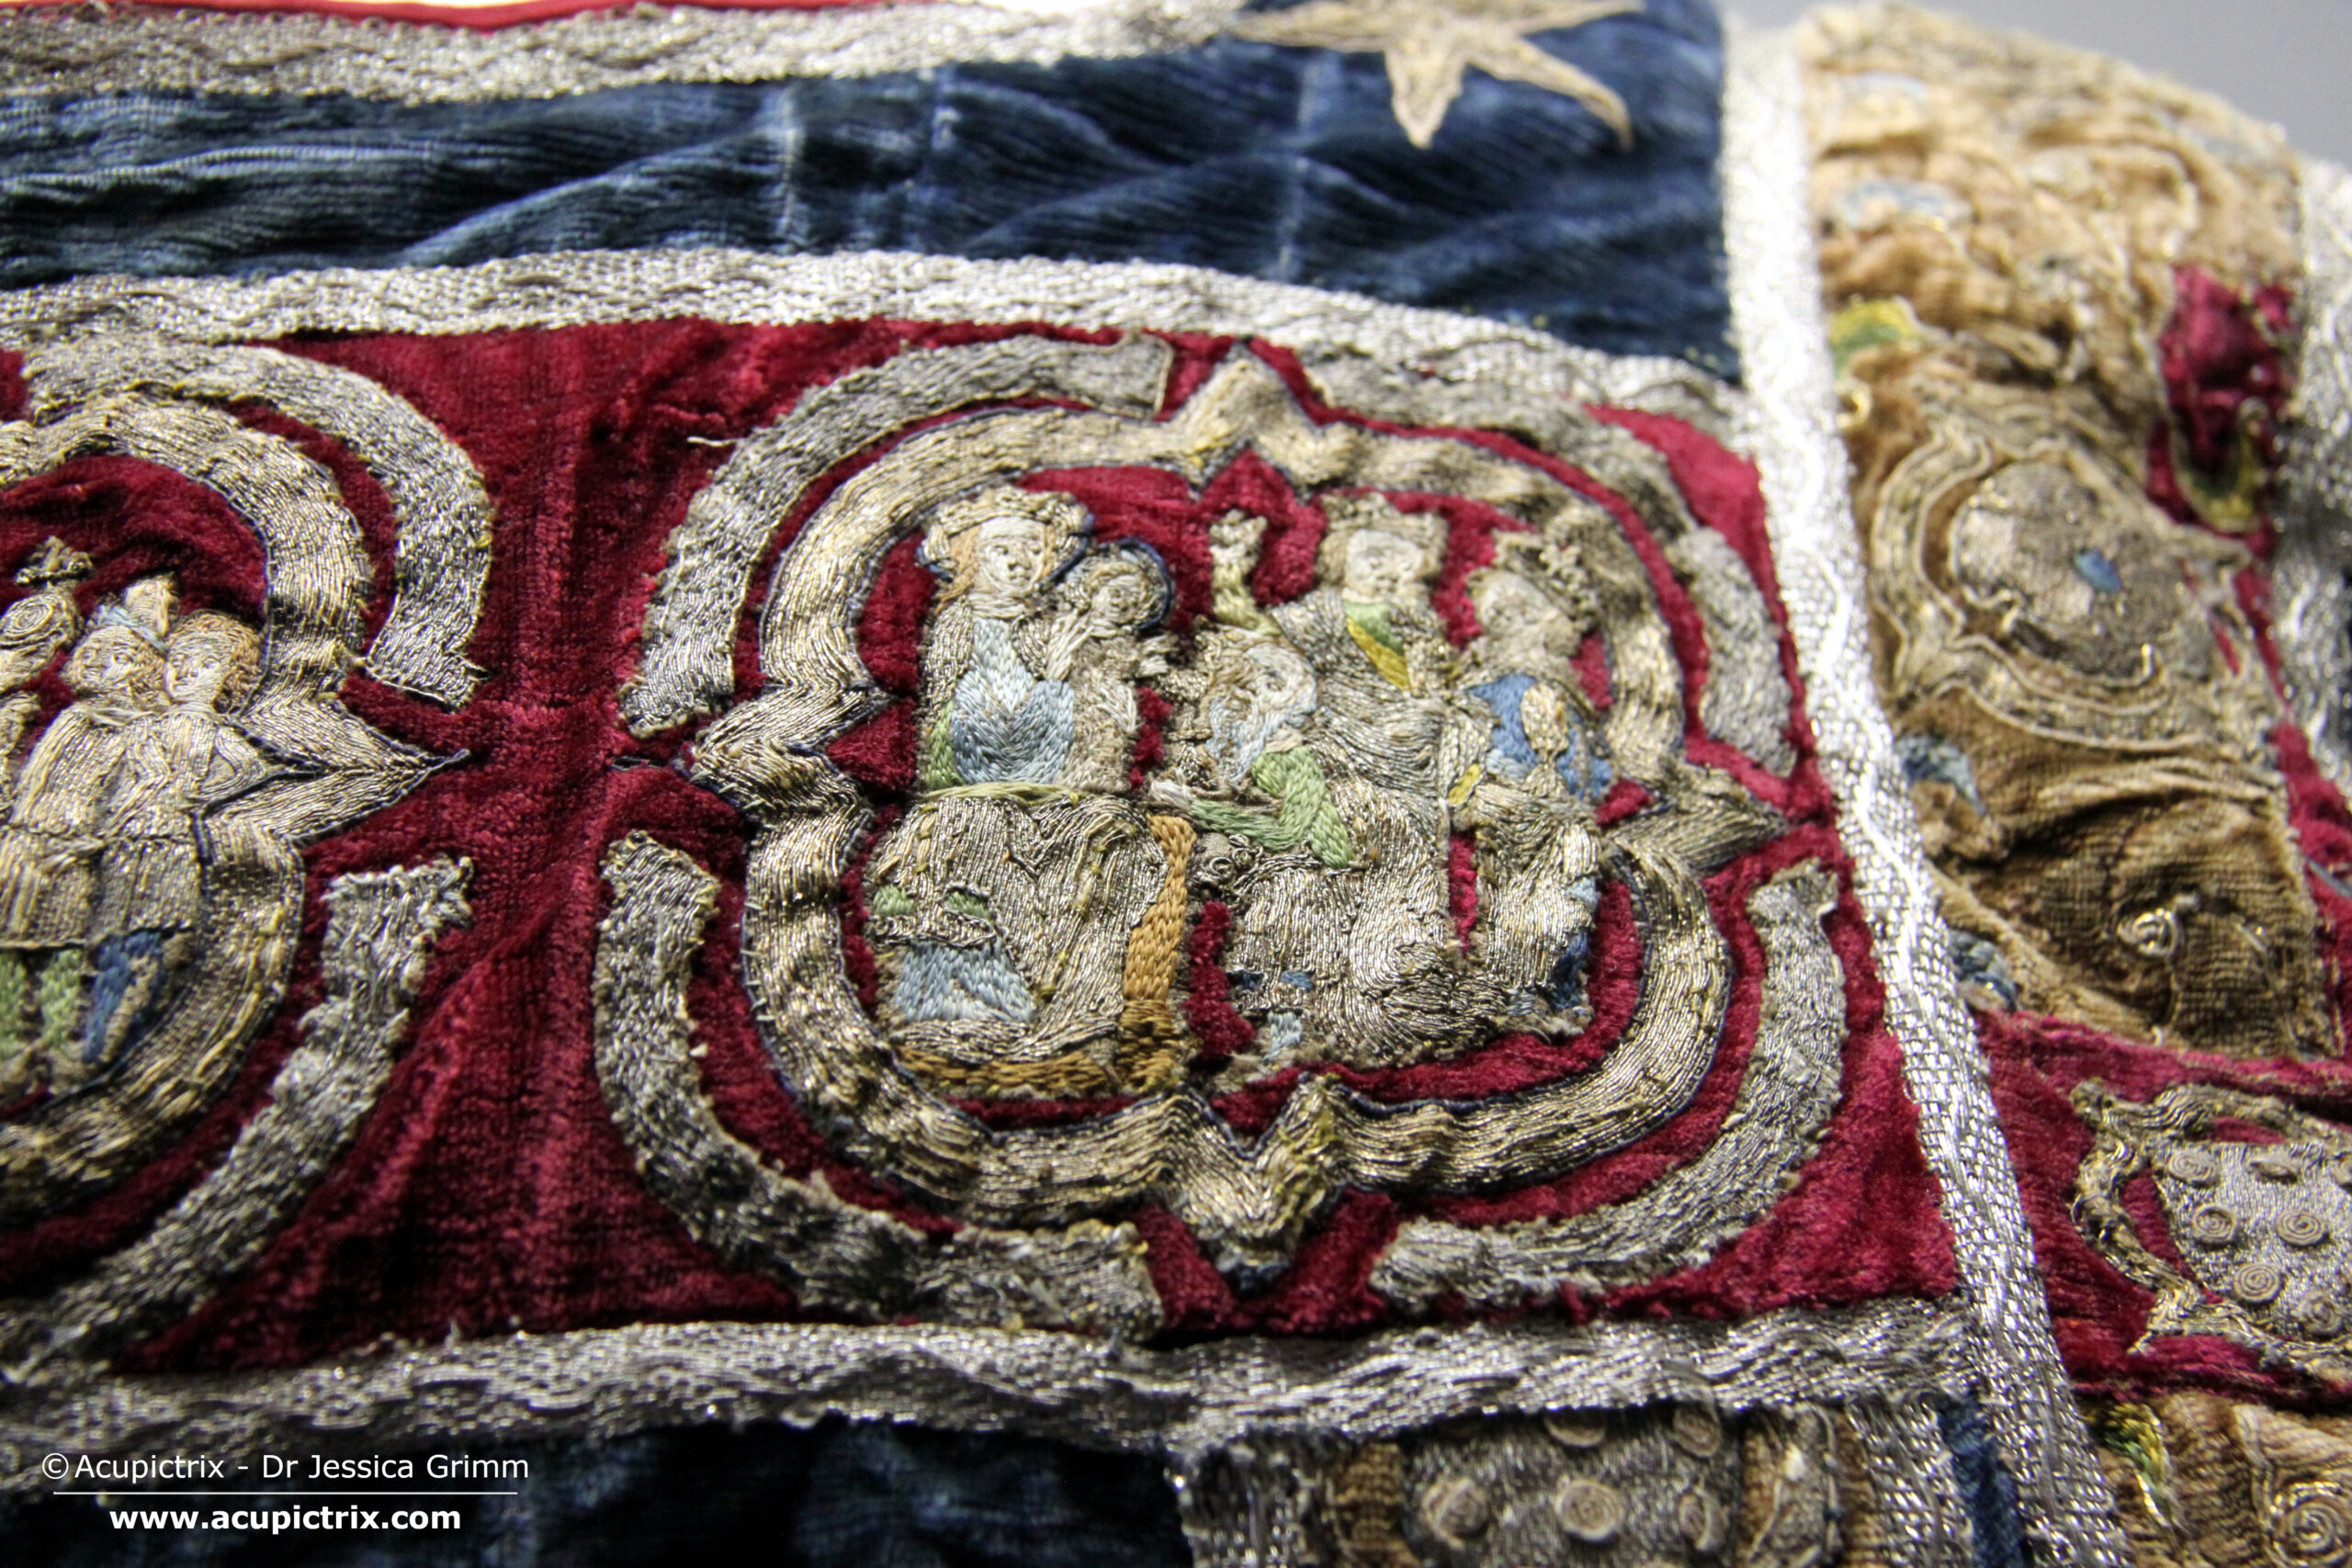
Today’s stitch tutorial is all about the white string we see in many medieval goldwork embroideries. This padding is often all that remains from the original bead embroidery worked with freshwater pearls. When we are really lucky, a few pearls still adhere. As is the case with the chasuble I showed you two weeks ago. In this stitch tutorial, I will show you how the padding and the beading were worked. I was really surprised by how sturdy this technique actually is. The beaded edge is VERY firm.

As always, I worked my sample on a piece of high-count (think 40ct and up) linen stretched on my slate frame. I determined the approximate size of St John’s head with his nimbus from the original embroidery. It is about 5.3 x 5.9 cm. I made a pricking on transparent paper and transferred the design with pounce powder and ink.

As is a favourite with medieval embroiderers, the simple nimbus is actually built up of several layers of embroidery. Start with a layer of radiating satin stitches in blue flat silk. The radiating does not need to be super precise. You can hardly spot the radiating stitches once the next layer of embroidery has been worked.

The next layer consists of couched gold thread. Use a fine red silken thread for the couching—work from the outside in. The first few rows consist of a double gold thread, whilst the last couple of rows consist of a single thread. In the original, the embroiderer would have hidden the turns under the slip of the head of St John. I have turned my threads on the edge of the nimbus.

It is now time to add the actual string padding. It is made up of a twisted bundle of linen threads. These are couched down with white silk. Start from the middle and retwist your bundle as you go. The ends appear tapered in the original. To achieve this, start cutting pairs of threads from your bundle about a cm before the end. Keep couching and removing pairs of threads until you are left with a single pair on the design line.
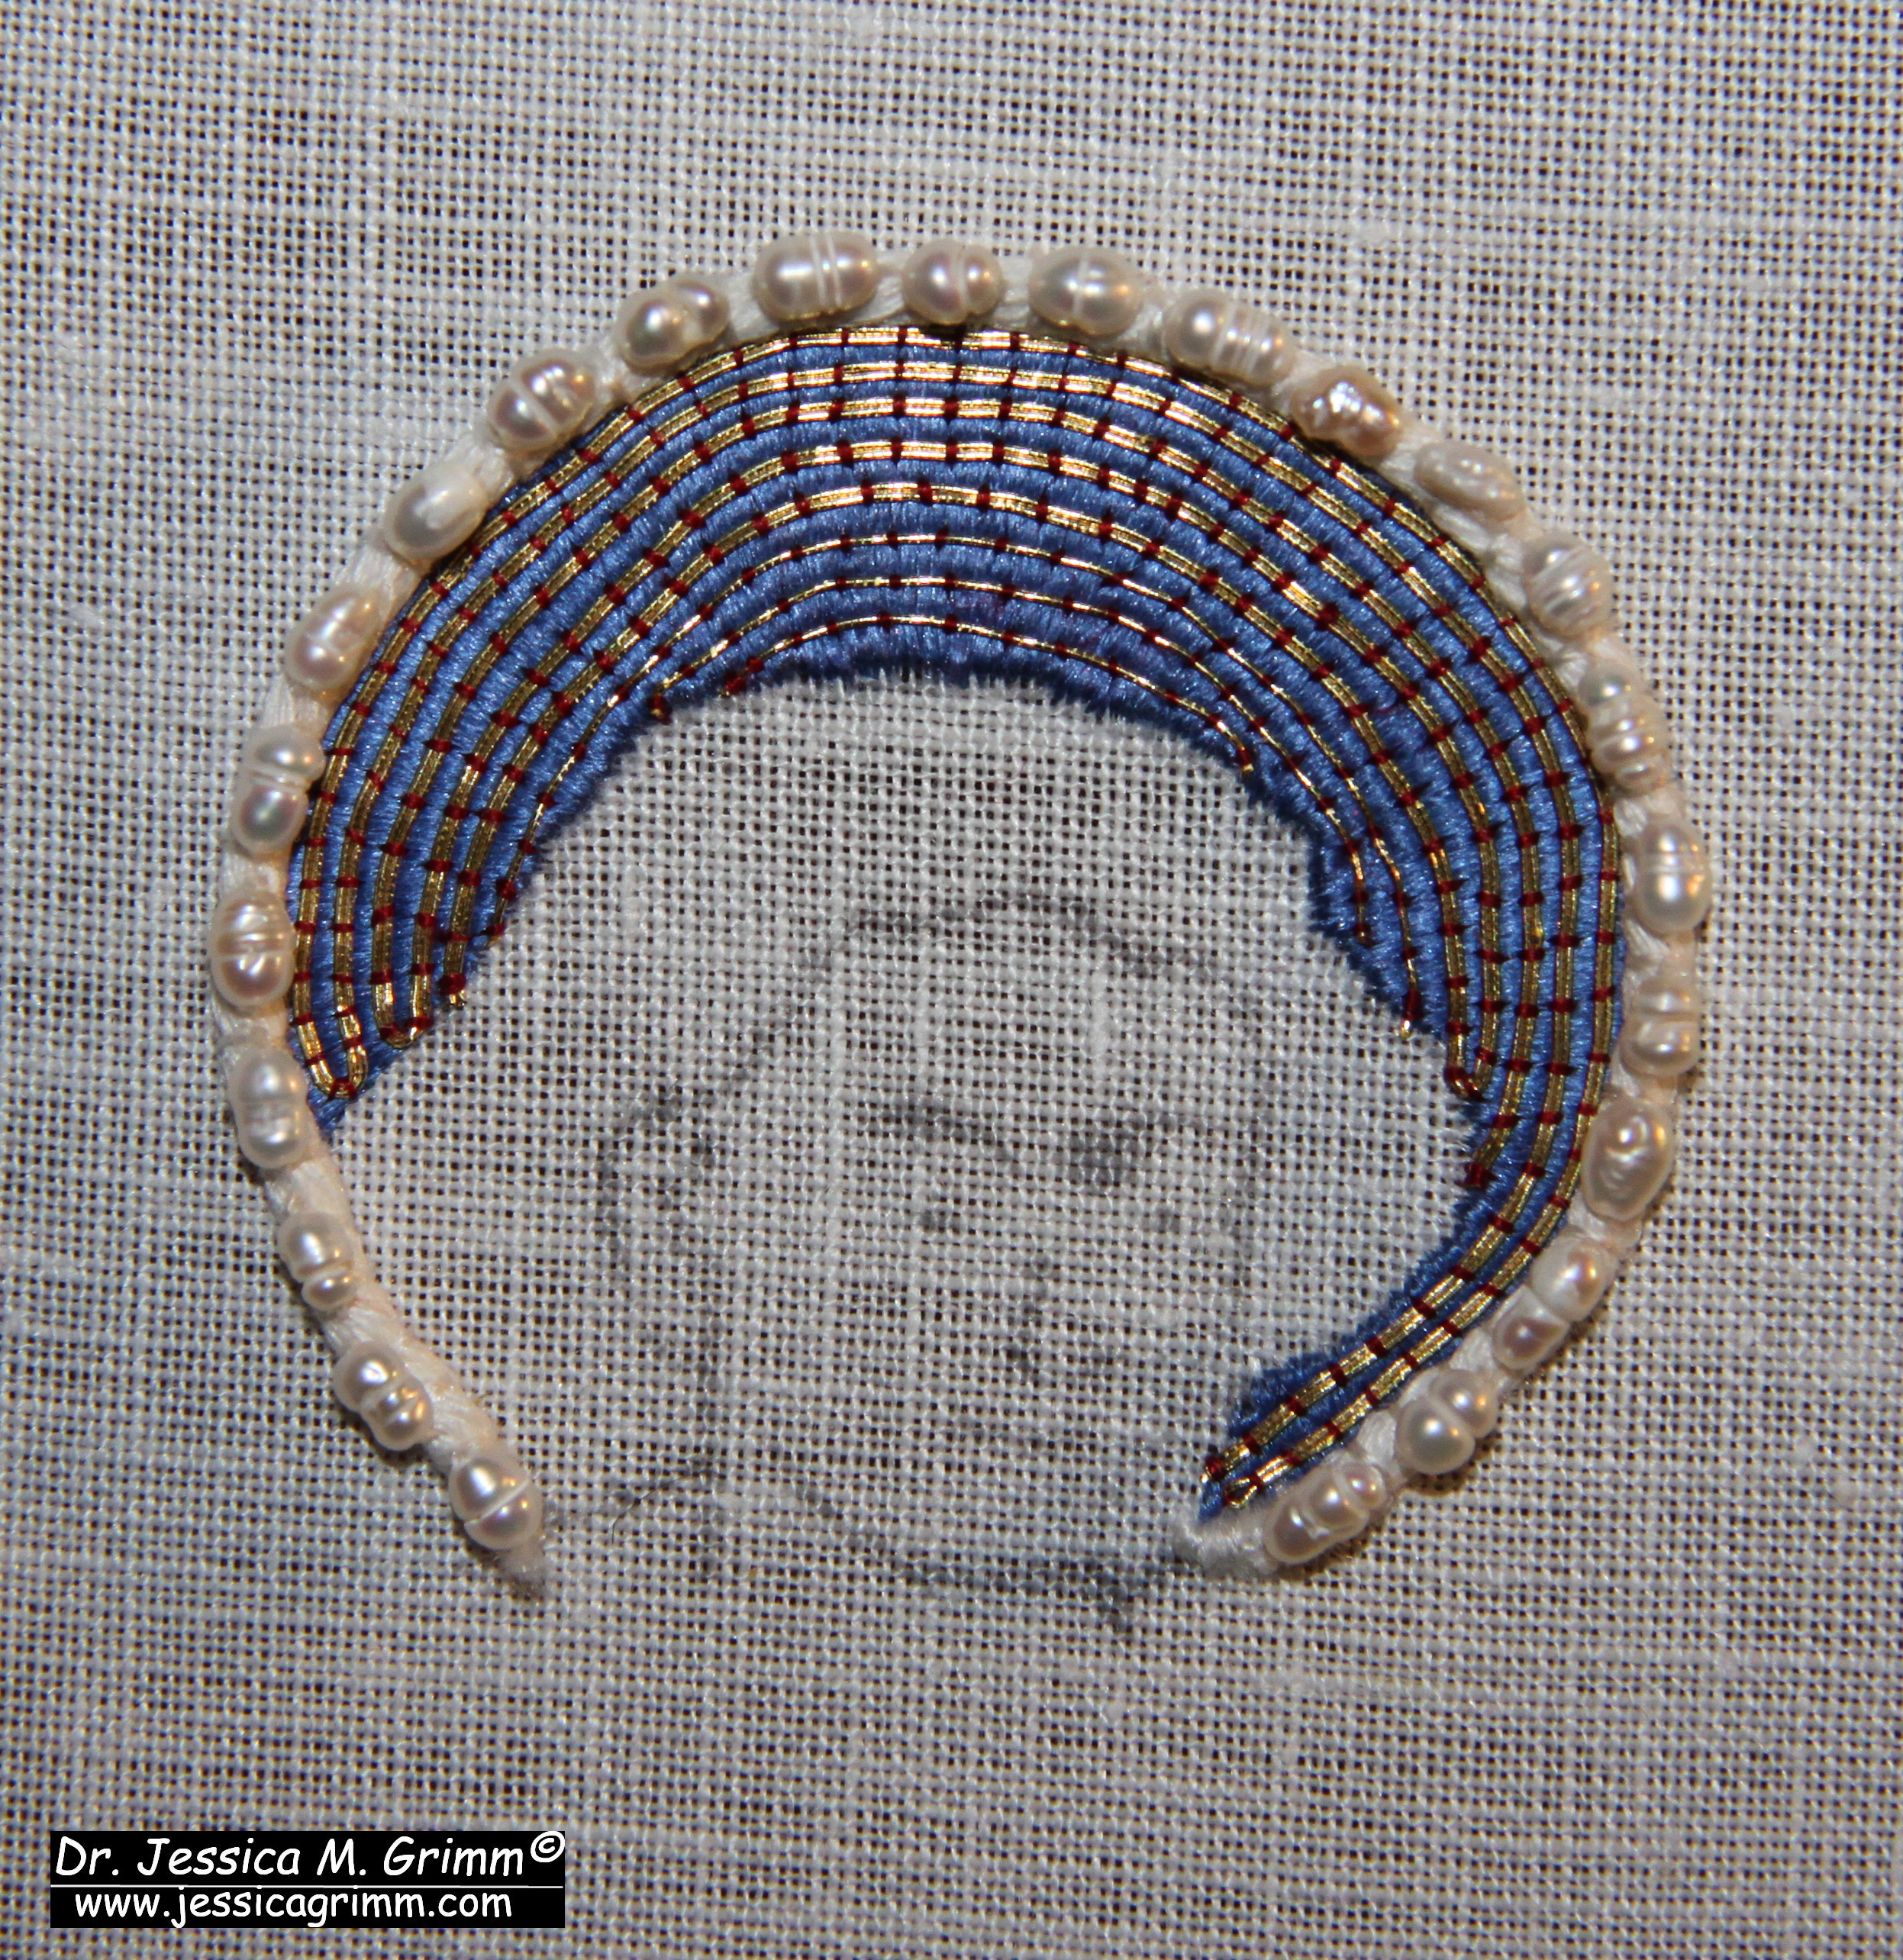
Sew down the freshwater pearls (Etsy is a good source for these!) onto the string padding using white silk. You might want to wax your thread, as the pearls’ holes can be quite rough. Go through each bead twice. In the original, the pearls are sewn down with a little bit of space between them. This was possibly done to save costs.

It is said that the string padding was used to elevate the pearls away from the very shiny gold. It also provided a continuous white edging when the pearls were slightly spaced apart, saving on costs. The result is very stunning!
As always, my Journeymen and Master Patrons find a downloadable PDF of this tutorial on my Patreon page. For as little as €5 per month, you can build your own library of medieval embroidery technique tutorials. Not a bad deal at all!
0 Comments