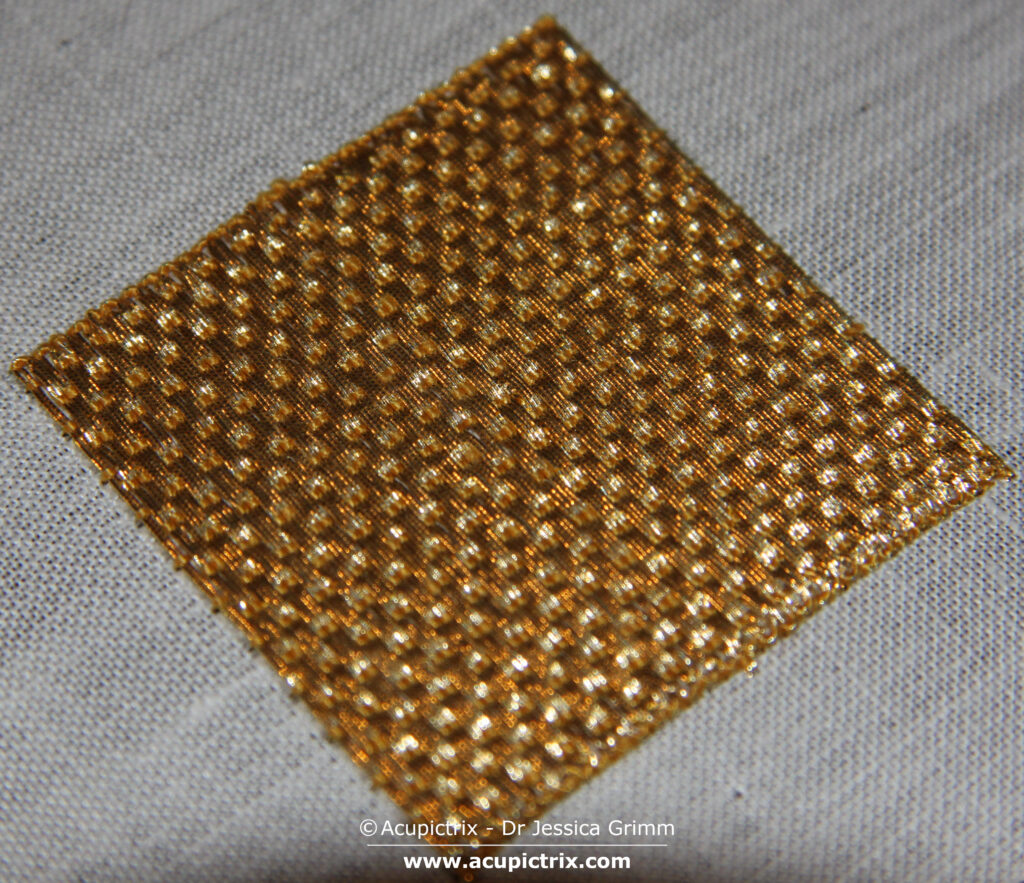
This goldwork tutorial shows you how to make a simple padded background for your goldwork or stumpwork embroidery. We saw this technique on the cope hood from Tuscany made in the first quarter of the 16th century. The method produces a nicely textured and firm background. It would look lovely with a stumpwork flower, butterfly or leaf on top. As always, my Journeyman and Master Patrons will find a downloadable PDF of this tutorial on my Patreon page.

For this goldwork tutorial, you will need embroidery linen, a firm but not too chunky padding thread, a couching thread and a passing thread (I used the equivalent of #4) or Japanese Thread. It is best to work on a slate frame. If you need instructions on dressing your slate frame, please scroll down to the bottom of this page for video instructions.

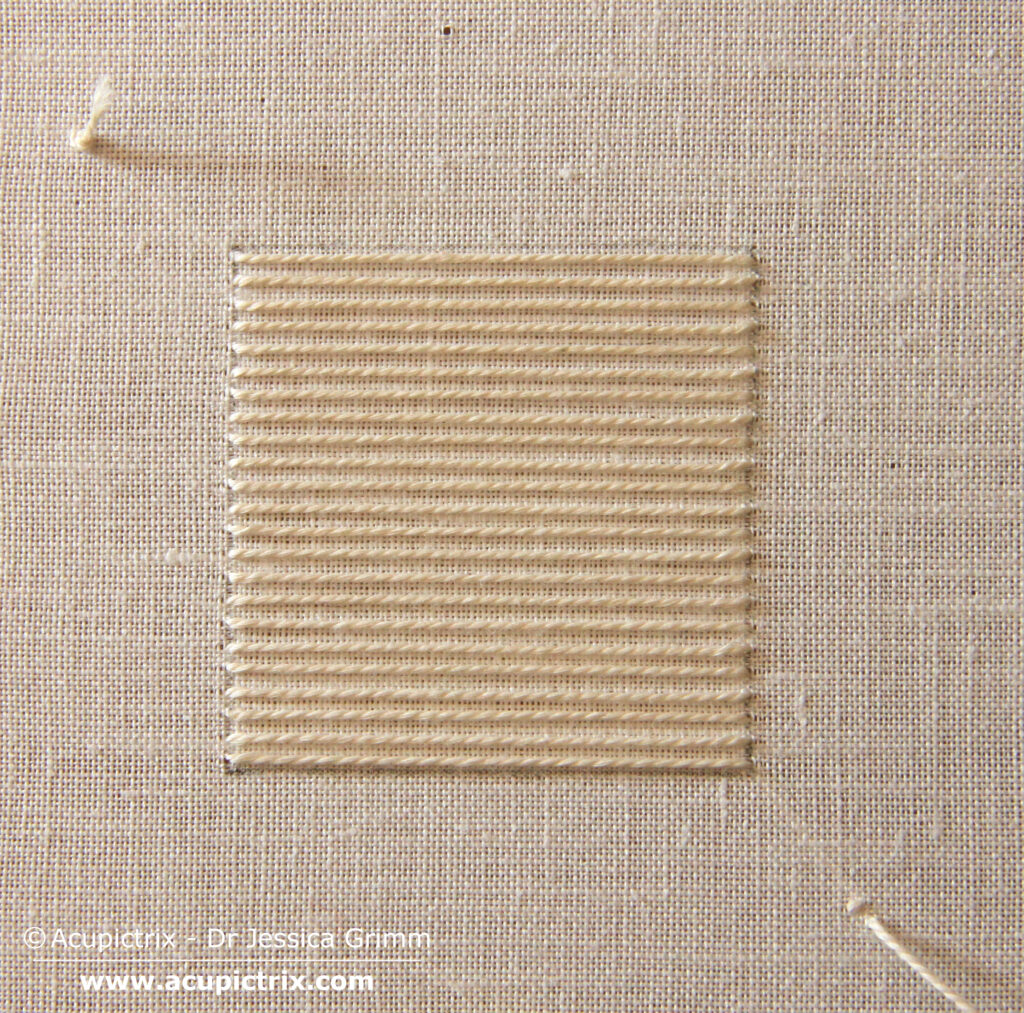
Start by drawing a square or rectangle on the grain of your embroidery fabric. Add the padding thread. I started with a knot outside my design and ended with a temporary anchoring stitch outside as well. Once all the embroidery has been finished, you will tie these ends to the back. Make sure you use a laid stitch and not a satin stitch to insert the padding threads, i.e., there’s minimal padding thread on the back of your work.

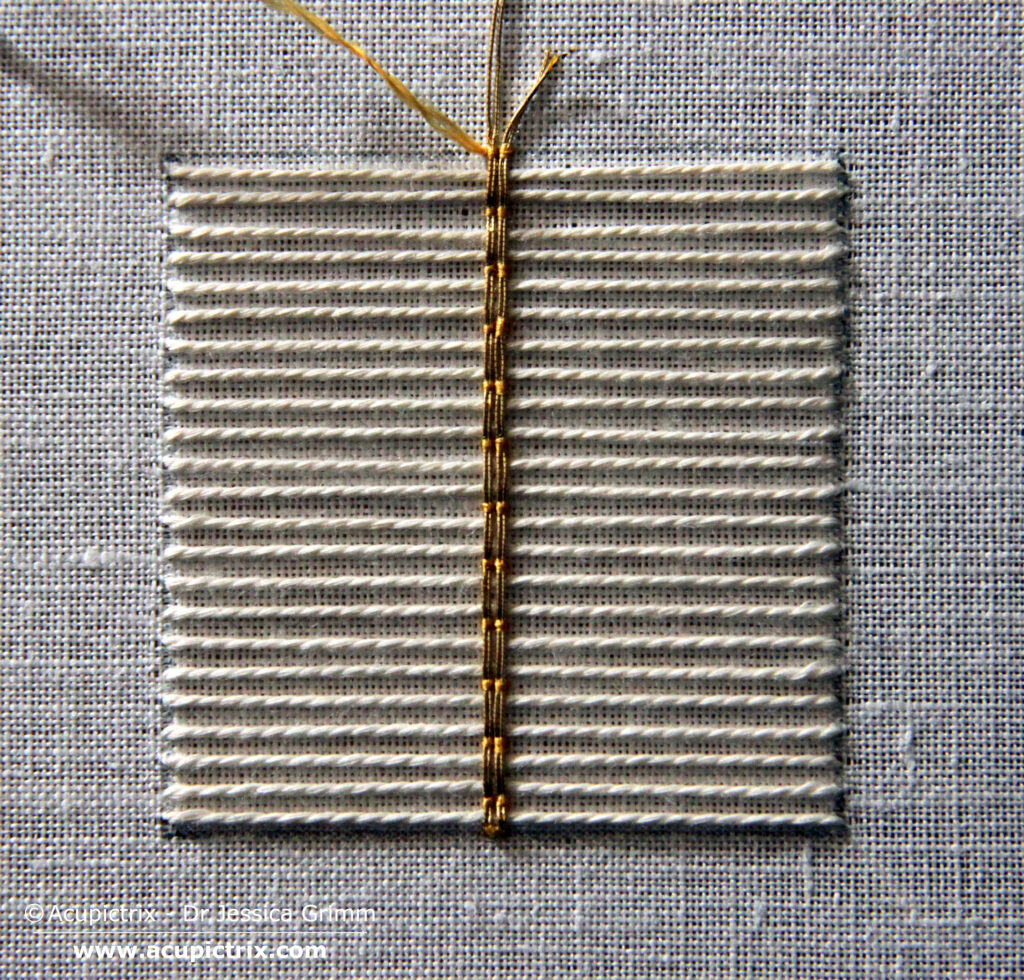
For this goldwork tutorial, couch down two gold threads over two padding threads. Repeat this for the second row. You start in the middle and work outwards. How you turn your gold threads is up to you. Every gold thread and every stitcher are different. Maybe you only need to use one stitch, or perhaps you’ll need a couple more. It doesn’t matter. The edges of this type of goldwork embroidery are usually not very pretty. That’s why they are often hidden under other goldwork embroidery or a nice trim.

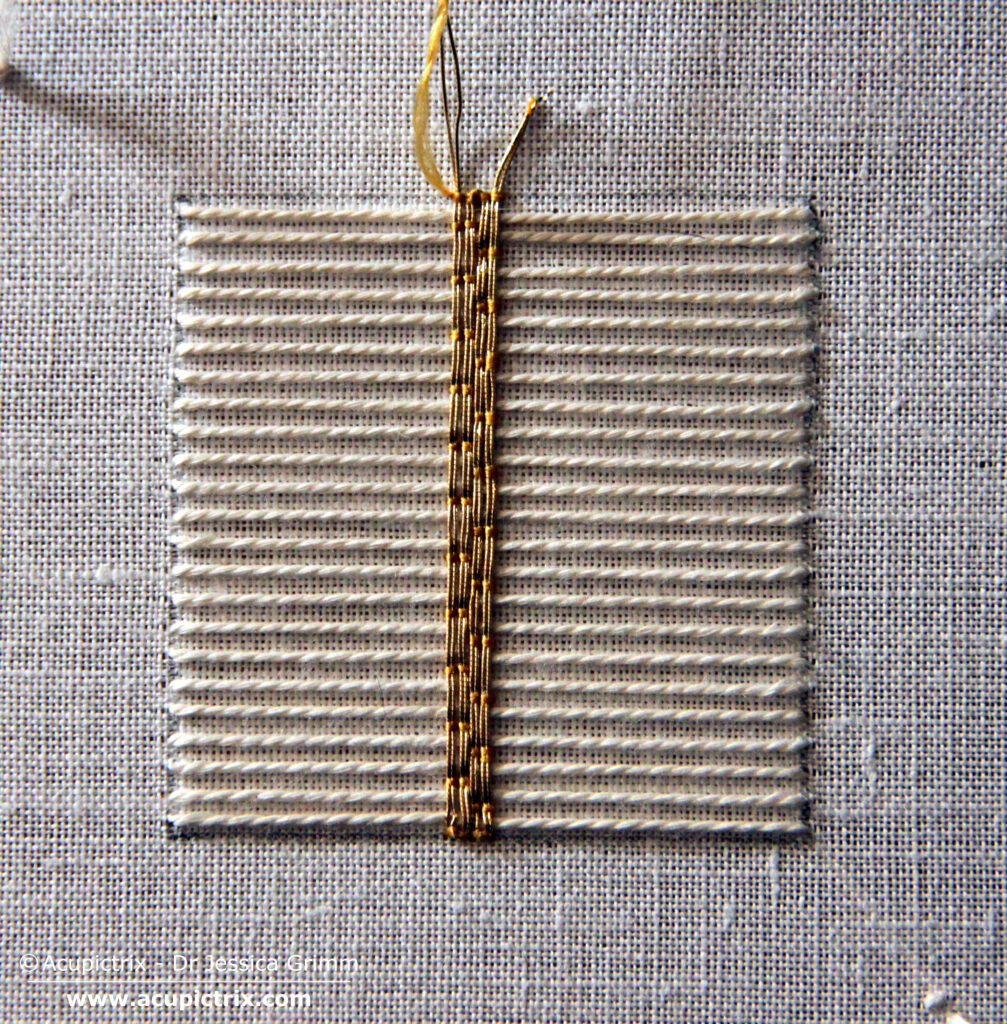
For the next two rows of gold in this goldwork tutorial, the couching stitches sit between the couching stitches of the first two rows. This is how the typical brick pattern forms. Keep filling the pattern. The last row will typically be a little fiddley. The gold threads want to roll off the padding. It is usually enough to slow down a bit and push the gold back up the padding as you go.

This is what the back of your embroidery should look like. Note that I don’t plunge my gold threads; I simply cut them off close to the couching stitches. I also start my couching thread with a simple knot on the back and end with two tiny anchoring stitches. This keeps the back of my embroidery neat and does not slow me down too much.
This goldwork tutorial produces a lovely firm and textured background for stumpwork embroidery. Normal ‘flat’ couching is often too flat to combine with a wired stumpwork element, even when using a pretty diaper pattern. As we did not fixate the padding threads, the pattern is not as ‘crisp’ as seen in the medieval orphrey frames. It is more subtle and really sparkly!

Beautiful background stitch. Loved the way you “visually” explained it. One question…for the padding thread, what would you recommend? A DMC perle cotton No. 5 or something thicker? Like cotton packing string or bumph?
You could use all of them :). The size and the firmness determine the look of the pattern. My thread is slightly thinner than a pearl cotton #5, but firmer. However, not as firm as string.