This week, I have a goldwork embroidery tutorial for you inspired by a late 15th-century embroidered chasuble kept in the Domschatz of Fritzlar. It has these lovely textured bands or borders between the individual orphreys. The border is made by couching gold threads and coloured silks over string padding. It seems to be a very ‘Central European‘ thing to do. The technique is not difficult at all and would look great in a modern piece of goldwork embroidery or on a piece of needlepoint/canvaswork. So, let me show you how it is done. As always, my Journeyman and Master Patrons can download a practical PDF with all the instructions from my Patreon Page.

To start with this medieval goldwork tutorial, couch down four parallel rows of padding thread or string on your embroidery linen. I am working on a 46ct evenweave. I used DeVere yarns #6 silk in a gold colour for my couching thread.
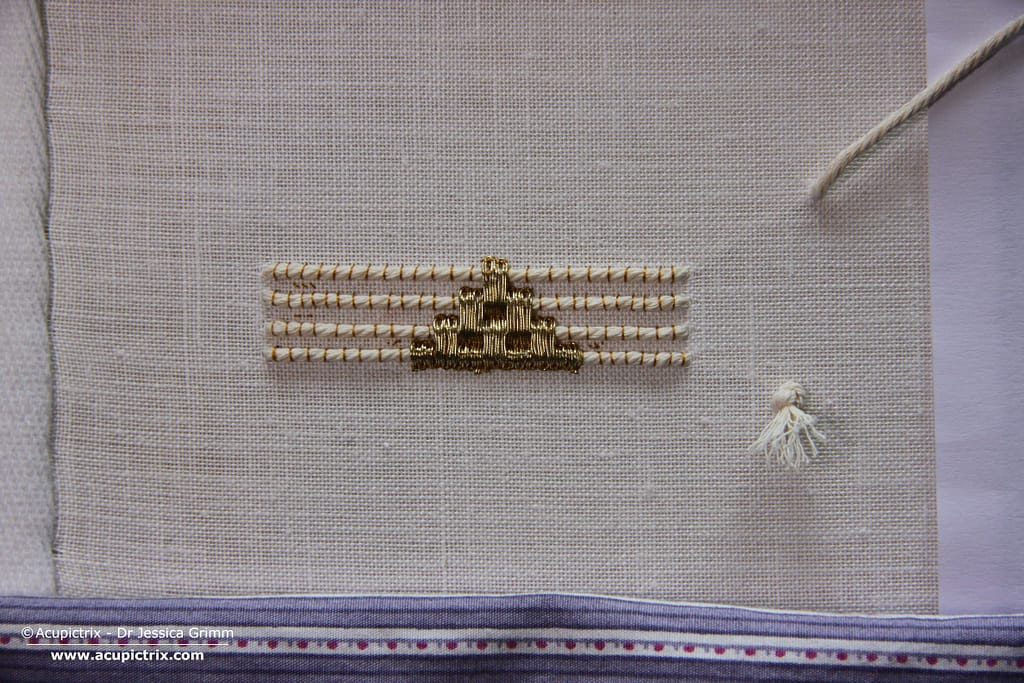
Looking closely at the original, I saw that the gold threads were applied first, followed by the silk. The golden triangles consist of 7 blocks of 4 rows of gold thread. The gold threads are couched down in pairs. I’ve used a passing thread #3 and the same DeVere yarns gold-coloured silk. Start from the middle. As the border is relatively narrow, your gold threads need a lot of manipulation at the turns. Tweezers might be handy, and you might need an extra couching stitch in the turn.
As silk is very slippery, I like to go over my couching stitches twice (i.e. place two couching stitches on top of each other). Alternatively, you can wax your silk thread. Remove any excess wax crumbs before stitching to avoid the wax piling up on your embroidery fabric.
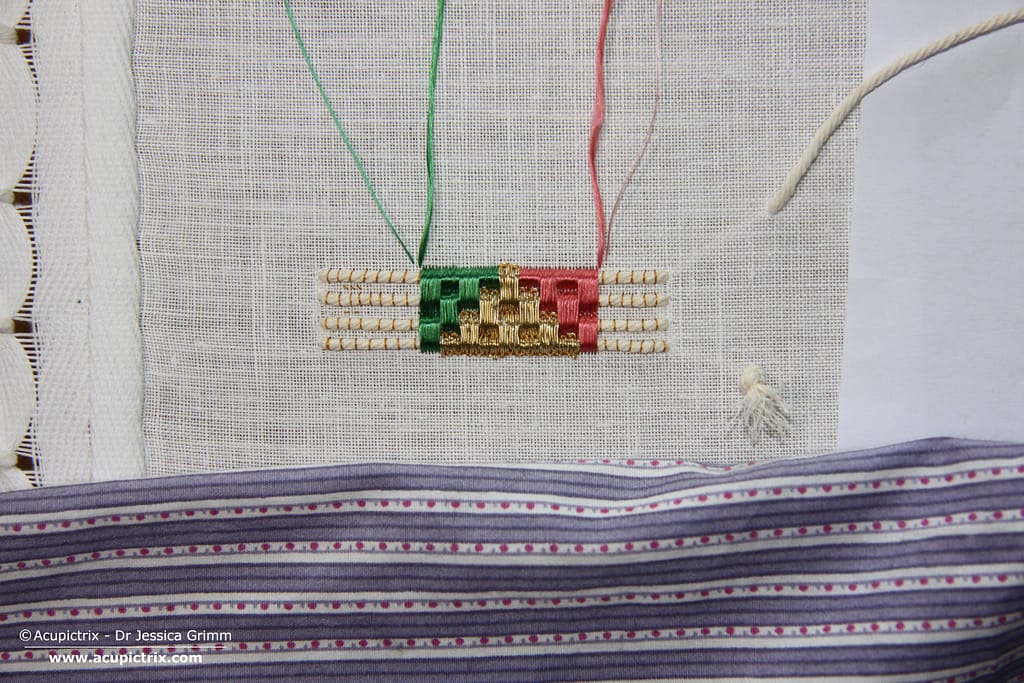
In the original, it becomes clear that the embroiderer went over the turns with their silks when they added the silken triangles. That’s how I can see that the gold was stitched first. However, I don’t like to do that in this goldwork embroidery tutorial as your silk snags so easily on the gold. Instead, I angled my needle under the turns. I’ve used Au ver a soie ovale with a matching colour DeVere yarns #6 for the couching. Start with only half a silken triangle. Measure the top of the golden triangle and match that for the silken triangles.
Add golden triangles before finishing the silken triangles. Your threads will tend to roll off the end of your string padding. In the original, this was solved with a red binding. Very clever indeed.

When you followed my goldwork embroidery tutorial, this is what the finished sample looks like. Wouldn’t it be fun to figure out how to turn a 90-degree corner with this technique?


0 Comments