Practical Sample Lesson 3
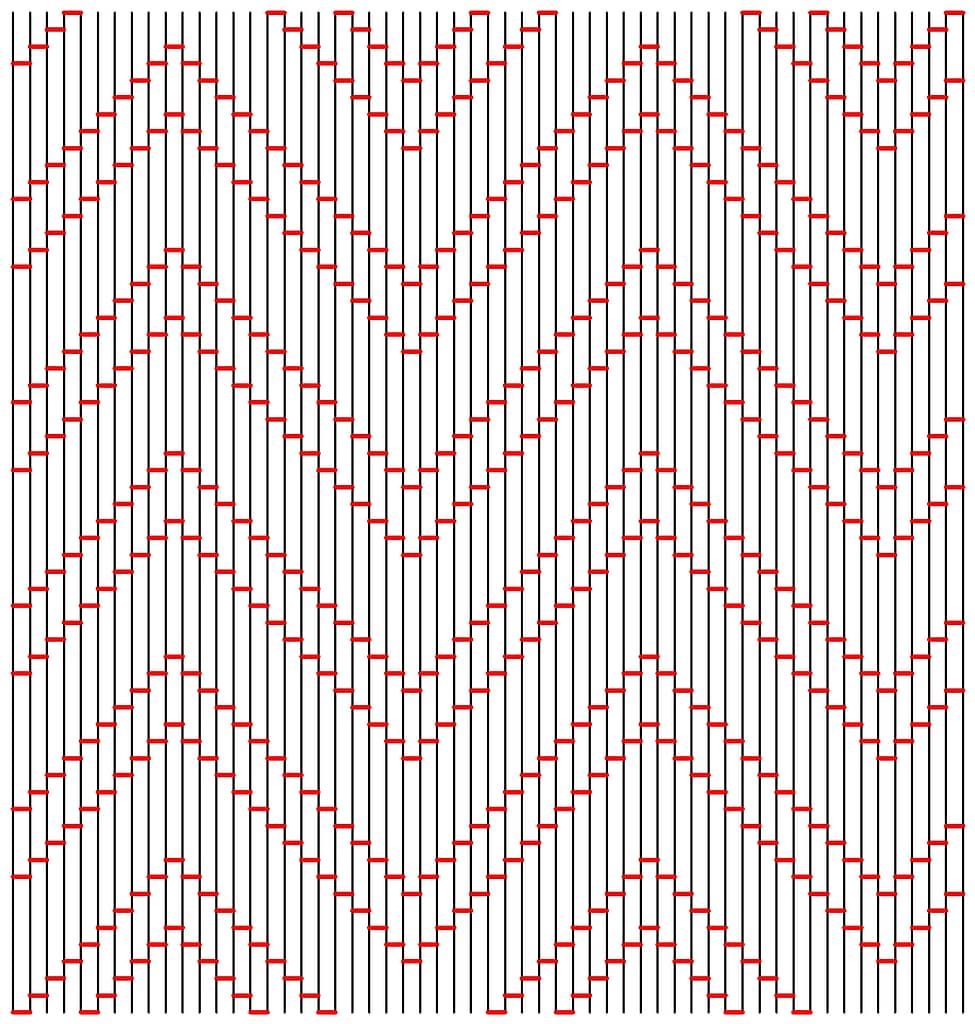
The pattern (Figure 1) you are working for the practical sample of this lesson comes from the possible antependium fragment seen in Figure 13–Figure 14 (Museum Mayer van den Bergh MMB.09050). A closely worked double chevron in underside couching can be seen in the background of the first scene (Figure 2). It depicts the martyrium of St Stephen; look at the bumps on his poor head. The piece was made in London around AD 1340-1360.
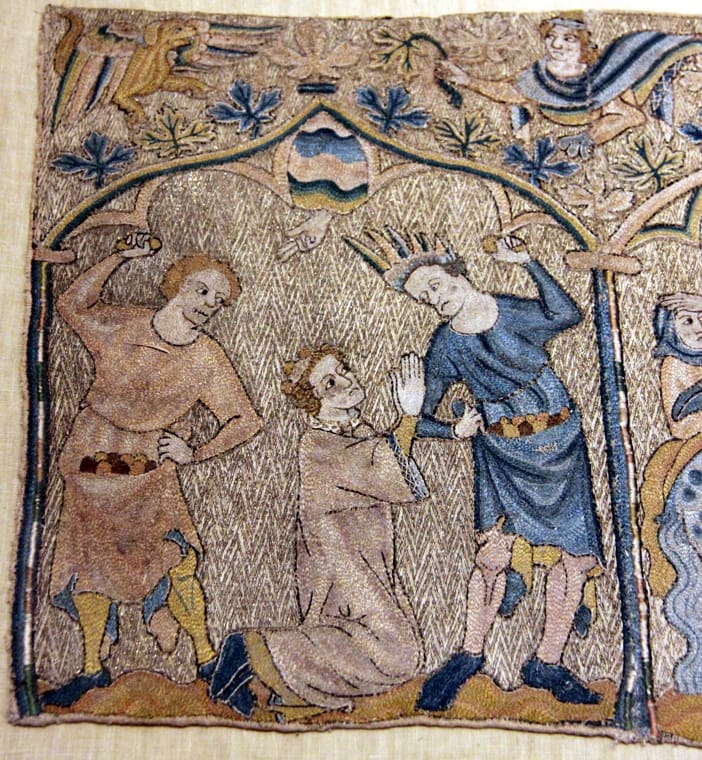
(Museum Mayer van den Bergh MMB.09050).
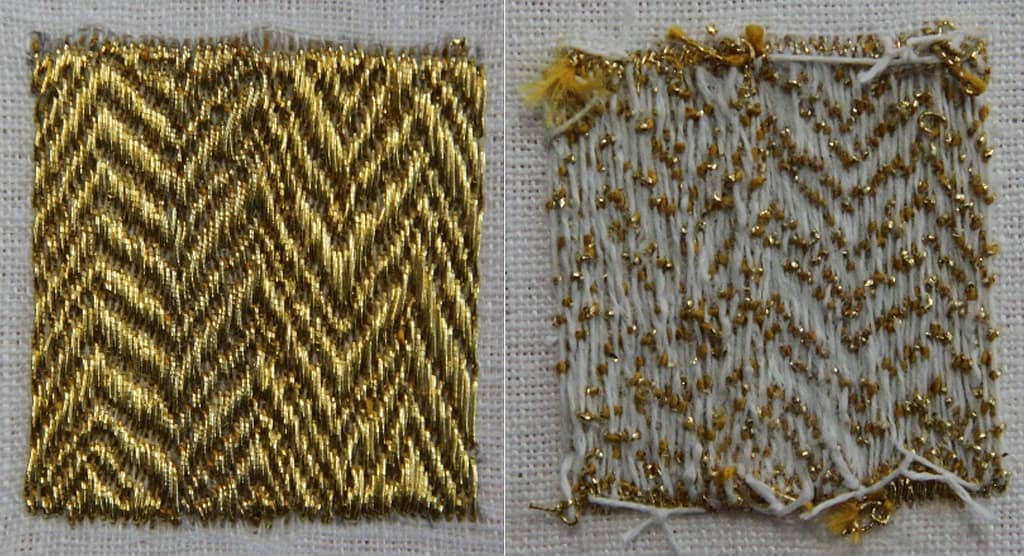
From the occasional small areas where the embroidery has completely worn away, I could tell that the linen it is worked on is rather fine. The metal threads used are also very fine. Unfortunately, more precise details are not provided in the literature for this piece. However, when the thread count is given for medieval embroidery with underside couching in this period, it often is upwards of 50 ct. The linen we use as the top layer is Sotema Art. 190 Bisso, a 100% 52 ct linen. Using a double layer is typical for medieval pieces[1]. Usually, a finer linen on top of a coarser linen was used.
It took a bit of testing with different types of linen fabric, metal threads and linen threads before I found a constellation that worked. As stated before, I think that these geometric patterns were mostly not drawn onto the fabric. Apart from the piece mentioned above in the Anagni cathedral treasure, I am unaware of another geometric piece with an underdrawing. Most patterns are also very regular (not always the pattern as a whole, but more the distances between the different elements of a pattern). This is probably easier achieved with counting than with painting/drawing.
You start by pinning out a square of 3 x 3 cm as close as possible on the grain. Gather your finest brush, your iron gall ink[2] and a piece of kitchen towel. Use the brush and ink to draw your rectangle onto the fabric. Let it dry. Then, gather your #5 needle (or your #22 chenille needle), your linen thread, and your passing thread #4. For the actual stitching, you might need to either shed your glasses or contact lenses or use high magnification. Please do not strain your eyes! It is perfectly fine to ignore the finer linen and work on your 48 ct support linen instead.
The turns are achieved by placing the last stitch of the first row on the design line. Then, you turn your thread so that it lays parallel to the first row. Now, continue with the correct couching pattern for the second row. There is no need to start your first couching stitch of this second row on the design line. A single underside couching stitch creates the turn.
By now, I am pretty sure you have gained even more admiration for your medieval colleagues!
[1] Bentham (2021) advices to use two layers of 80 ct ramie. According to her, ramie was used in the medieval period, but not routinely identified as such in catalogues and museum records. This is highly unlikely. In this 2015 poster presentation (page 16) by researchers from the University of Bergen in Norway, it clearly states that ramie is not found in the medieval period in Northern Europe. The UK is part of Northern Europe. However, fabrics of nettle fibres are known in Europe since the Bronze Age. This is just not ramie but nettle cloth. In this excellent blog post with many sources, the difference between the two is explained. As the quality of nettle cloth was less, it was typically worn by poor people, it is thus unlikely that it was used in high-end goldwork embroidery in the Middle Ages.
[2] Please do not spill! The ink is permanent.