Practical Sample Lesson 2
You might already have spotted this week’s practical sample in Figure 6. Although the original lion is worked on a piece of samite, you will work on a piece of silk twill. As explained in lesson 1, there is no single-coloured samite available. Working the lion instead onto one of these bold patterned replica samites would make most people dizzy. However, silk twill was a popular embroidery fabric during this period. I worked my sample on a heavier variety, but I am not sure how comparable it is to the weight of silk twill used in the medieval period. The fabric in Figure 6 seems a bit “meatier”. The underside couching of the original embroideries was done without a linen backing fabric. Unfortunately, my experiments have shown this is impossible with the blue silk twill I used. It simply tears under the strain.
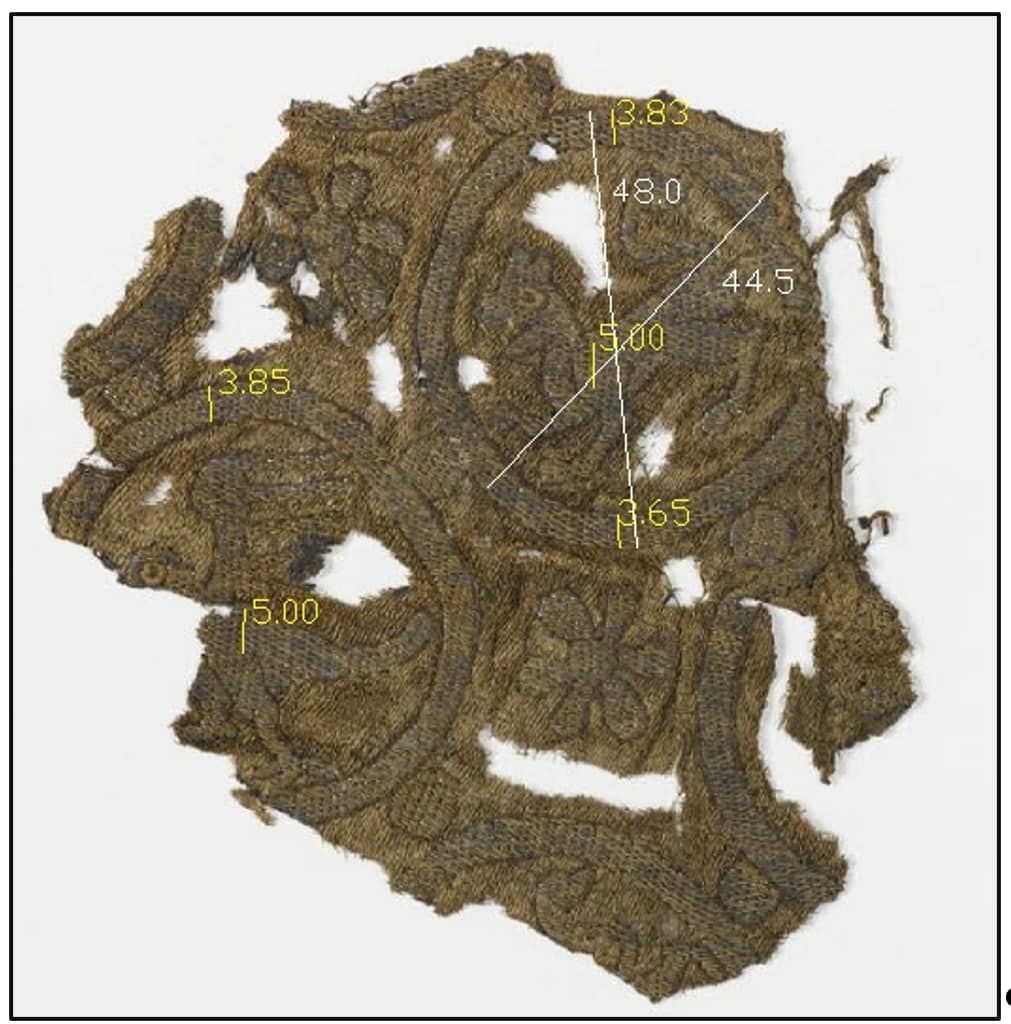
Determining the size of the goldthread used required careful measuring and counting on a picture of the sample (Figure 11). On average, 29 parallel goldthreads are needed to cover a centimetre. Experiments with Stech 70/80 showed that 29 parallel threads only covered 0.9 cm. Repeating the experiment with Stech 80/90 resulted in 30 parallel threads covering a centimetre—close enough.
For the actual underside couching, a sturdy two-ply linen thread was used in the historical pieces (Browne et al., 2016). Although pictures of the back of embroideries are rare, this example from the V&A shows that the linen couching thread had a width comparable to the gold thread. The back of the embroidery is covered solidly with linen thread. Many experiments with different brands of linen thread made me choose Barkonie 50/2 as a good candidate. You can use the thread as is or lightly coat it with beeswax. Do run it through your fingers again to remove any excess.
Underside couching puts a lot of strain on the linen couching thread. With practice, you probably learn to minimise breaks, but they will remain part of the game.


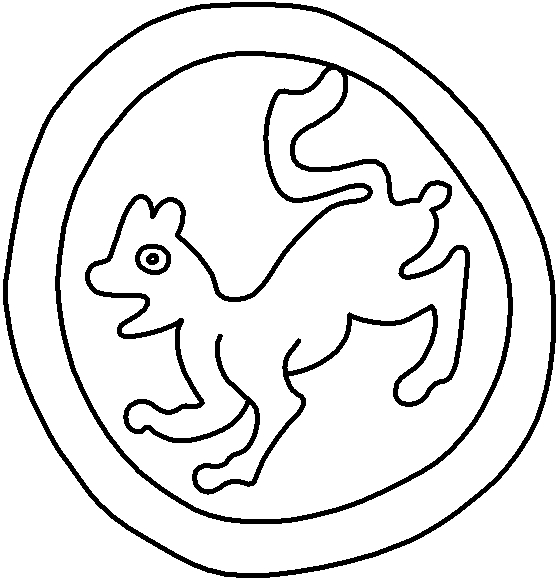
Start by transferring the design (Figure 13) onto a piece of transparent paper. Protect your working surface and start pricking. Pin your pricking onto your silk twill with four pins and gather your pounce pad and white pounce powder. Carefully rub the pounce powder through the holes of your pricking, and then carefully remove your pricking[1]. If the design did not transfer to your satisfaction, simply brush the pounce powder off with your baby brush and start again.
Now, you need your paint and finest brush to paint the design by connecting the dots. You also need a small container with a little water and something to mix paint and water on. A piece of kitchen towel is required to regularly clean your brush as it clogs up with the pounce powder. Let the paint dry before you brush off the excess pounce powder with your baby brush.
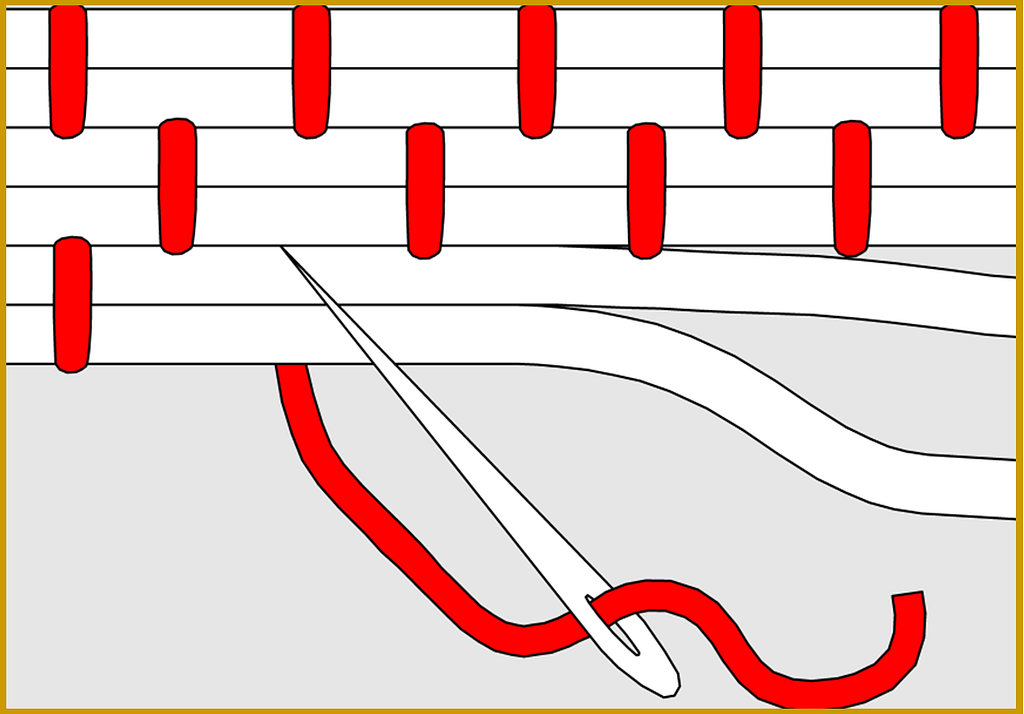
It is time to start stitching. Gather your linen thread, your #5 needle (some prefer a #22 chenille needle), your #10 needle, your black and white Chinese flat silk, and your spool of Passing Thread #4. You are going to attach the single goldthread to your fabric by underside couching (i.e., coming up and going down in the same hole with your linen thread and pulling a tiny piece of your goldthread to the back of your fabric) in a bricking pattern (Figure 14).
Start at the widest part of the design and avoid following the grain of the twill fabric. Although you are usually told to make stitching easier for yourself by following the grain, medieval embroiderers avoided the grain. This is probably due to the fact that they did not use a linen backing fabric, which would have blocked their twill. Their “naked” silk twill wanted to naturally stretch in the direction of the grain. This stretching would have been pushed even further by placing the heavy gold embroidery in the same direction.
To define its body, keep filling your lion with underside couching and the occasional surface couching stitch in black silk. Try to keep the bricking or basketweave pattern going as best as you can. However, you will likely end up with a kind of underside-couched satin stitch for the narrower parts of your lion. You can also see this happen in the original sample (paws and tail). The space is just too narrow for a pattern.

After filling in the whole lion, it is time to eliminate all the tails of goldthread and linen. The goldthread tails are plunged to the back and secured with oversewing. Equally, you weave the ends of your linen threads into the back of your embroidery. This is hard going as the back of underside couching is quite solid.
To finish the lion, add a dark outline in stem stitch with the black silk, and add the eye, teeth, and claws with silk, too. From the literature and the pictures I took, it is impossible to tell what stitch and thread were used to embellish the lion. Use the Chinese flat silk as is, and do not split it. Last but not least, stitch the medallion around the lion in exactly the same way.
If you would like to learn more about the practical side of Opus Anglicanum, please have a look at the excellent book by Tanya Bentham (Bentham, 2021).
[1] We do not know when transferring a design by using a pricking was invented. However, used prickings were routinely used to stiffen orphreys in the late medieval period (see for instance: Kielland (1957); Wetter (2012)).