
Your basket is currently empty!
Last week, we looked at a mid-15th-century orphrey panel from Venice with an interesting goldwork background on silk. I’ve adapted the design slightly and turned it into a goldwork embroidery tutorial. The stitching is relatively simple but teaches you a few key things when it comes to medieval goldwork embroidery. Journeyman and Master Patrons find a downloadable PDF on my Patreon page. Becoming a Journeyman or Master Patron is an affordable way to obtain an archivable goldwork lesson each month. Let’s dive in!
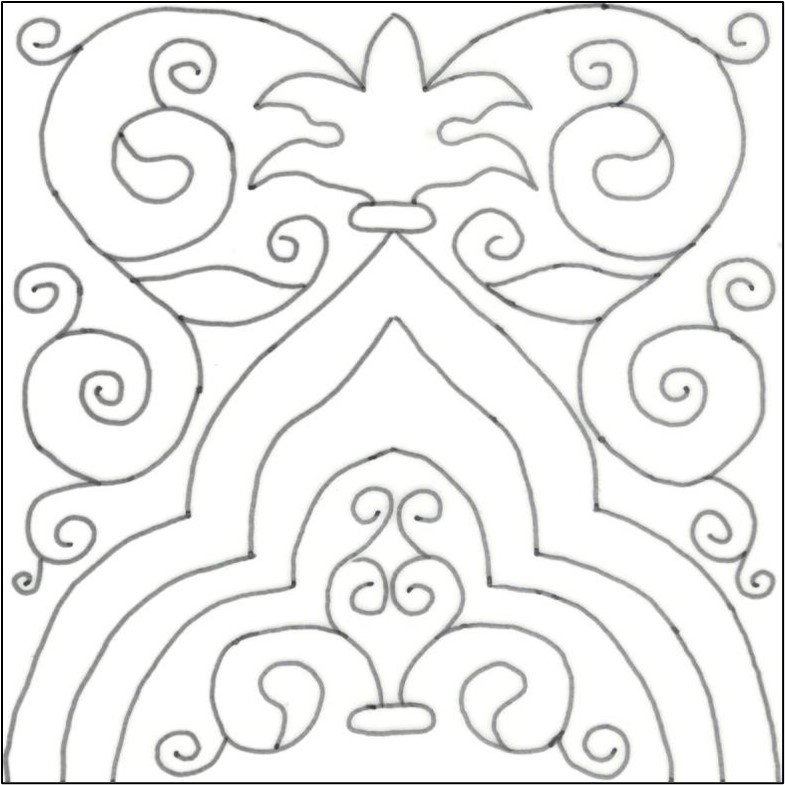
The design should measure c. 10 x 10 cm. This is approximately the size of the original. However, I’ve squared it off a little to make it look like a Moroccan tile. It is best to work a project like this on a professional slate frame, as there is some heavy goldwork. Dress it with a layer of high-count linen (40 ct or up would be good) and apply a piece of silk on top. You can find my free video tutorial on the process here (scroll to the bottom of the page). Transfer the design any way you prefer. I’ve used prick-and-pounce and watercolour paint.
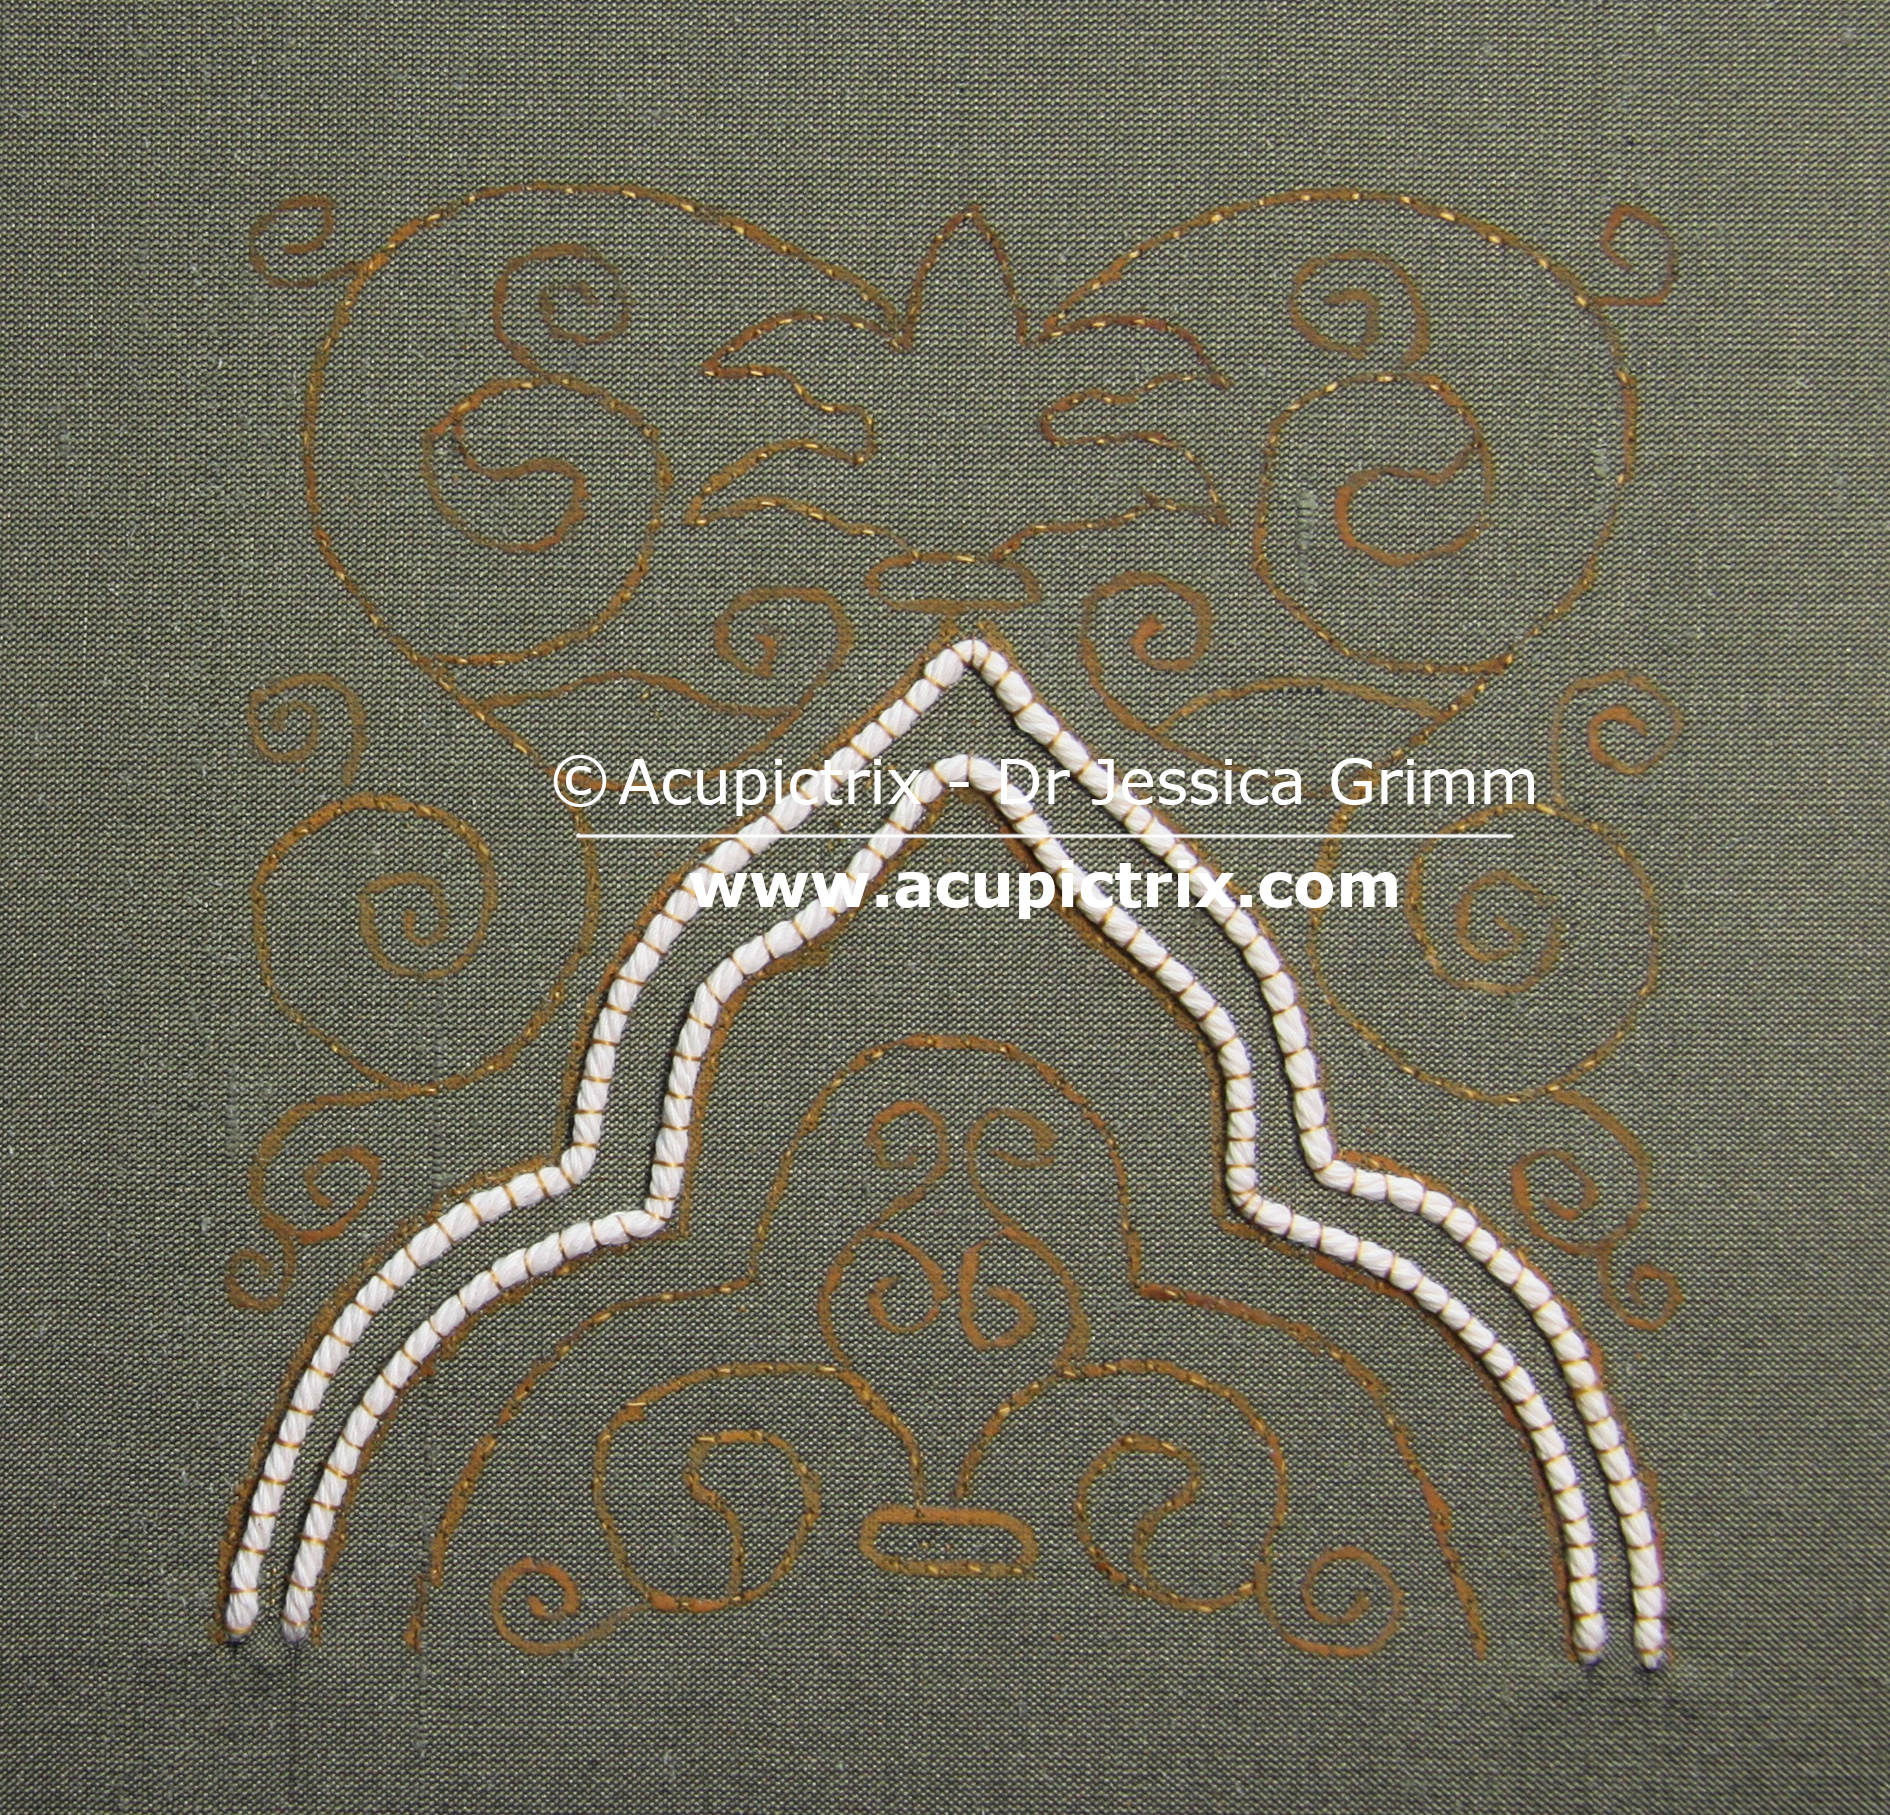
You will need to fuse your silk to the linen with tacking stitches on all the major design lines. This is basically a running stitch with a short stitch on the top and a long stitch on the back. Use a gold-coloured silk or sewing thread for this. Next, attach the white string padding by couching it down securely with the same gold-coloured thread. The padding threads need to lie well within the design lines. The design line is where your gold threads will turn. You do not want the padded area to encroach on the rest of the design.
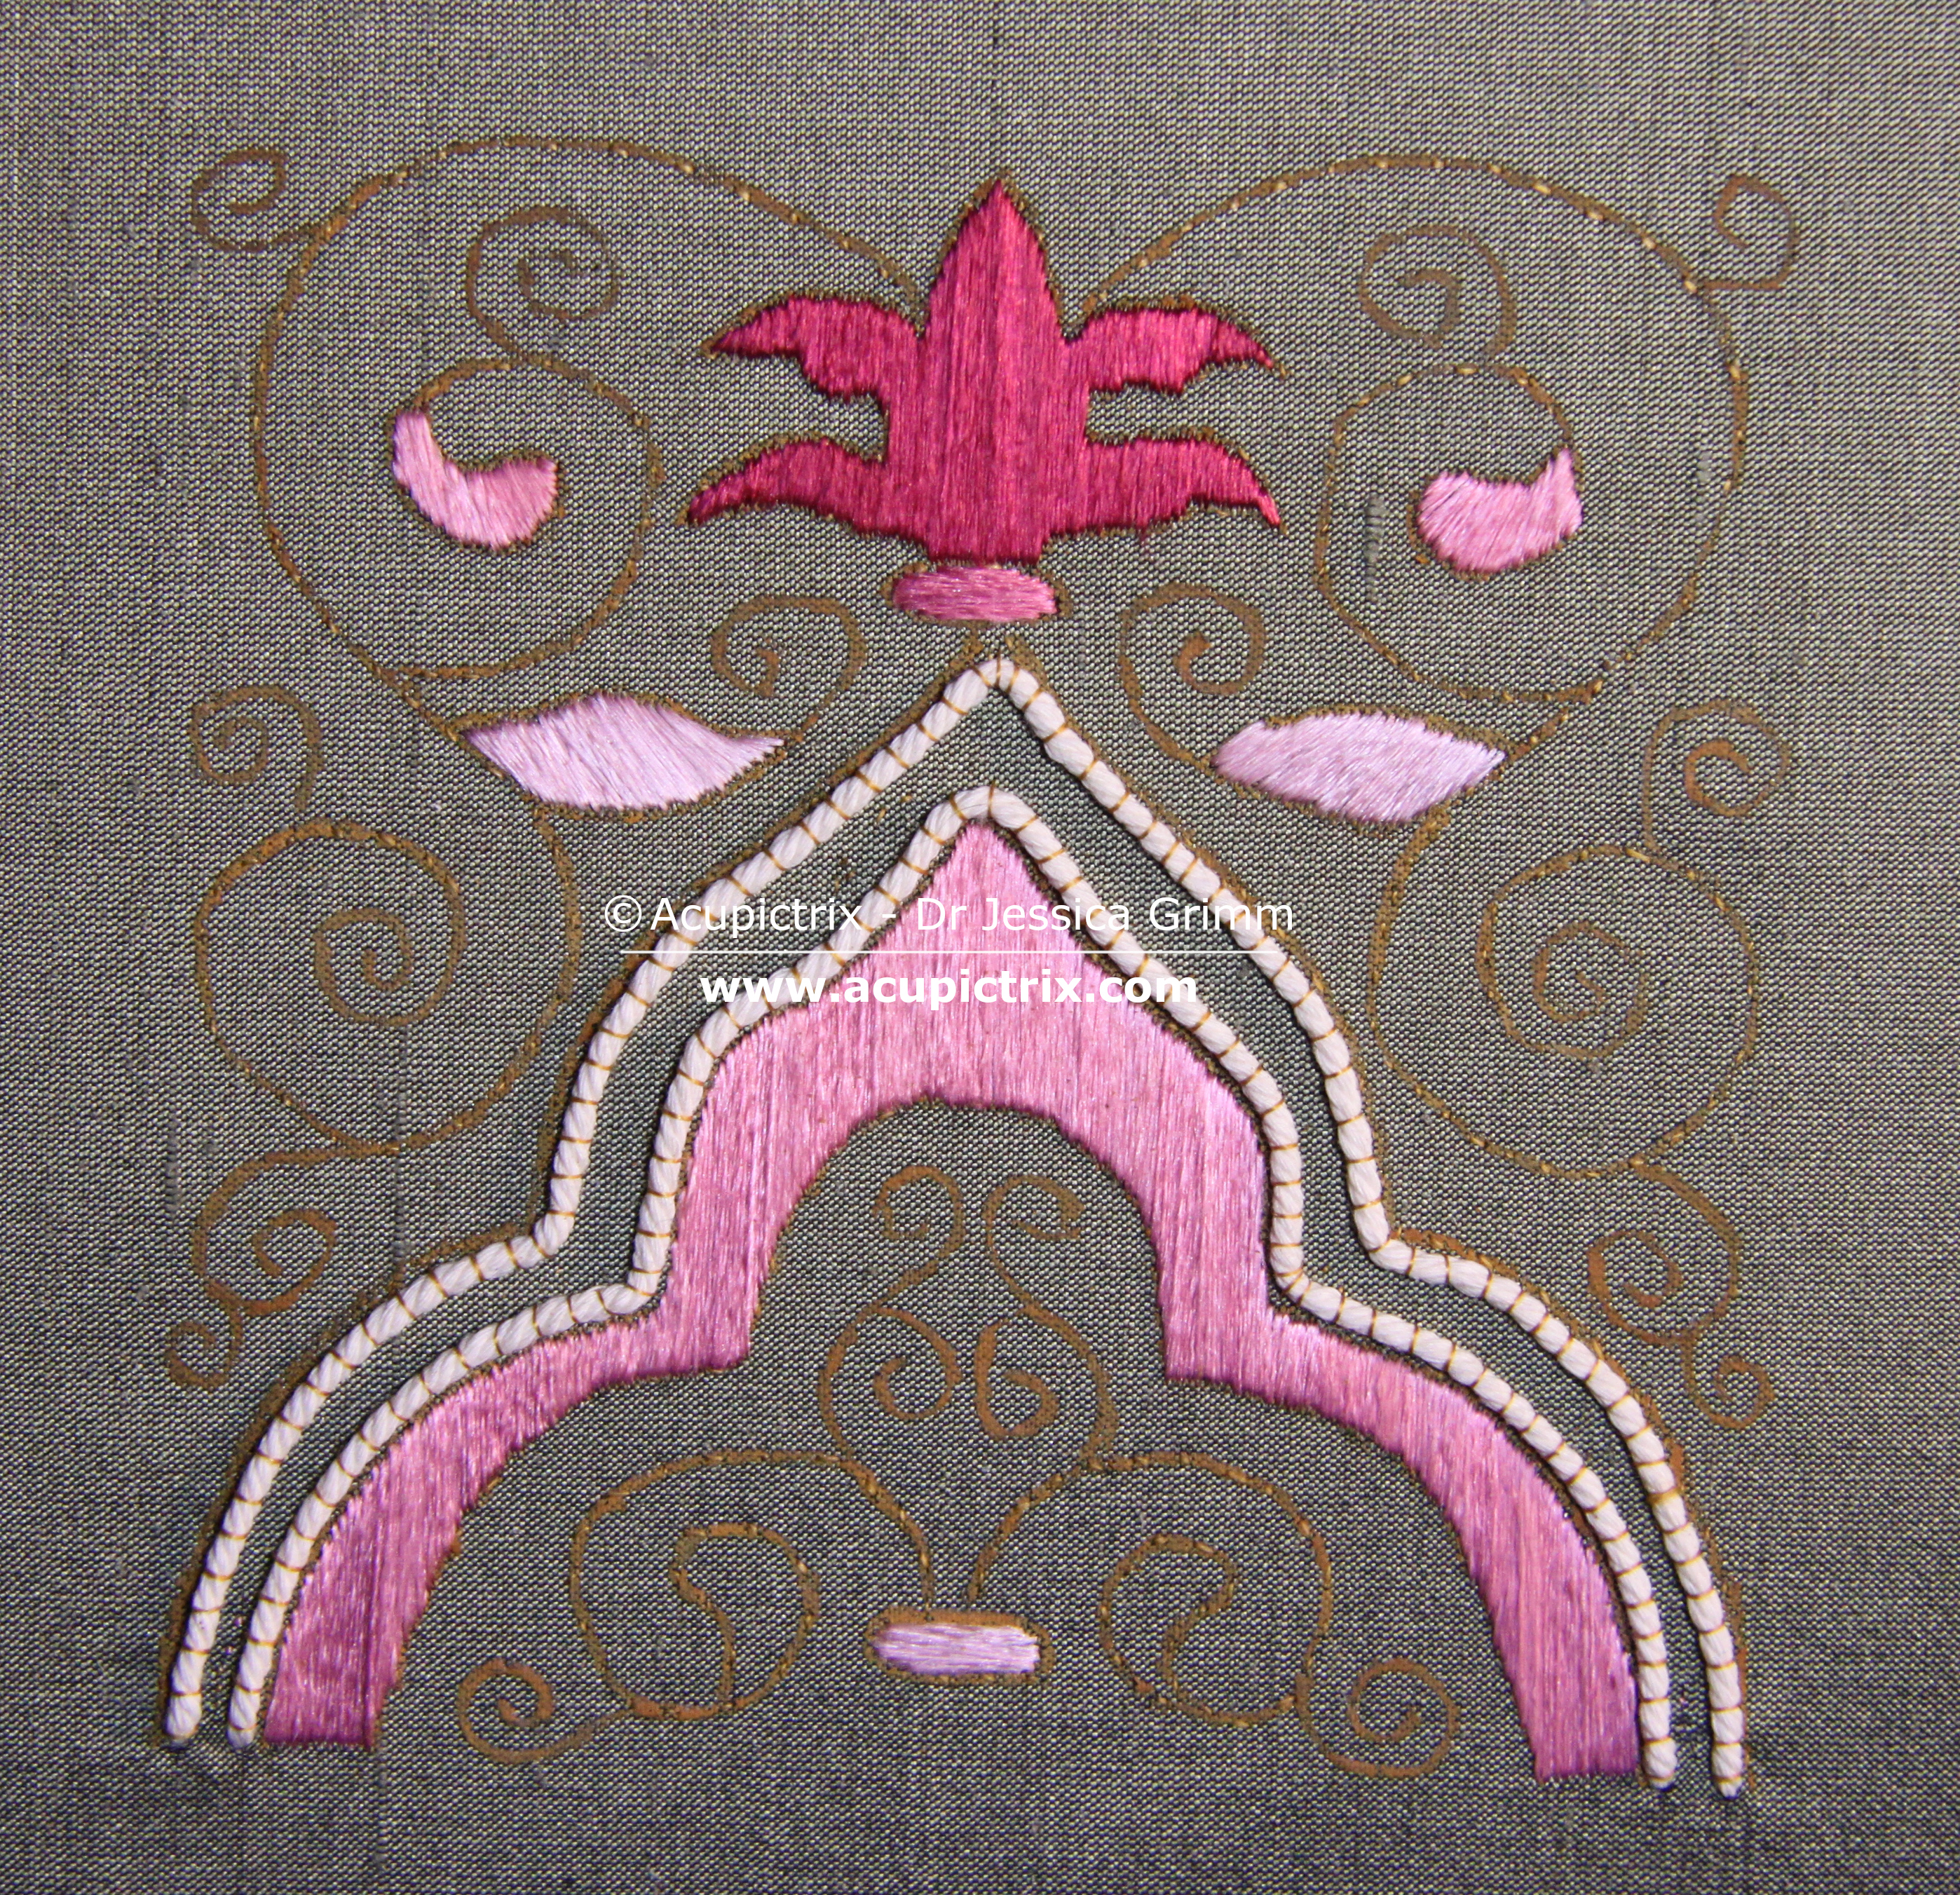
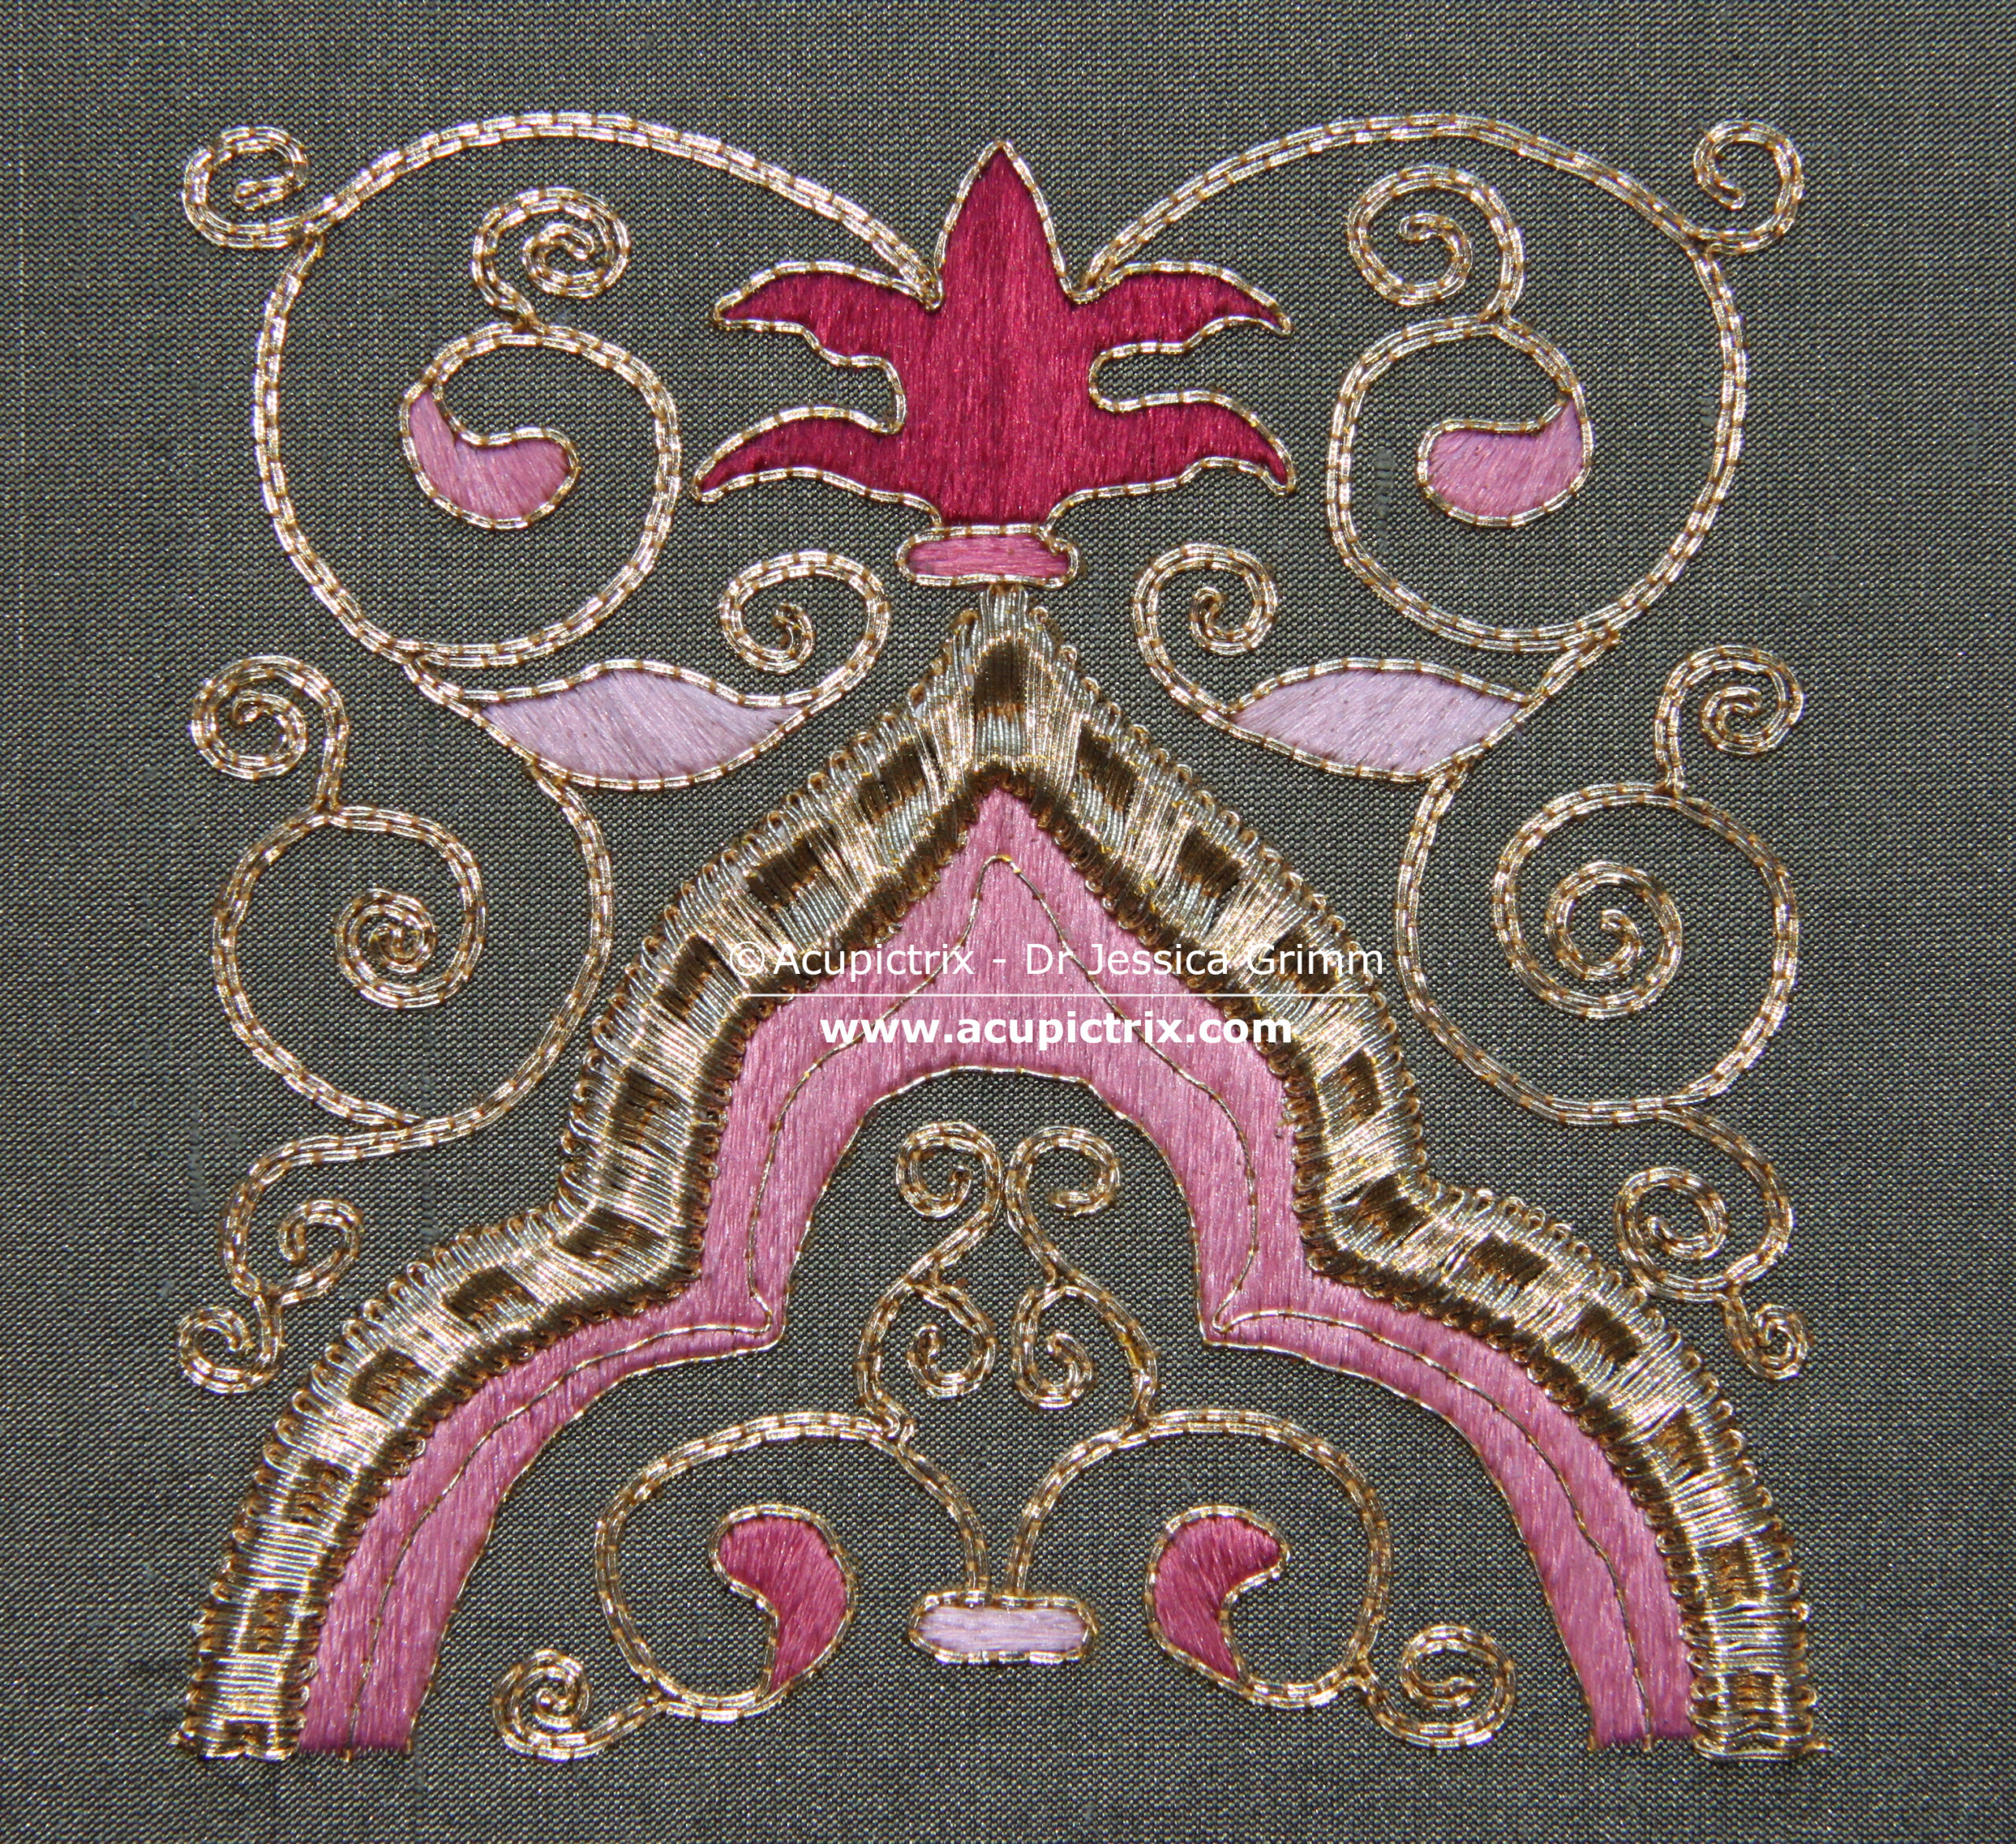
Time to fill the appropriate areas with silken satin stitches. The original shows quite stark shading, and the silken areas have a very stripey appearance. The satin stitches are also worked a little ‘open’ with some background fabric showing. Instead, I’ve opted for solid fillings. There is no split-stitch edge beneath the satin stitches, as all edges will be covered with gold. This will neaten them automatically. (Please note: I forgot to fill in the two small leaves at the bottom!).

Couch down the gold threads over the padding. Gold threads are couched down in pairs. Start in the middle of the shape. I’ve used Stech 70/80, which is comparable to passing thread #3. The couching rhythm is as follows: 5x with an extra couching stitch in between the padding threads and 5x without this extra stitch. Alternate all the way down. You will need to fudge a little as you start vertical, but you need to end horizontal.
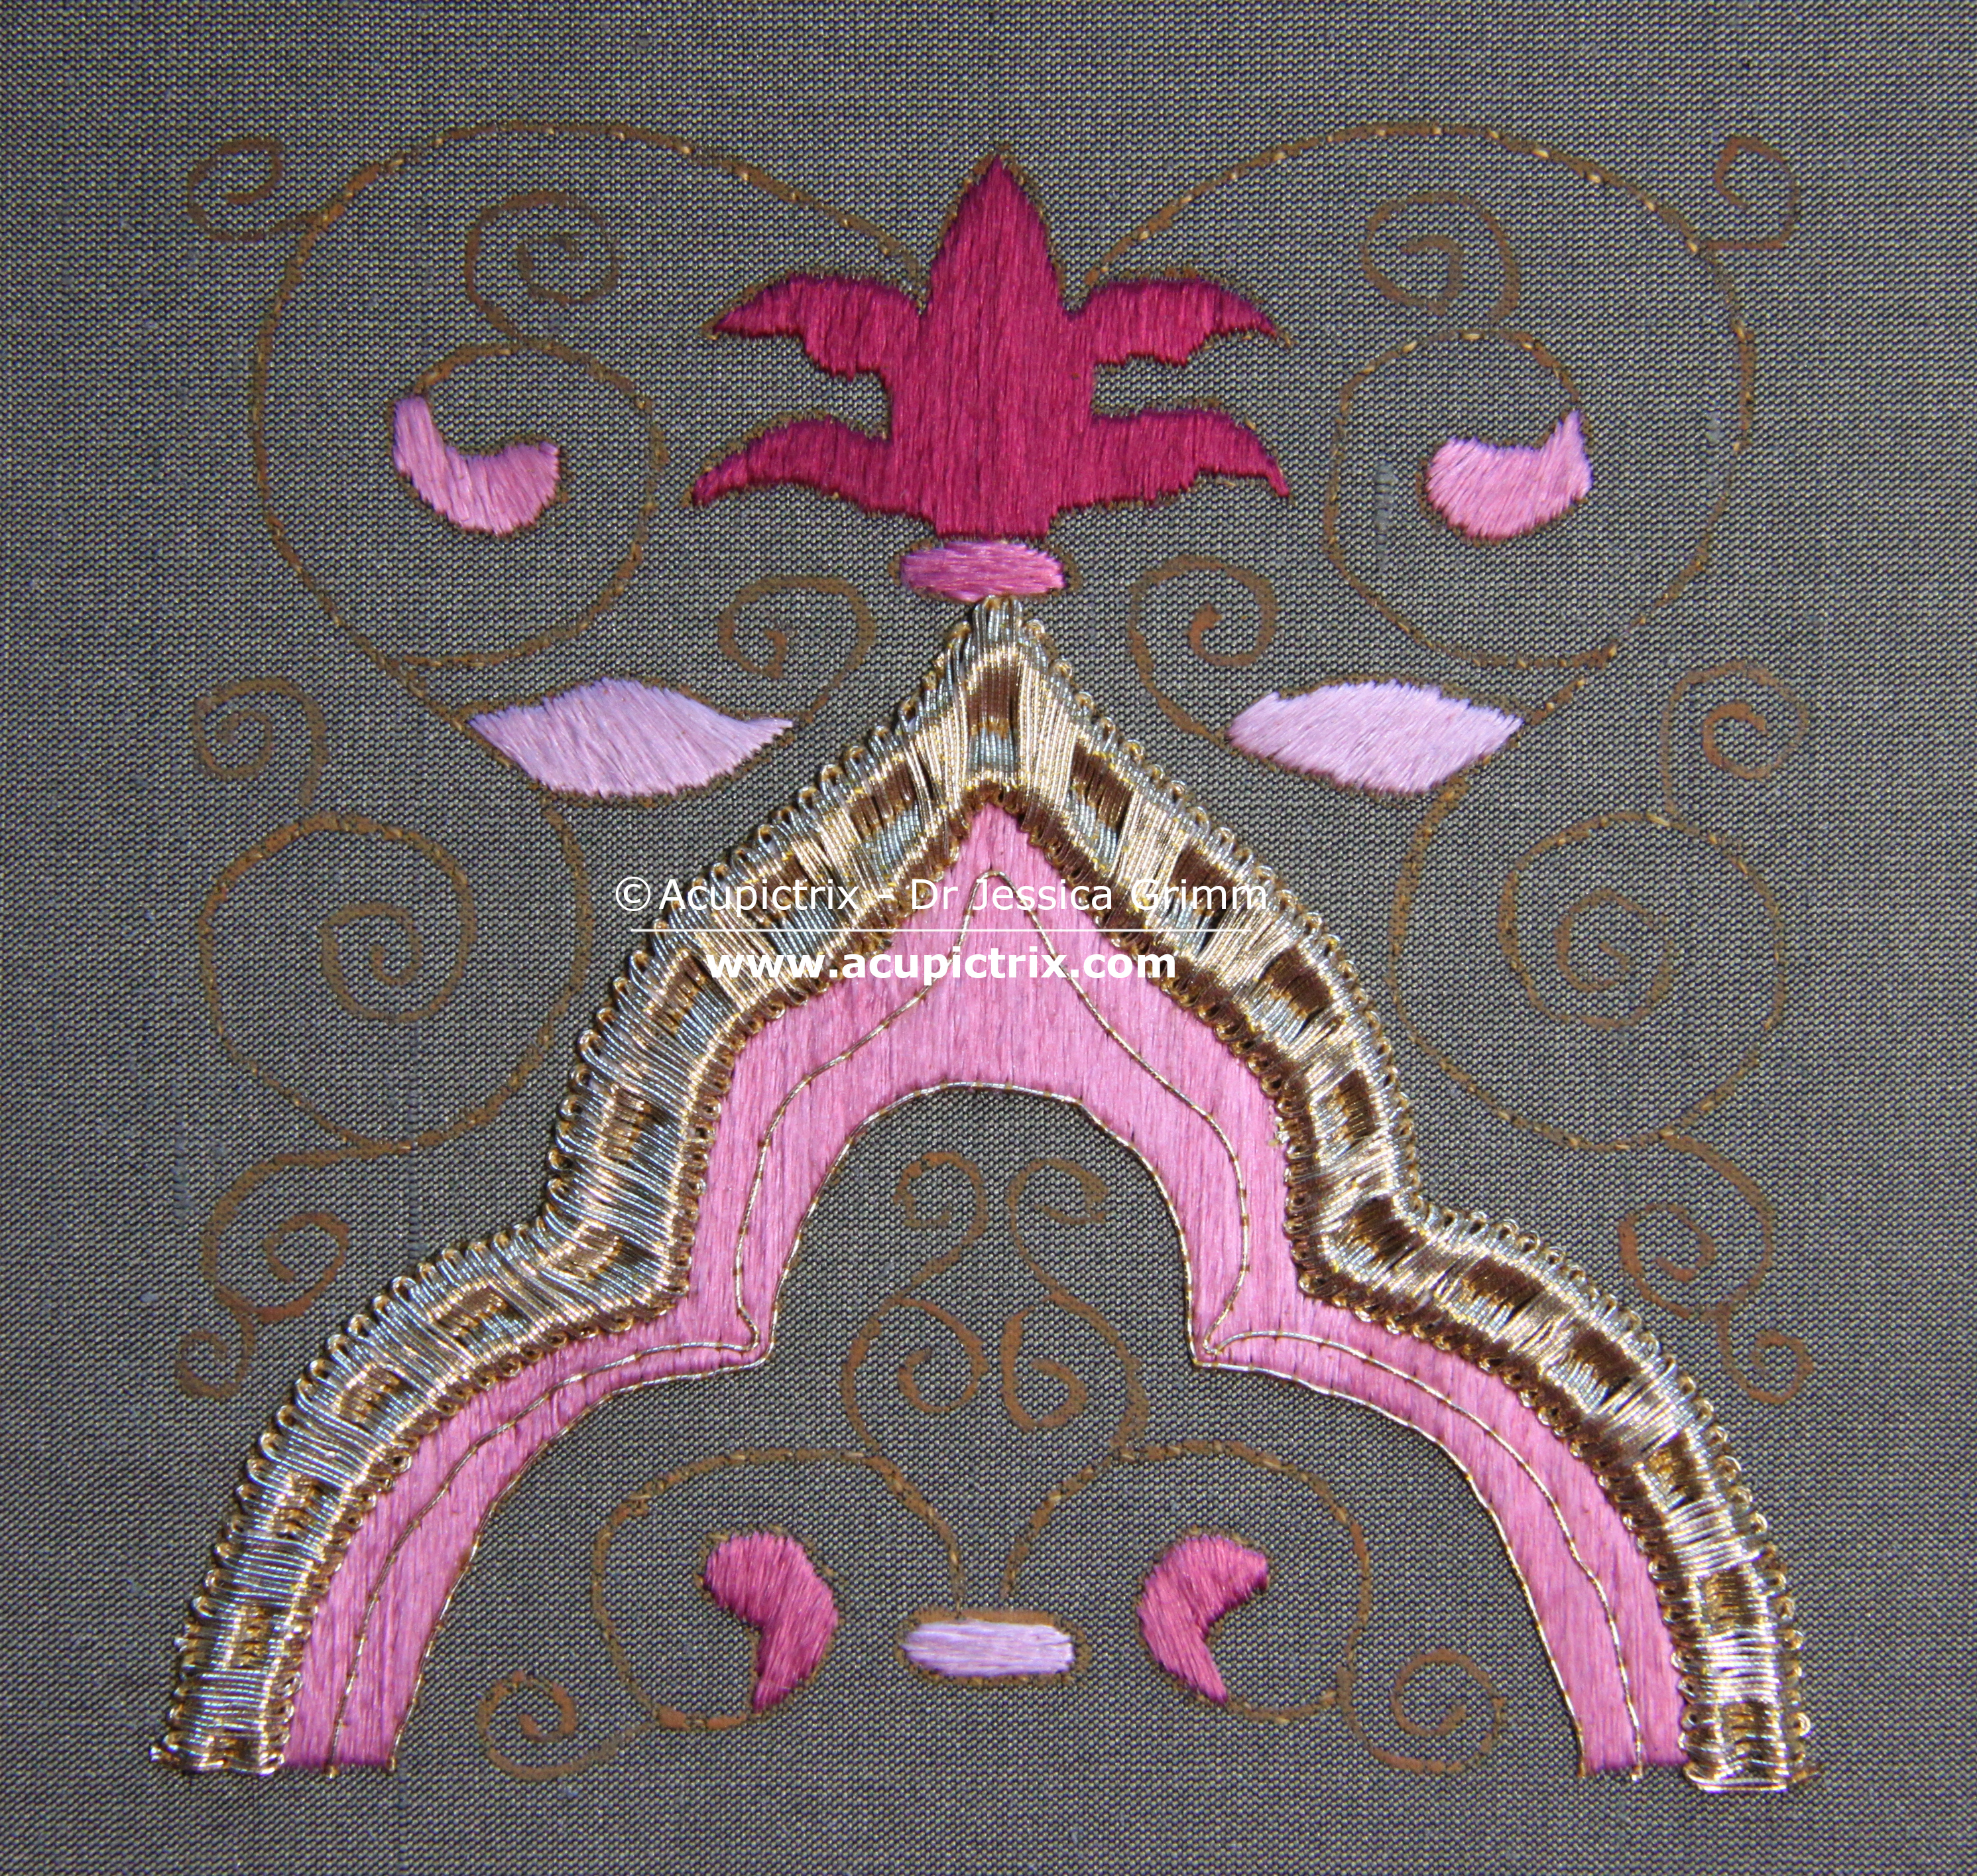
Couch two single lines of gold thread in place on the pink area underneath the padded gold. How you end your gold threads is up to you. You can either plunge and tie back on the back, or you can oversew on the front and clip.

The ‘only’ thing left to do is to cover the tendrils with couched gold. You aim for as few starting and stopping points as possible. And you try to hide starting and stopping under subsequent goldwork. This was common practice in medieval goldwork embroidery as it made the finished product more durable. And that’s your goldwork project finished!
Wishing you all a lovely holiday season and all the best for 2024! Thank you for being such a loyal audience.
Leave a Reply