When I started work on this week’s stitch tutorial, I had the growing feeling that things weren’t quite what they seemed at first. That’s the great thing about doing research. I usually have no idea where the medieval embroideries will lead me. Dead ends are common. But so are those ‘aha’ moments. In this case, it was the latter. Let’s dive in!
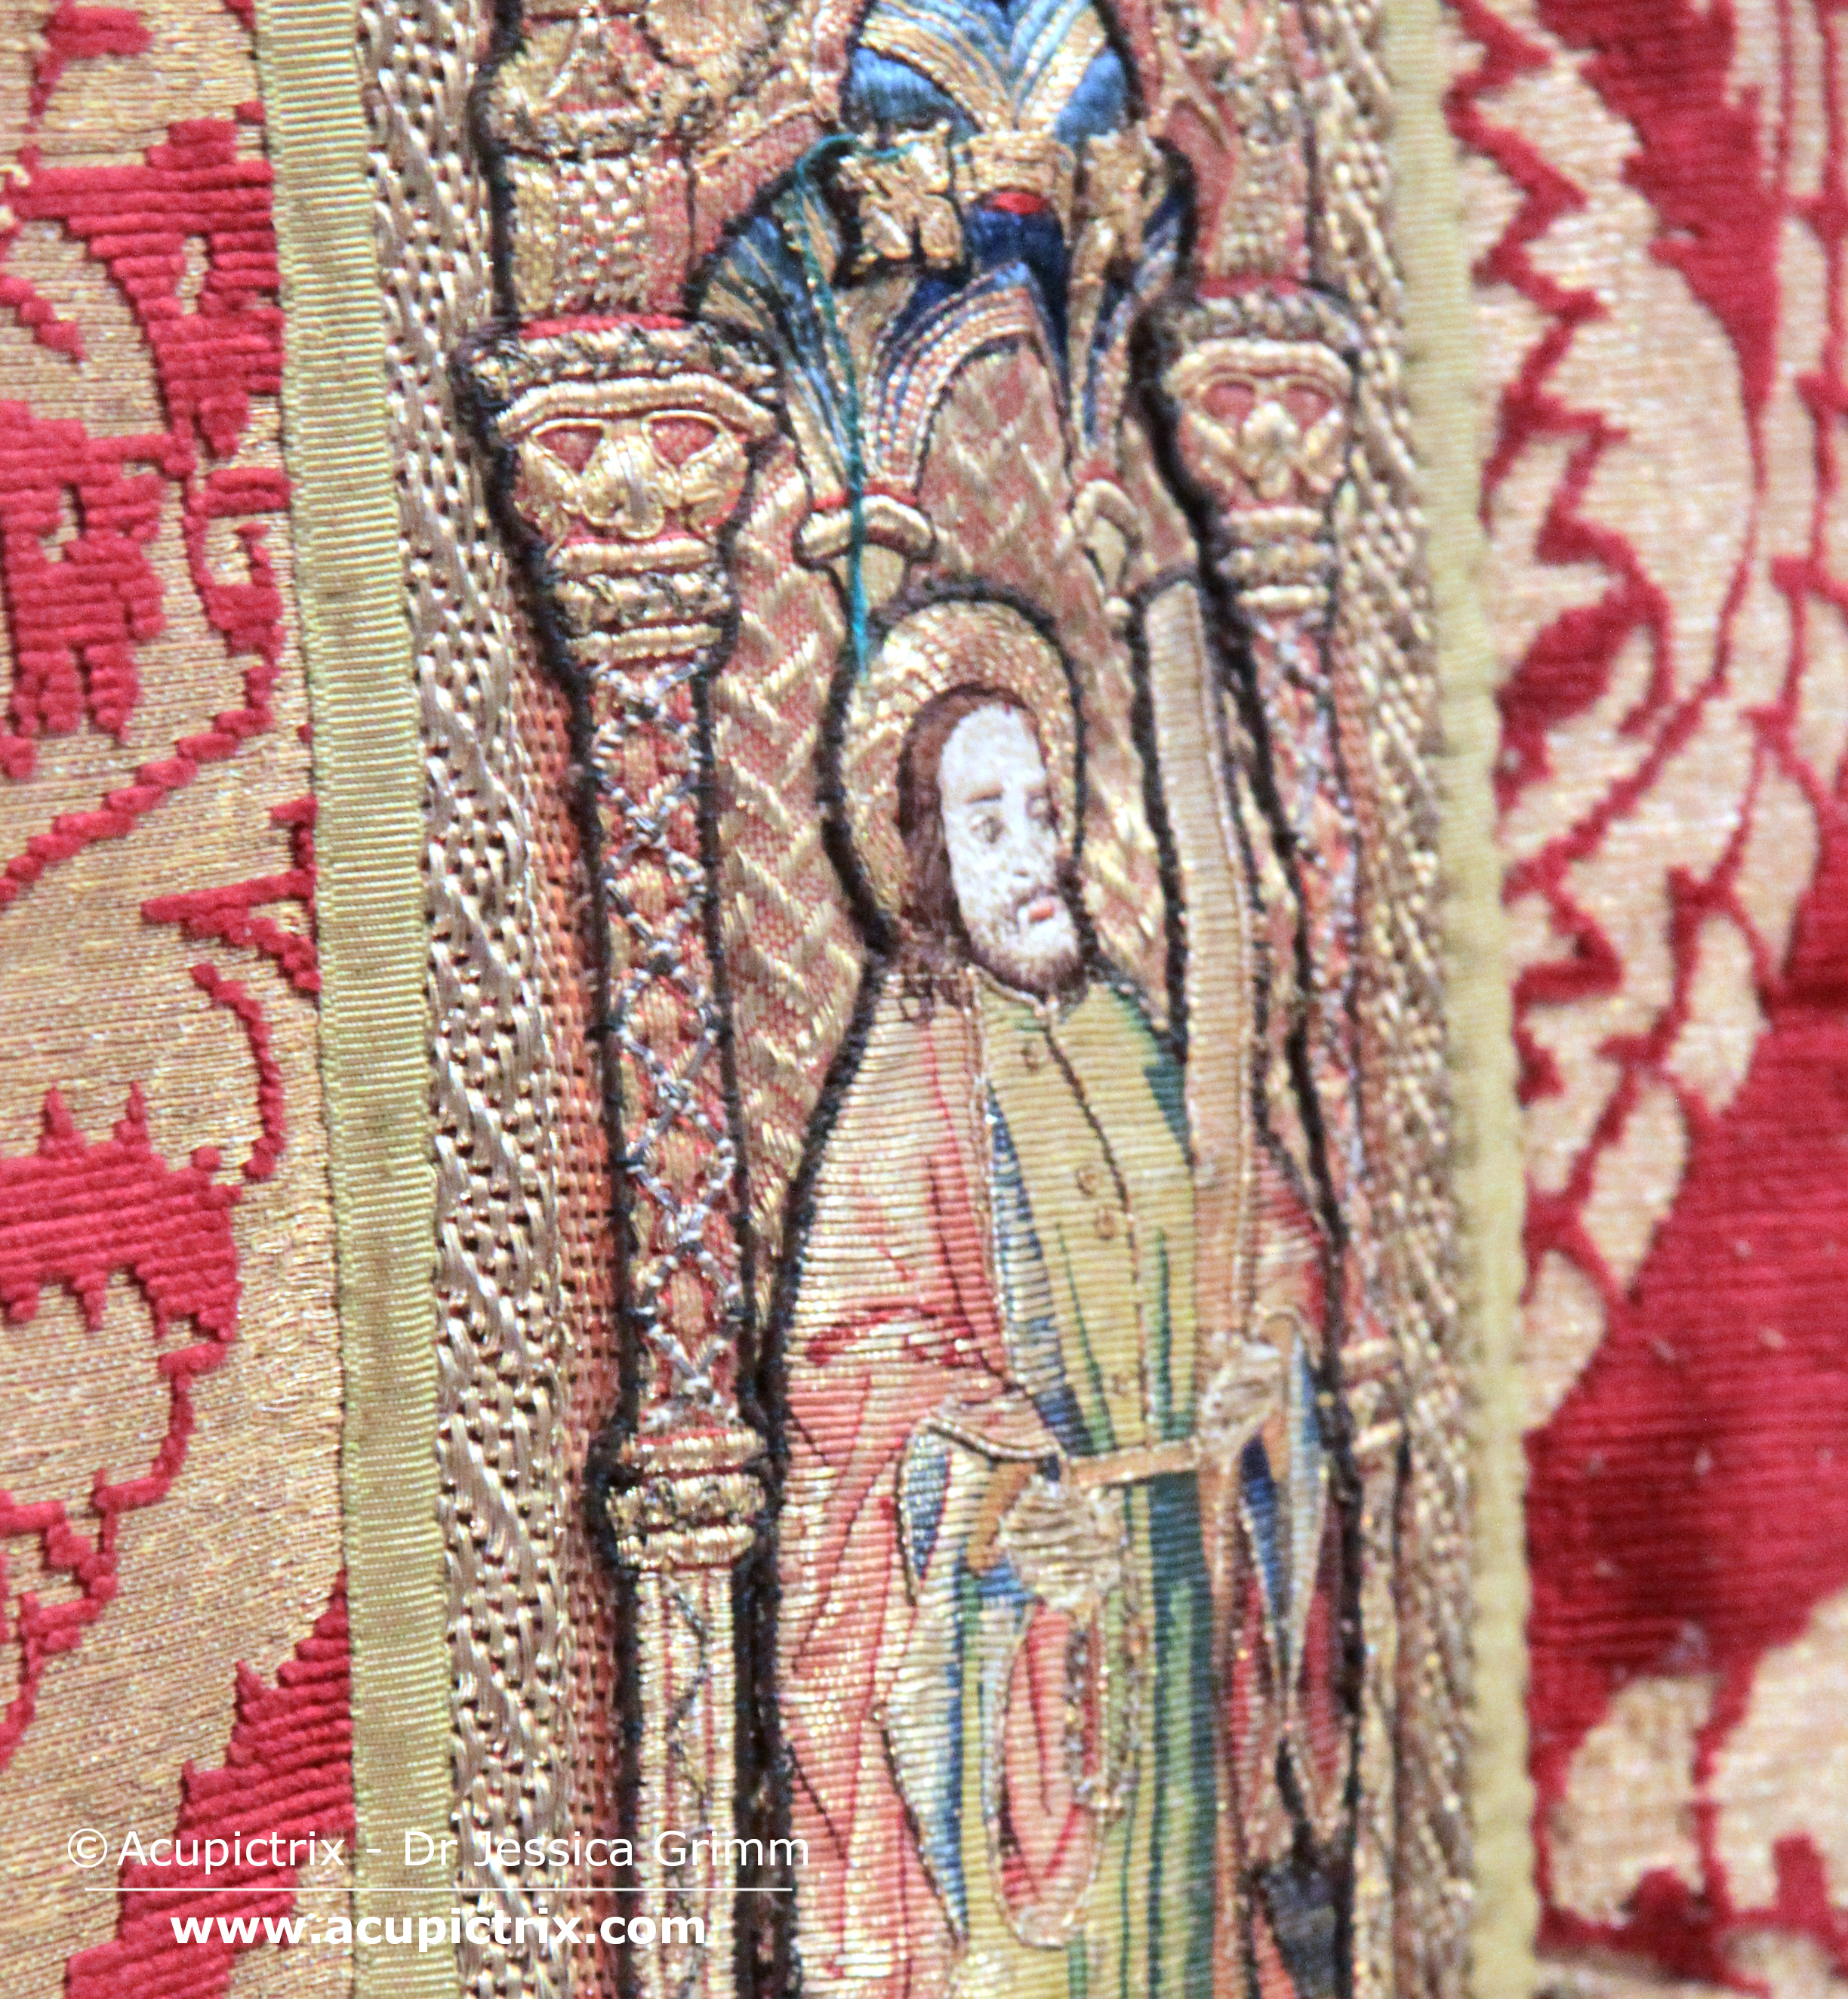
And here is the culprit. No, not Saint Andrew. It is the columns on either side of him. They are odd. The layering of goldwork is a common thing in late-medieval goldwork embroidery. But this is too OTT. It does not make sense. Let’s start our stitch tutorial proper, and I’ll point out the oddness to you.

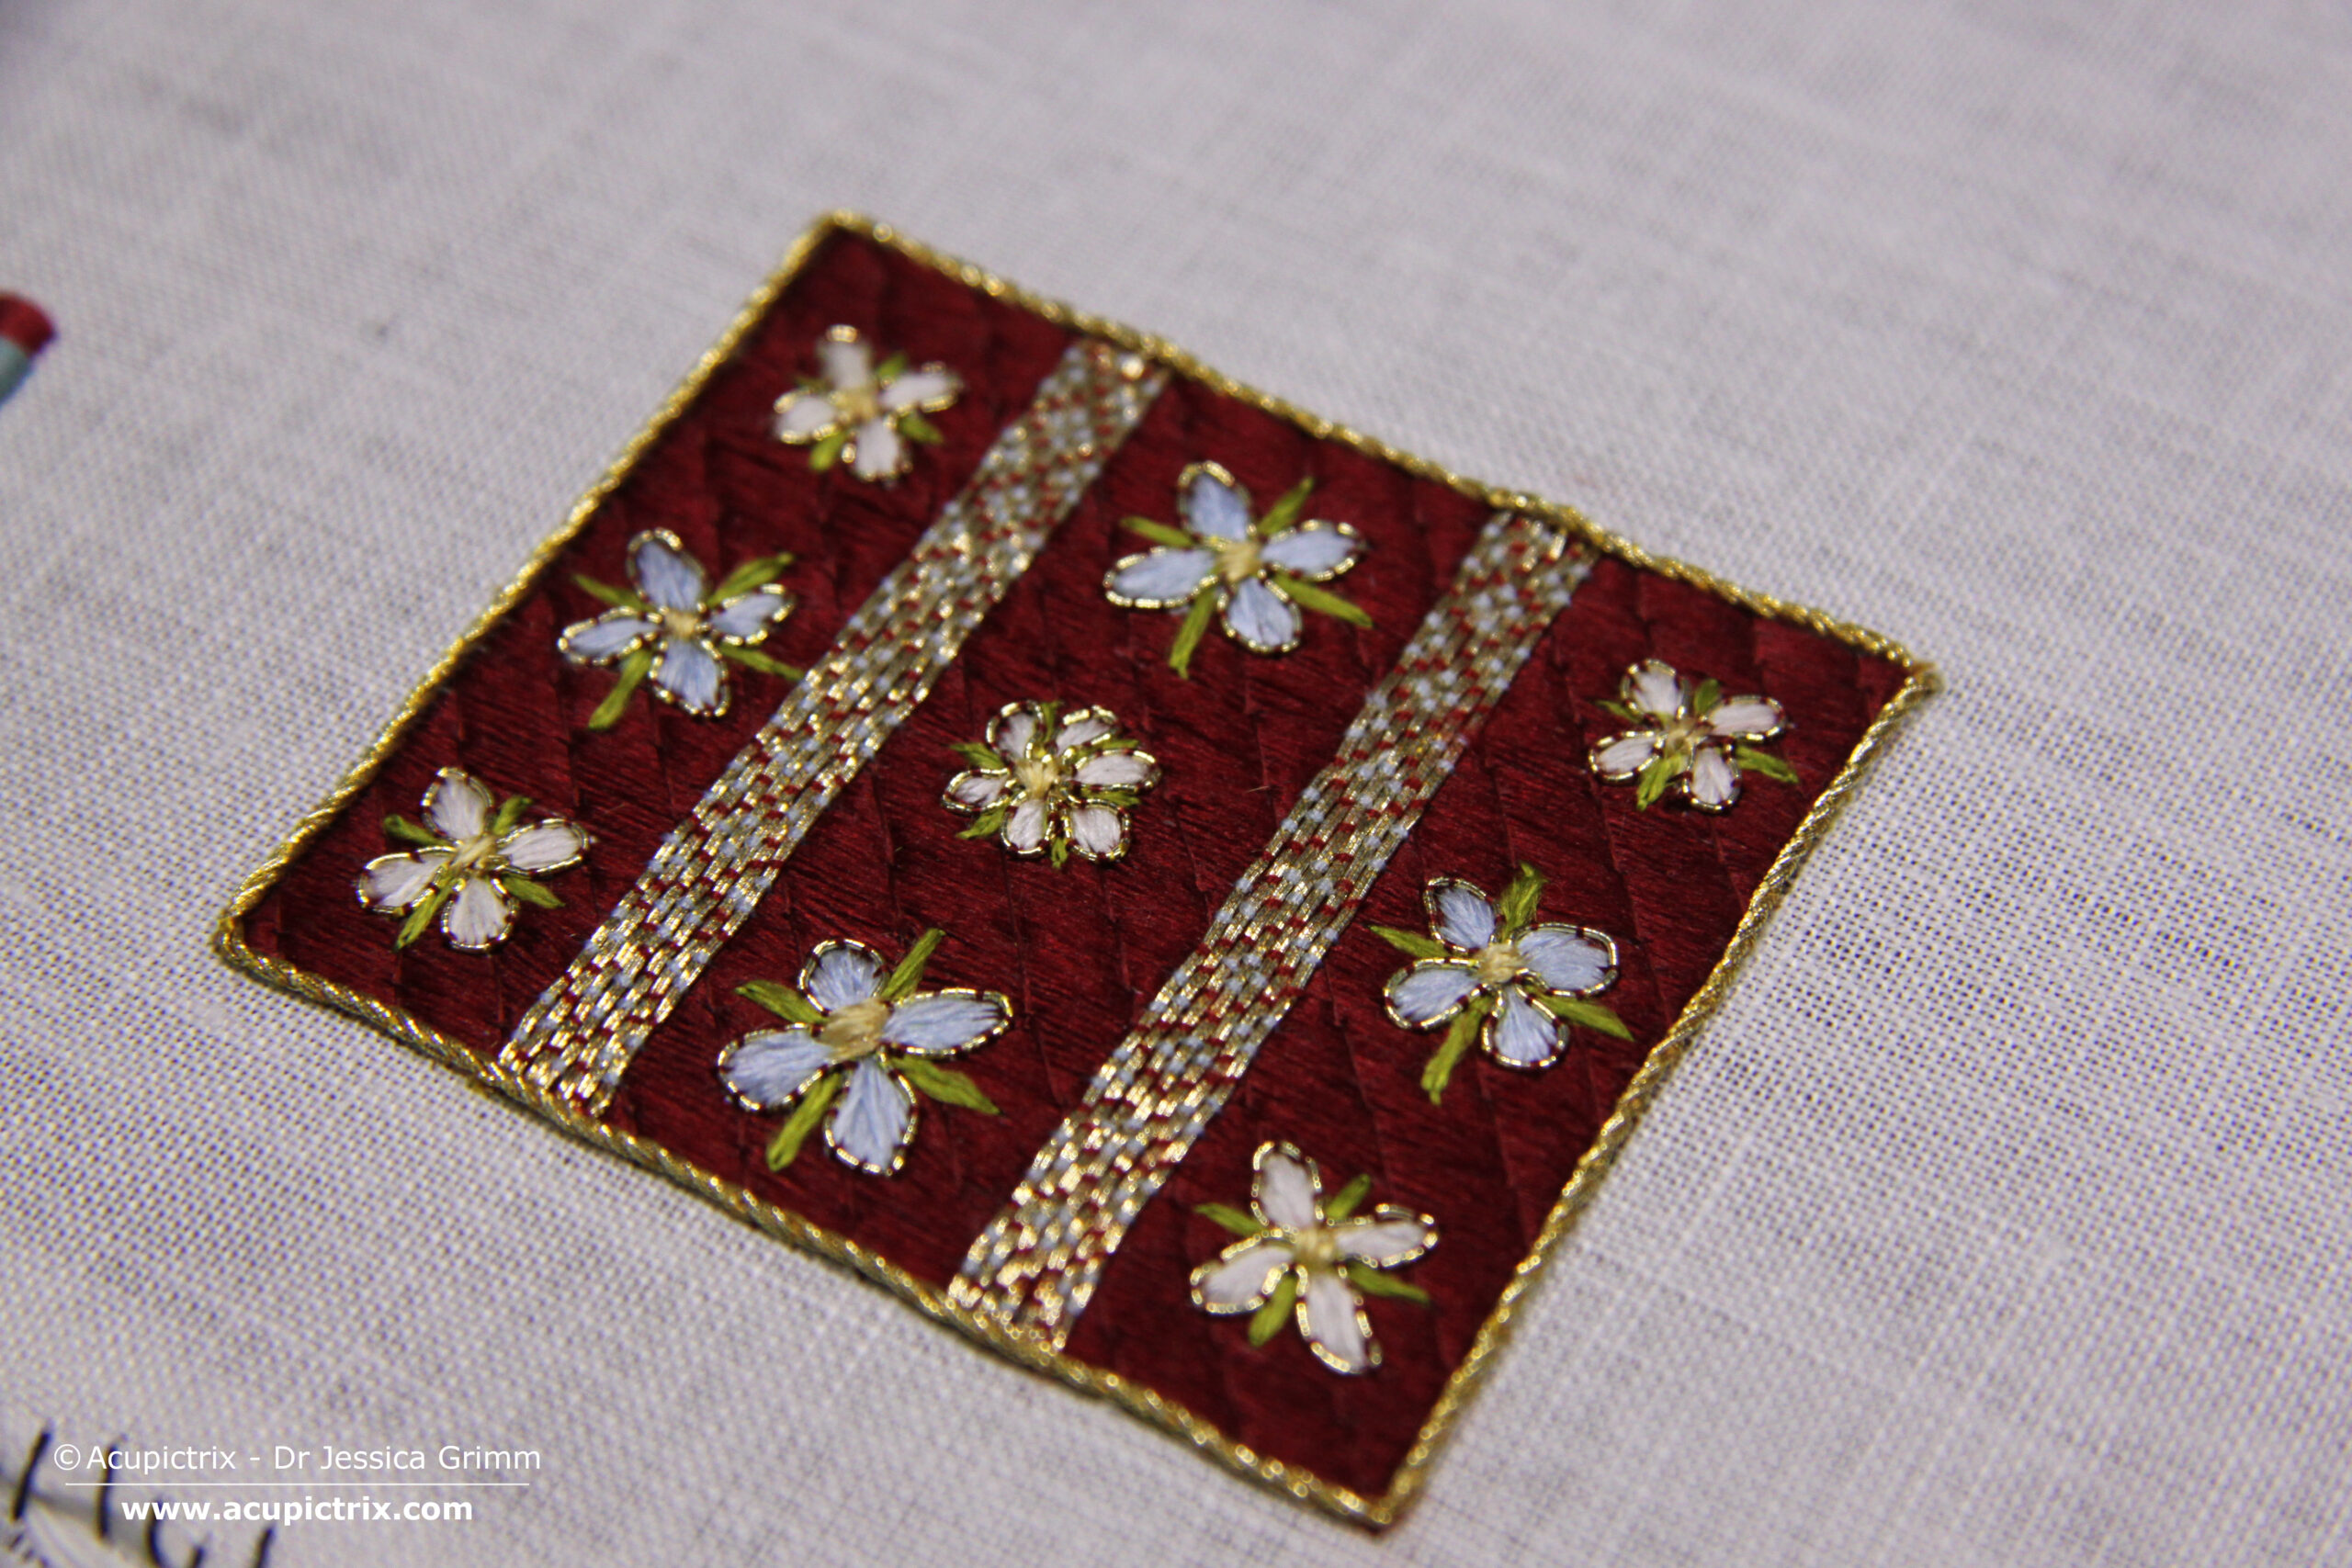
Start with a layer of shaded couched goldwork. For my sample (c. 0.8 x 5.0 cm), I used 46ct linen and passing thread #3 couched down with a single ply of red Chinese flat silk.


Next up, add the silver passing thread. You will mainly be stitching between the rows of gold thread of the first layer. However, you will inevitably hit threads of the first layer. Make sure you use a fine needle. A new #12 would be perfect. You might also like to wax your silken couching thread (one ply of grey silk).

The “original” embroiderer then added a layer of thicker red stitches along each side of the silver-passing thread. I’ve used a full thread of red Chinese flat silk to do this for the inside of the right-hand side only. By now, I was pretty certain that this was not all done in the late Middle Ages …
So much additional stitching in such a relatively small space is nuts. It does not add anything to the design. On the contrary, you lose quite a bit of the original lovely shading of the first layer. When additional details are added, they usually enhance the design. They bling things up or make the design easier to read by accentuating elements. That does not seem to be the case here. So, what’s going on?

Here’s an extreme blown-up detail of that same column. Can you see the thick white/beige couching stitches used to couch down those silver threads? The silver threads themselves are also much thicker than all the other threads used in the embroidery. The added red stitches to the outside of the silver threads are also comparable in thickness to the white/beige stuff. It all looks so much cruder than the original, very high-quality stitching done in the medieval period.
As I already mentioned in my earlier blog post, these vestments underwent extensive restoration in the 1840s. The addition of these silver passing threads on top of the columns was likely done then. It likely serves several purposes. Maybe some columns had so many damaged, loose gold threads that this was a decorative way to clean them up. But it also does something else. This additional stitching likely goes through many of the layers that these vestments are made of. This stabilises the whole construction. You often see horrible bulging on non-restored late-medieval vestments. By stitching through multiple layers, you can make things very stable and secure. It can’t really bulge anymore. Was that what was attempted here? What do you think? Do you also feel that not all of the embroidery on these columns is original?
You can find a downloadable PDF of these instructions on my Patreon page. As a Patron, you support my research, and I can’t thank you enough for that!
0 Comments