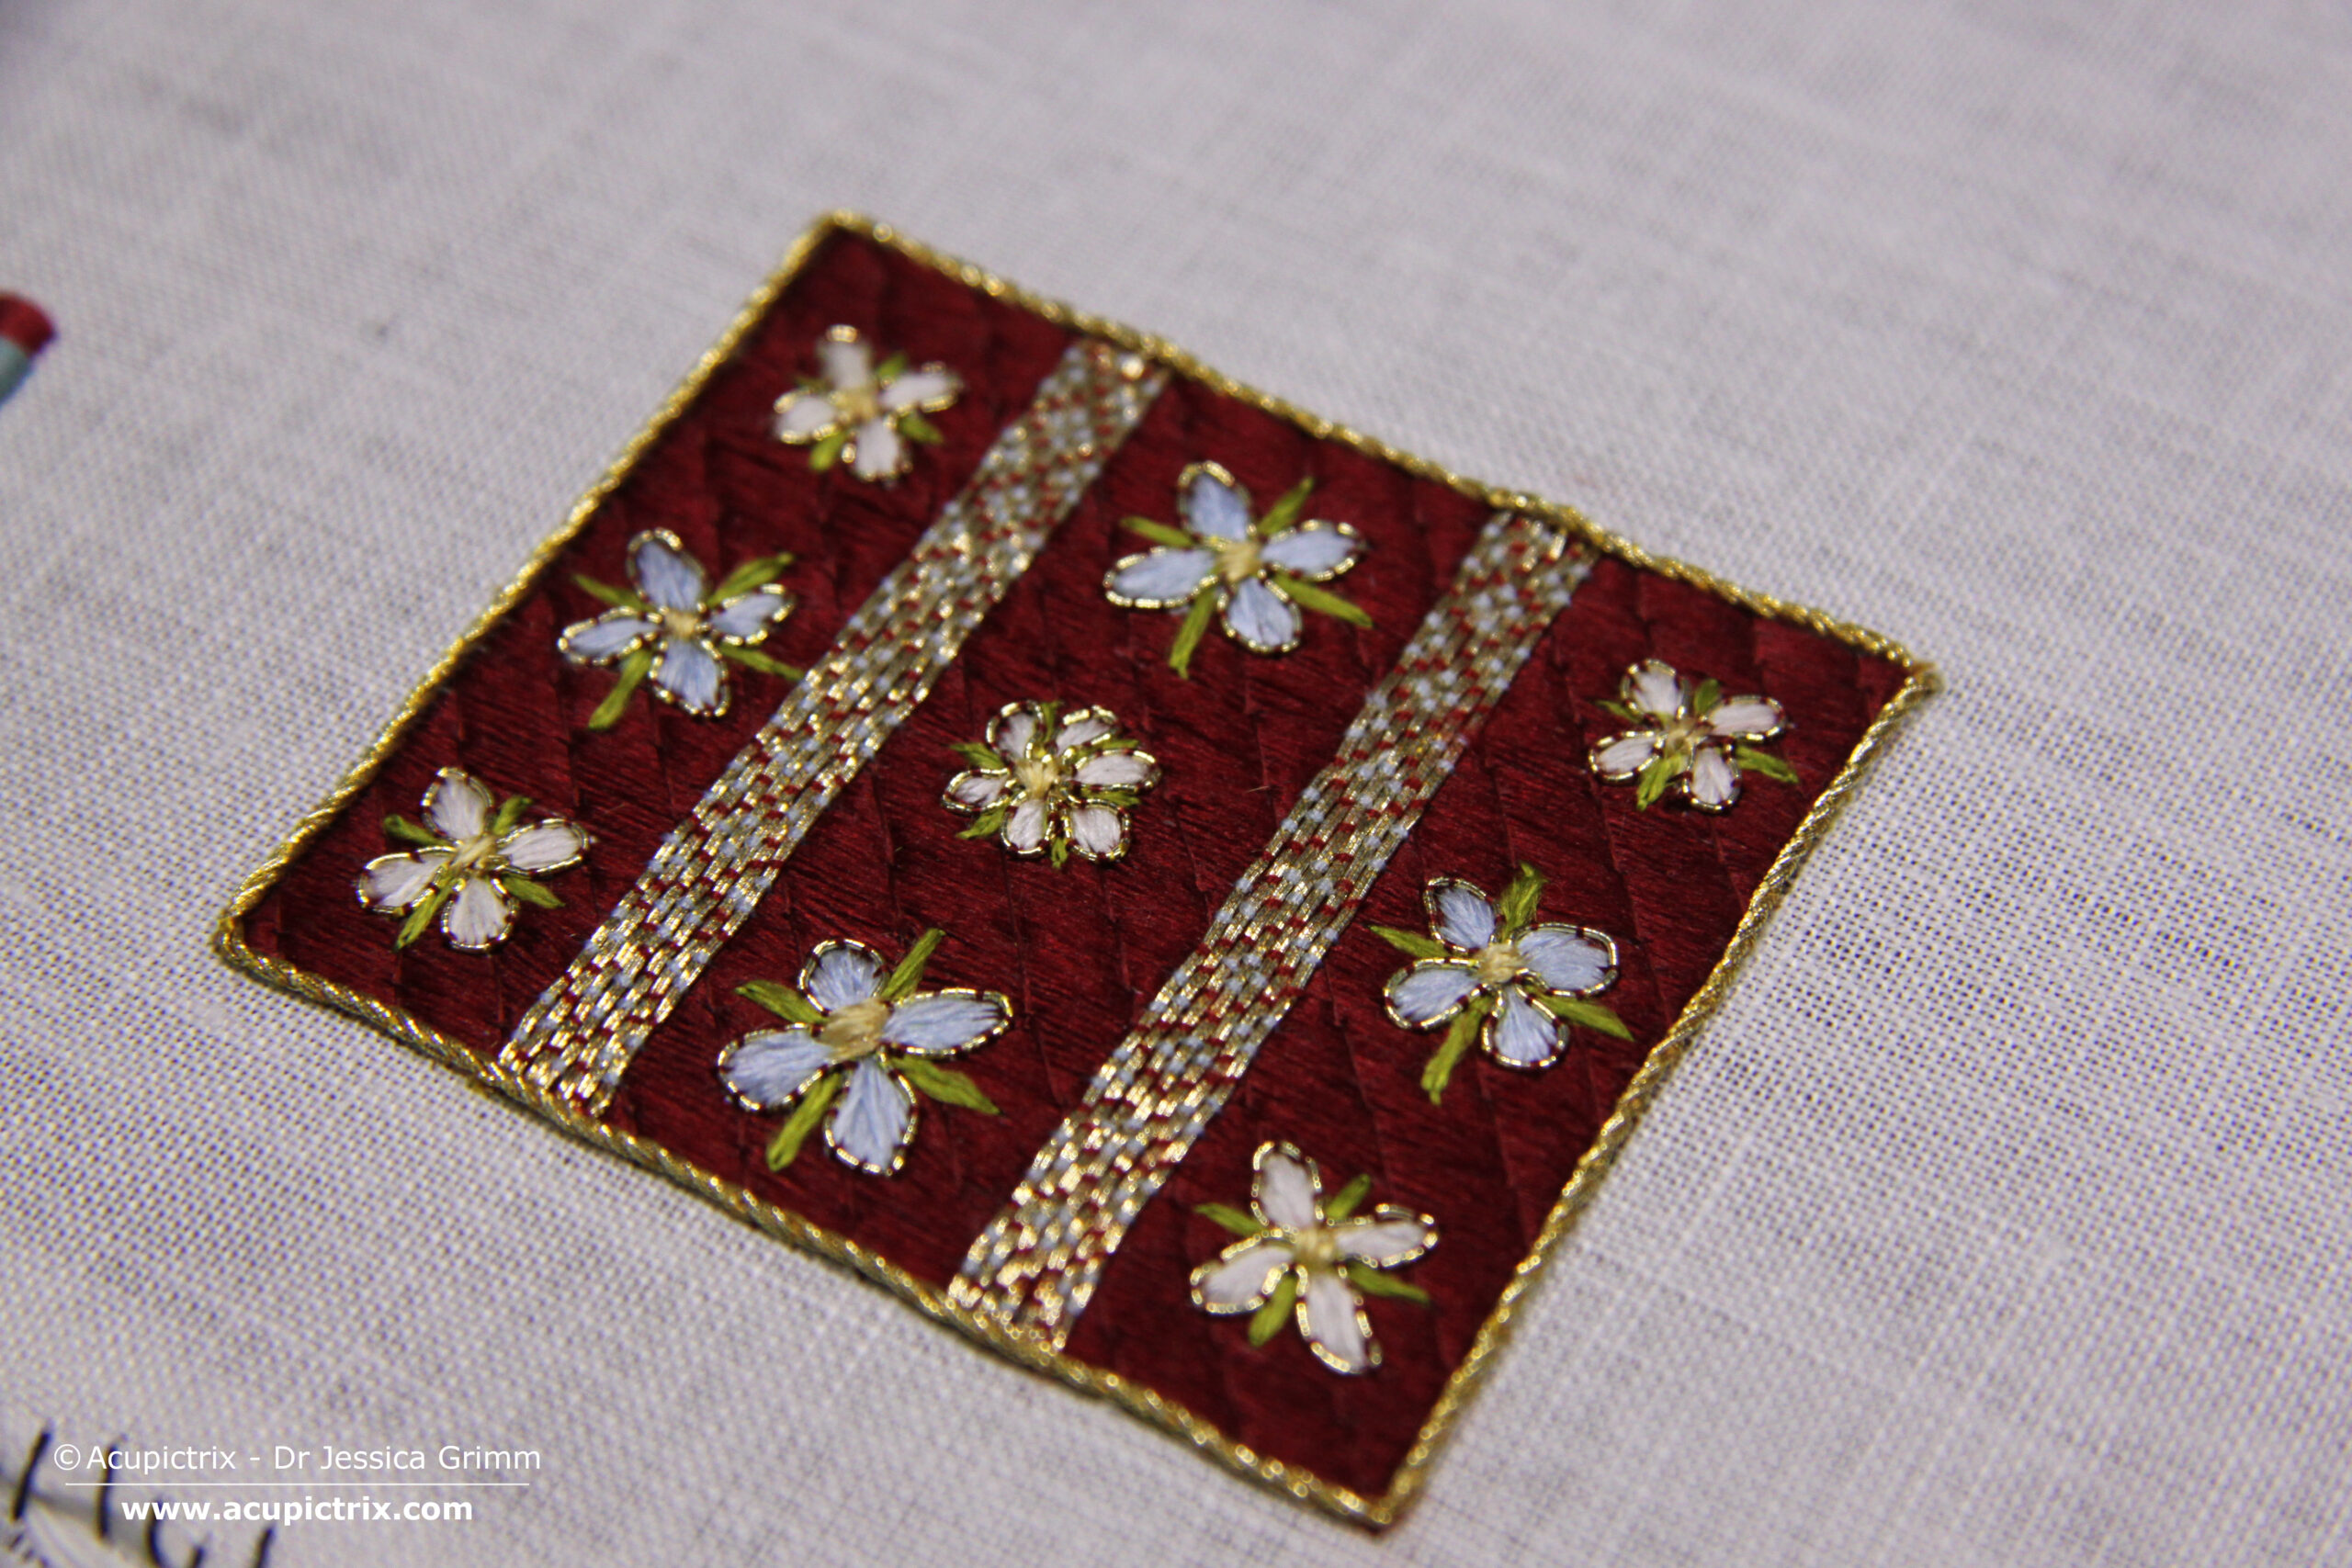
This week’s medieval goldwork embroidery tutorial is based on the lovely cope from Hulst, which I wrote about earlier. The border around the orphrey panels is geometric and highly textured. It would look good in any modern piece of goldwork embroidery. As always, my Journeyman and Master Patrons can find a downloadable PDF of the instructions below on my Patreon site. Your continued support means the world to me! Not a Patron yet? Please join and enjoy the benefits, such as weekly Stitch & Chat on Zoom, a private and safe Forum on Discourse and many more!
For this medieval goldwork embroidery tutorial, you will need a high-count linen (I used Sotema 30L candido 46ct Linen), Stech 80/90 vergoldet or real gold (comparable to passing thread #4), two colours of silk gimp (Access Commodities), a fine silken couching thread that matches the colour of your gold (I used DeVere Yarns #6 colour Chamoix) and a padding thread/string (mine is 2.4 mm thick). It is best to work on a slate frame. You can find my video instructions on how to dress your slate frame on this page (scroll to the bottom).
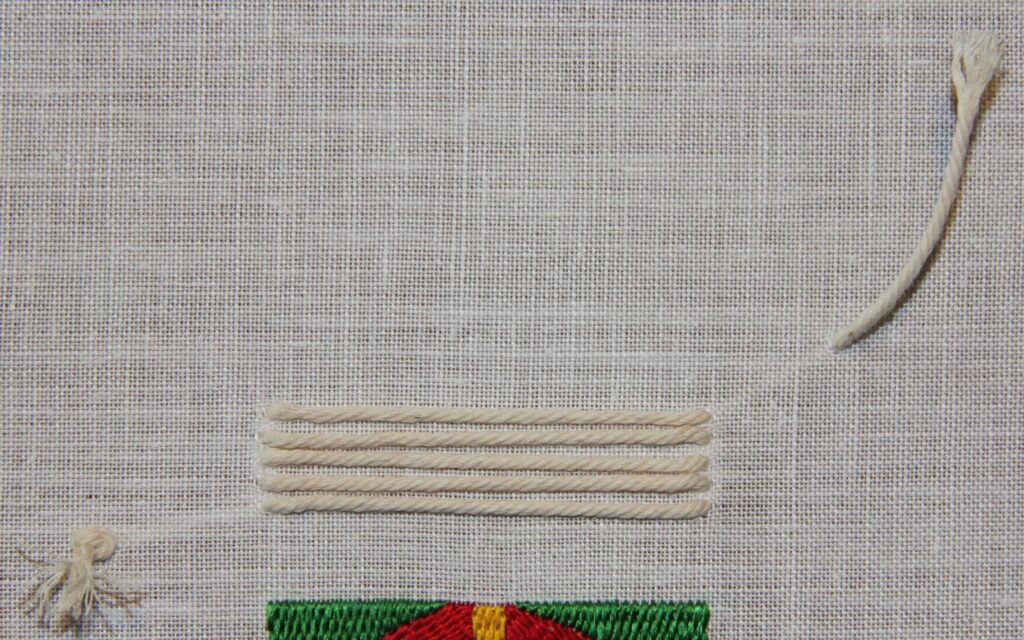
Start by couching down five parallel padding threads. Cut a length of your padding thread/string and thread it in a large needle. Make five horizontal parallel stitches. The space between the padding threads is the width of your padding thread. Note: only have minimal string running on the back (i.e. only on the edges of your sample). Make sure you follow the grain of your linen fabric. Have a knot in the end of your string that sits on top of your fabric, a little away from your sample. After the last stitch, come up with your needle a little further away from your sample and let the tail sit on the front of your fabric. We will deal with these ends of your padding thread/string later.
Thread up your gold coloured fine silk and couch down the padding at regular intervals. Don’t pull your stitches too tight and don’t have them too slack either. You don’t want dents in your padding. Equally, the padding threads are not allowed to move either. Follow the grain of the linen fabric for the placement of your couching stitches. How you anchor your couching thread is up to you; I use a simple knot on the back.
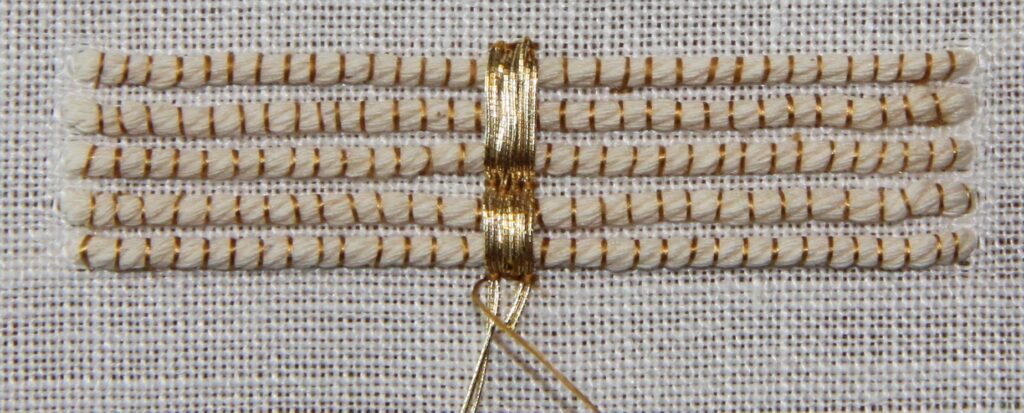
Time to add the gold for this medieval goldwork tutorial. Start in the middle. You will couch down two parallel gold threads with each couching stitch. Leave a tail. You can either cut these close to the couching stitches after you have put a few rows in or you can plunge them and secure on the back. The two gold threads are couched before the first padding thread, after the second padding thread and after the fifth padding thread. Make sure that your gold threads follow the grain.
After the first row, come up on the outside of your gold threads and go down towards the previously stitched row. This ensures that the rows of gold thread butt up against each other and that there is no gaping. I prefer to go over each couching stitch twice as the silk is quite slippery. Using two stitches means that I can manipulate my gold better. However, you can also try to use a little wax on your couching stitch. Make sure you remove any excess crumbs from your thread prior to stitching.
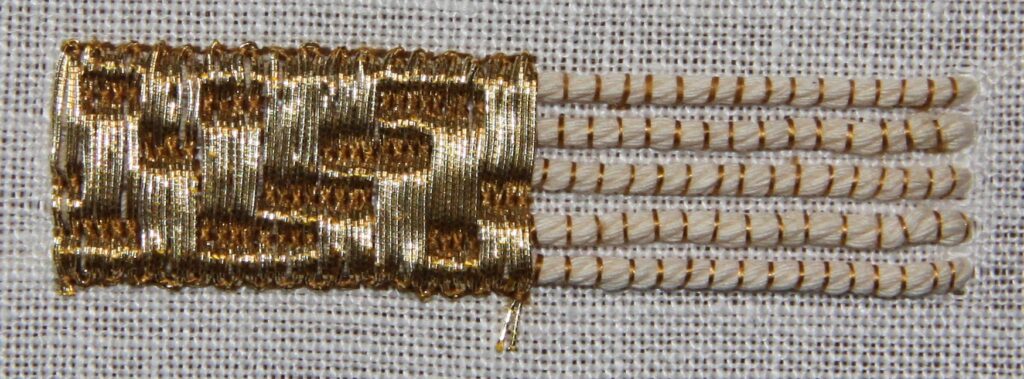
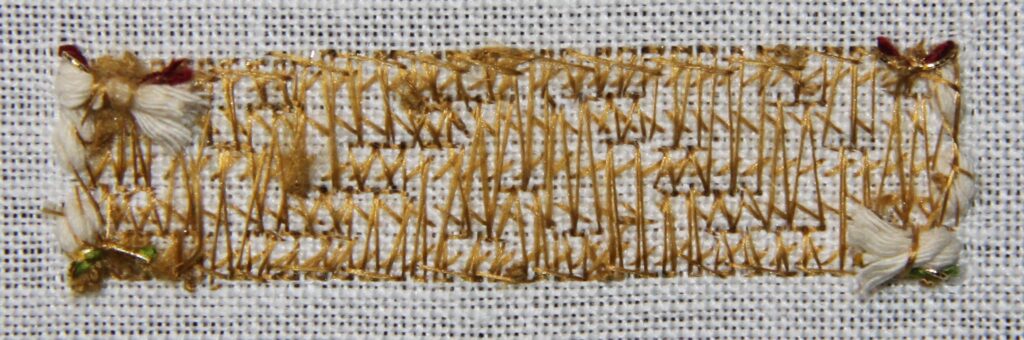
The couching rhythm for half a repeat of this medieval goldwork embroidery tutorial sample is as follows:
– The next four rows are couched before and after the first padding thread, after the fourth padding thread and after the fifth padding thread.
– before the first padding thread, after the third, after the fourth padding and after the fifth.
– before the first padding thread, after the second, after the third and after the fifth.
– before and after the first padding thread, after the second and after the fifth.
– before and after the first padding thread, after the fourth and after the fifth-
– before the first padding thread, after the third and after the fifth.
– before and after the first padding thread, after the fourth and after the fifth.
– before and after the first padding thread, after the second and after the fifth (incomplete for me).
My medieval goldwork embroidery tutorial sample ends here. However, if you have more space, this is how the couching rhythm continues:
– Before and after first, after fourth and after fifth.
– before first padding thread, after second, after third and after fifth.
– Before and after first, after fourth and after fifth.
– Before first, after third and after fifth.
– Before and after first, after second and after fifth.
– Before first, after second, after third and after fifth.
– Before and after first, after second and after fifth.
You should be able to see a full report now. Repeat to fill the other half of the sample. Your threads will have a tendency to roll off the edges of your padding threads. This can’t be helped. In the original samples, there is often a binding or a thicker gold thread twist butted up against these ‘problem areas’.
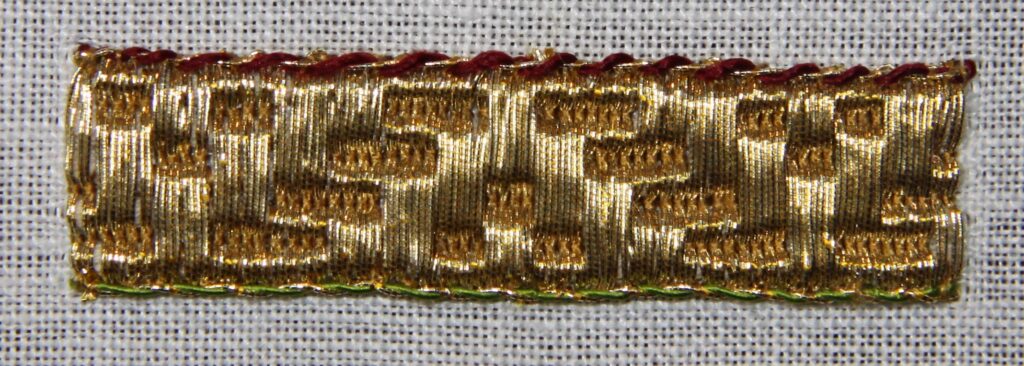
Once you have finished couching the gold, it is time to cover the turns with a twist made of silk gimp and a single gold thread. Cut a length of your silk gimp and a length of your gold thread and twist them together. I could not get it as tight as the original. Either one of the threads would break. Testimony that our modern materials differ from the medieval ones. If you can’t get them twisted properly, try putting them together differently (i.e. head of one to tail of the other). Sewing the created twist on is a little bit fiddly. Couch down one end securely with a few stitches. You will plunge the tails later. I used my gold coloured silk thread to couch over the gold thread of the twist. Come up on the edge of your band of couched gold, go over the twist and into the gold band a bit. This way, you push your twist up over the edge of your gold band instead of pulling it off.
And last, but not least, pull the tails of your padding threads to the back and secure them. I hope you have enjoyed this tutorial. Many more are available as PDF downloads (usually with many more pictures than I can accommodate on the blog) on my Patreon page. Please consider becoming a Patreon so I can keep providing these medieval goldwork tutorials for free on my blog to those with a limited budget. Thank you very much for your support!
0 Comments