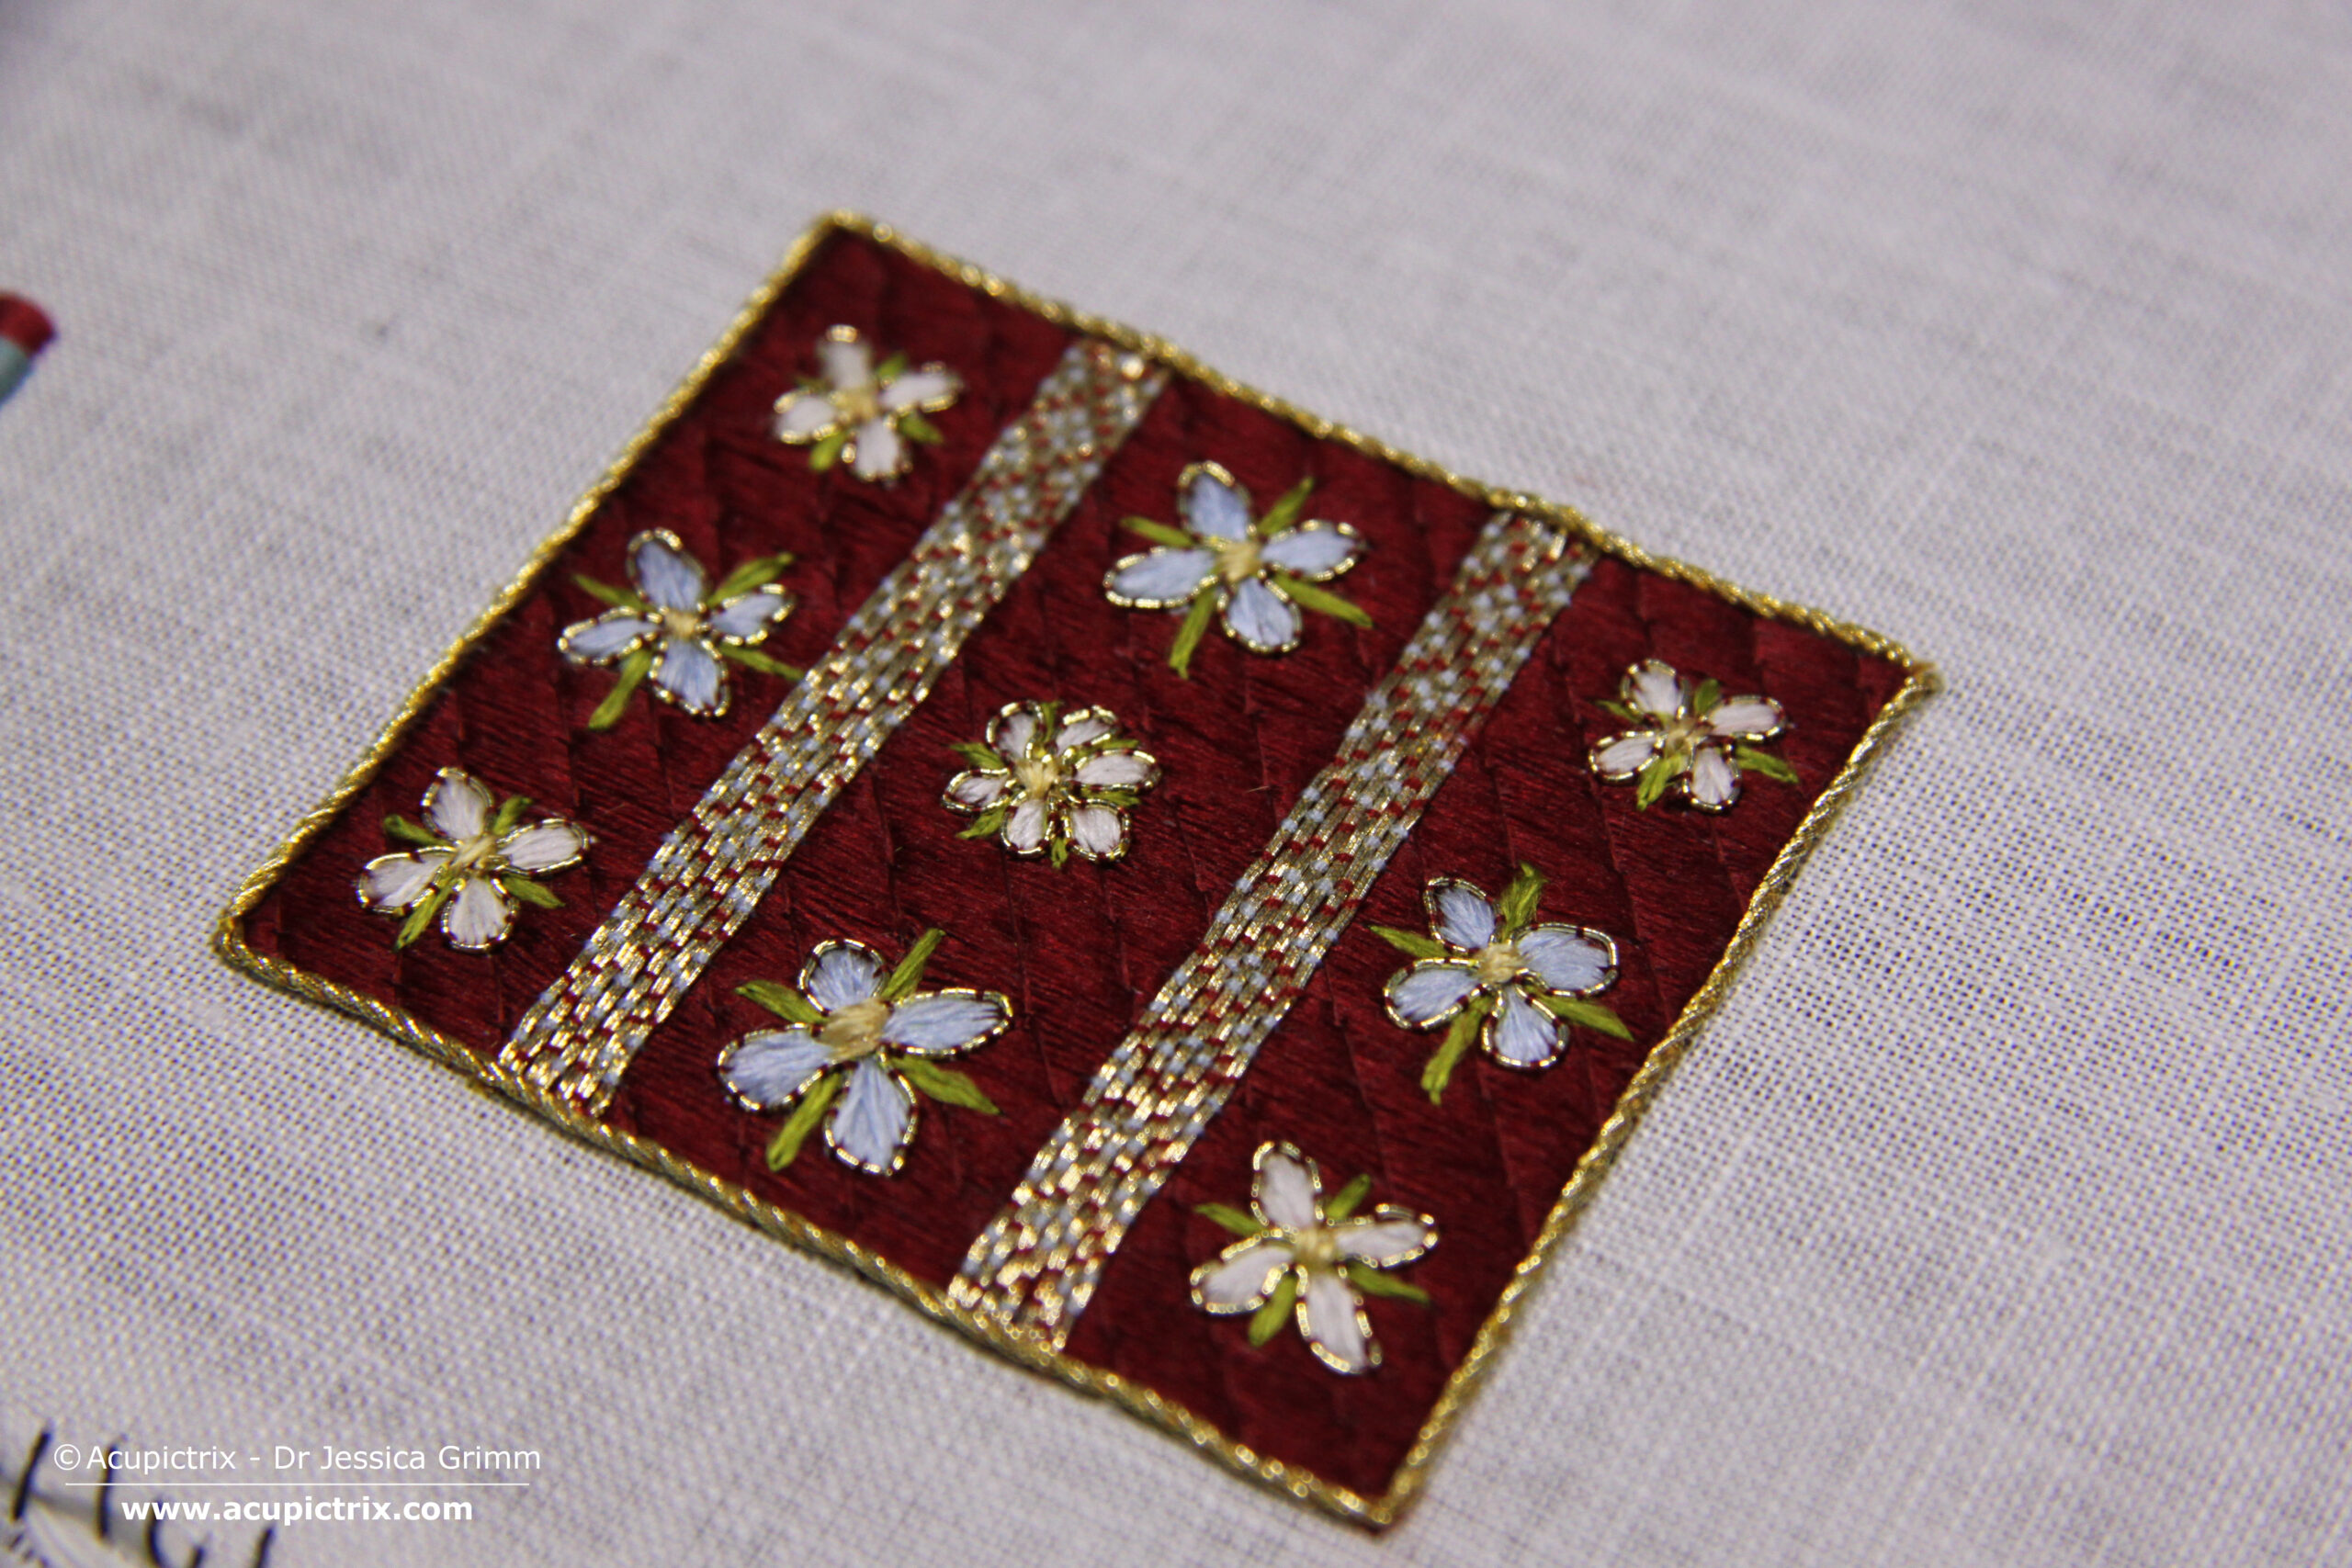
Several of my tutorials have shown you how to recreate a fancy padded orphrey panel frame. They are easy to do on a straight bit of border. But what happens when you need to turn a corner? The beautiful stumpwork chasuble at
Merseburg Cathedral shows how medieval embroiderers managed this tricky part. They fudged it! Any real surprises there? No. Fudging was king with
medieval embroiderers. And indeed still is with professional embroiderers the world over. You can find a downloadable PDF of this embroidery tutorial here.
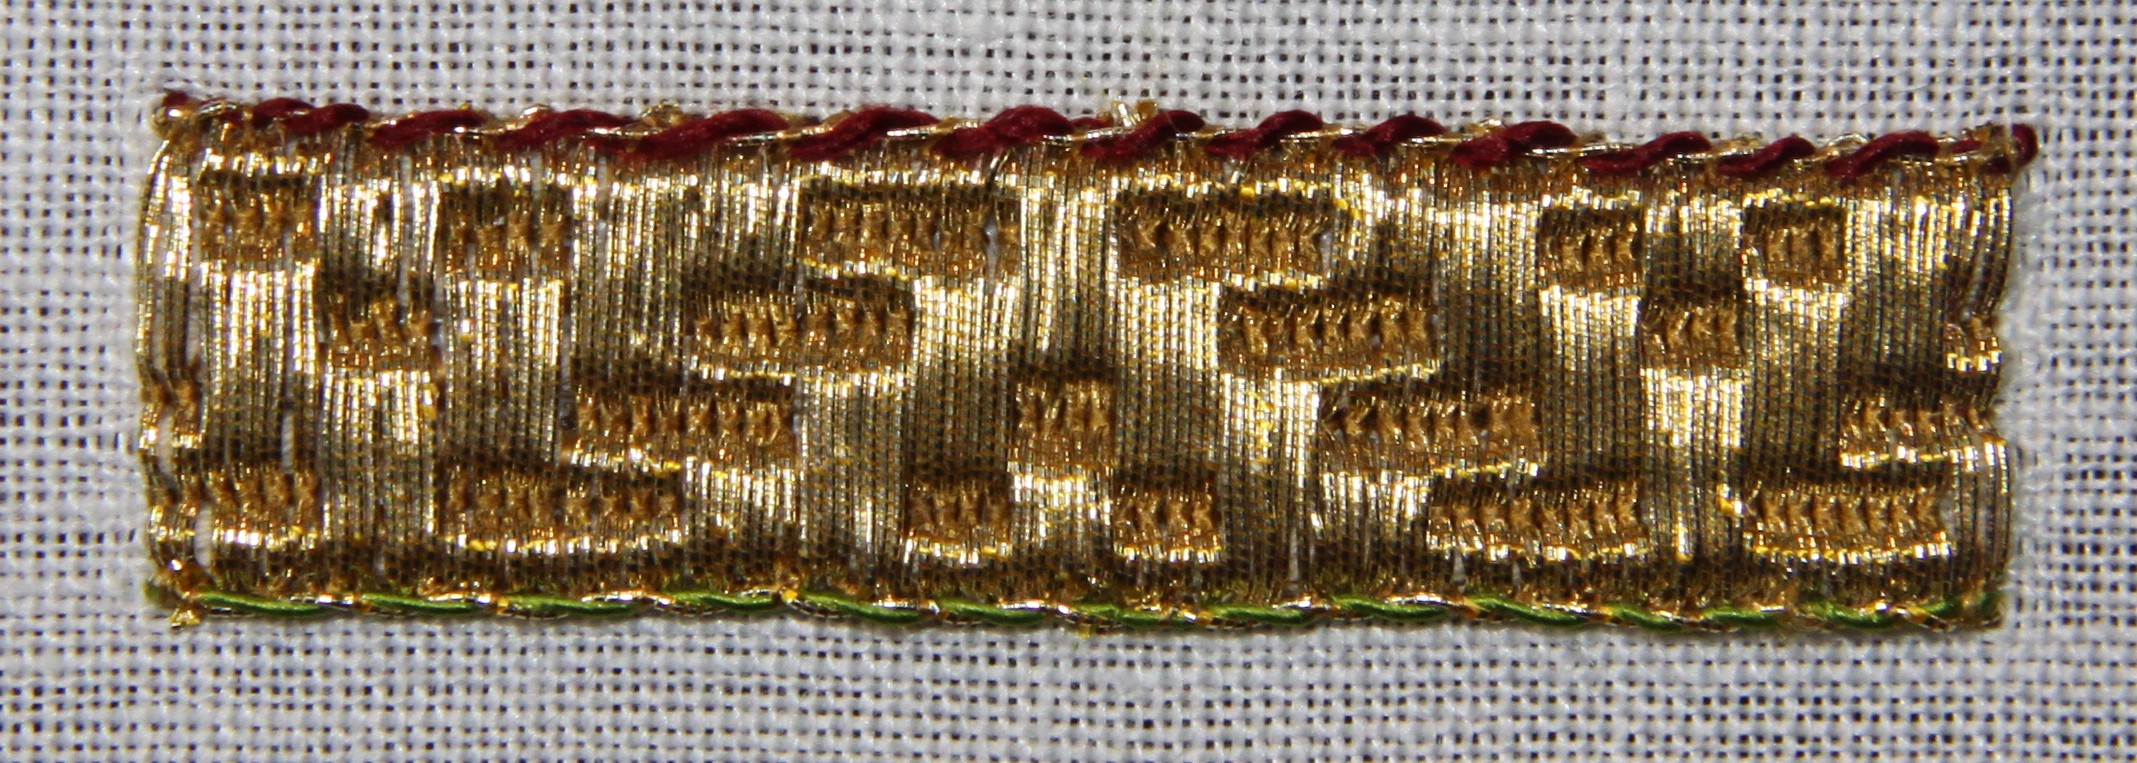
This embroidery tutorial teaches you how to fudge a corner on a textured orphrey panel. The size of the sample will depend on the exact materials you use. There is no need to transfer a design onto your embroidery linen. You will need a high-count linen, twisted silks (Soie de Paris by Au ver à Soie works well), silken sewing thread (DeVere Yarns #6 works well), and padding thread/string.
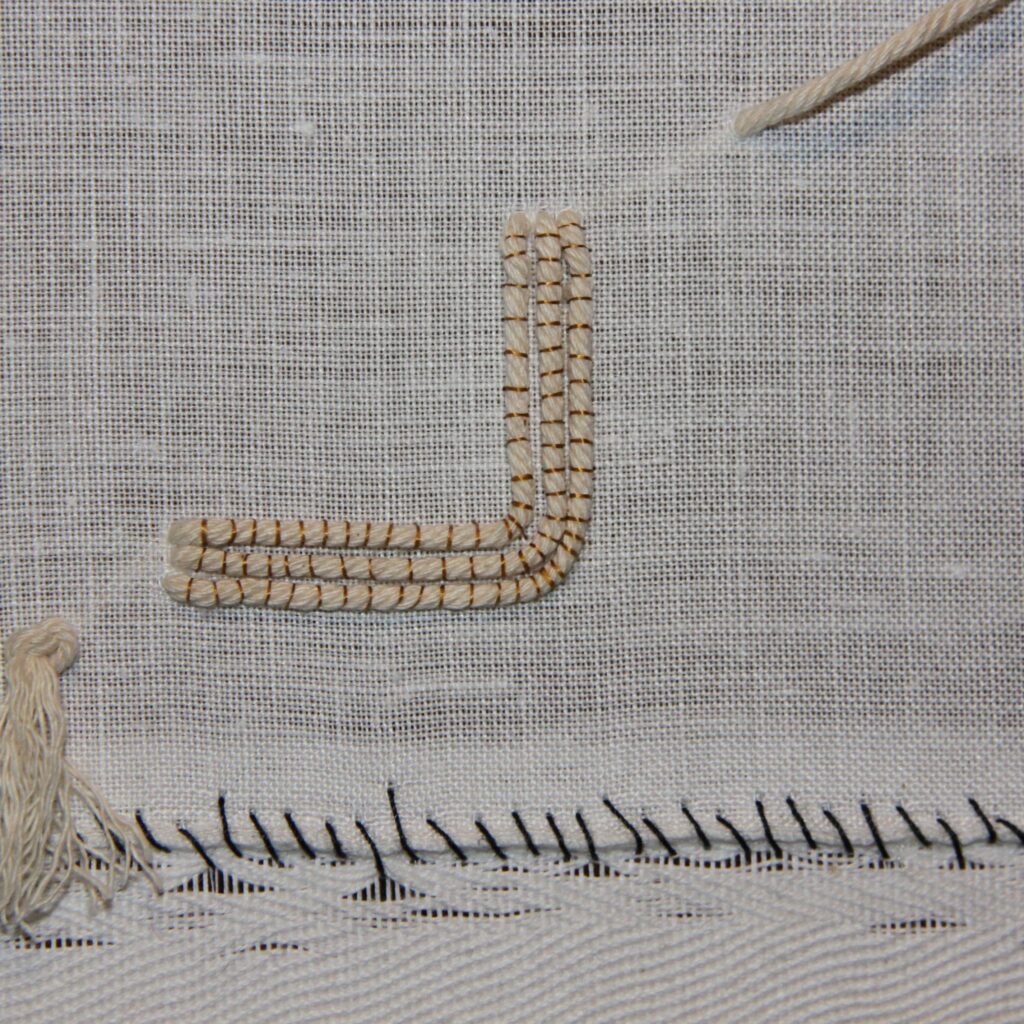
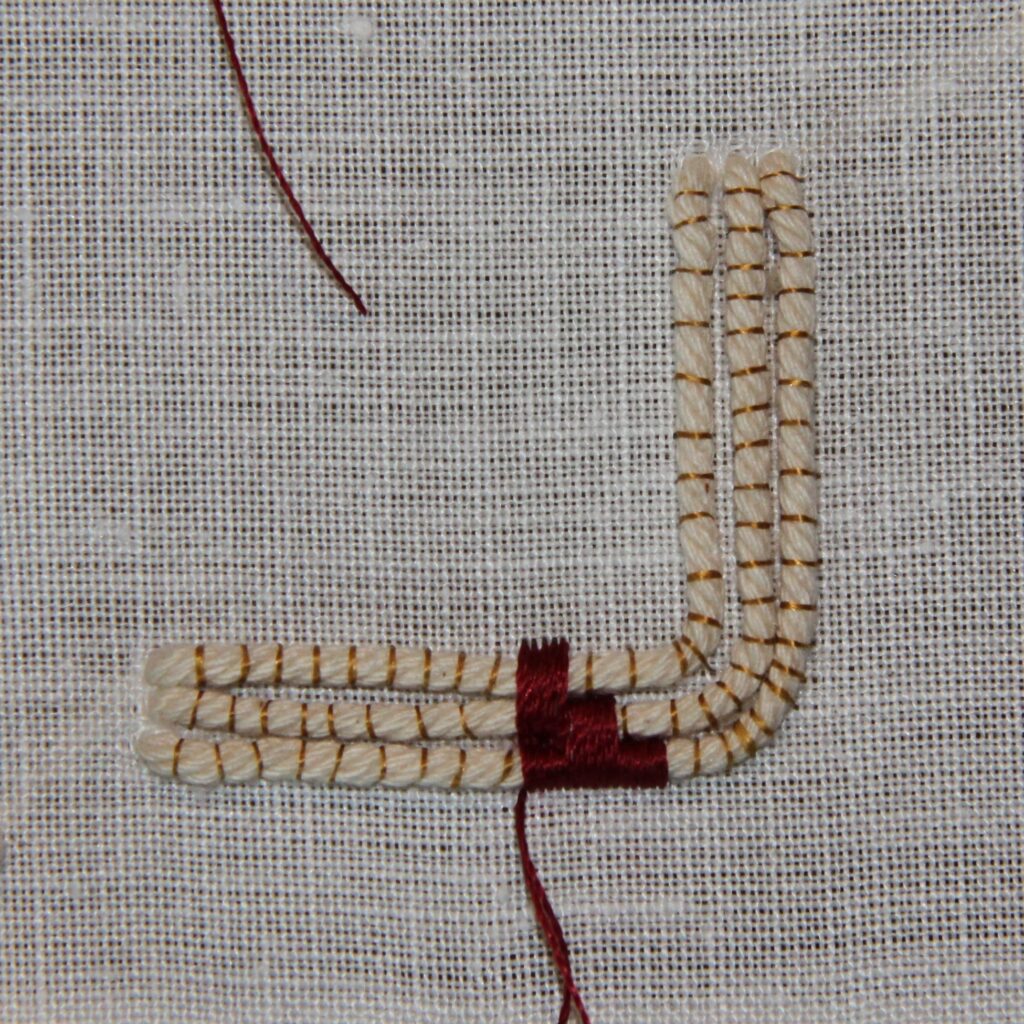
Start by couching down three parallel padding threads. Cut a length of your
padding thread/string and thread it in a large needle. Knot the end. Make three parallel stitches that turn the corner. The space between the padding threads is smaller than the width of your padding thread. Note: only have minimal string running on the back (i.e. only on the edges of your sample). Make sure you follow the grain of your linen fabric.
Have a knot in the end of your string that sits on top of your fabric, a little away from your sample. After the last stitch, come up with your needle a little further away from your sample and let the tail sit on the front of your
fabric. We will deal with these ends of your padding thread/string later.
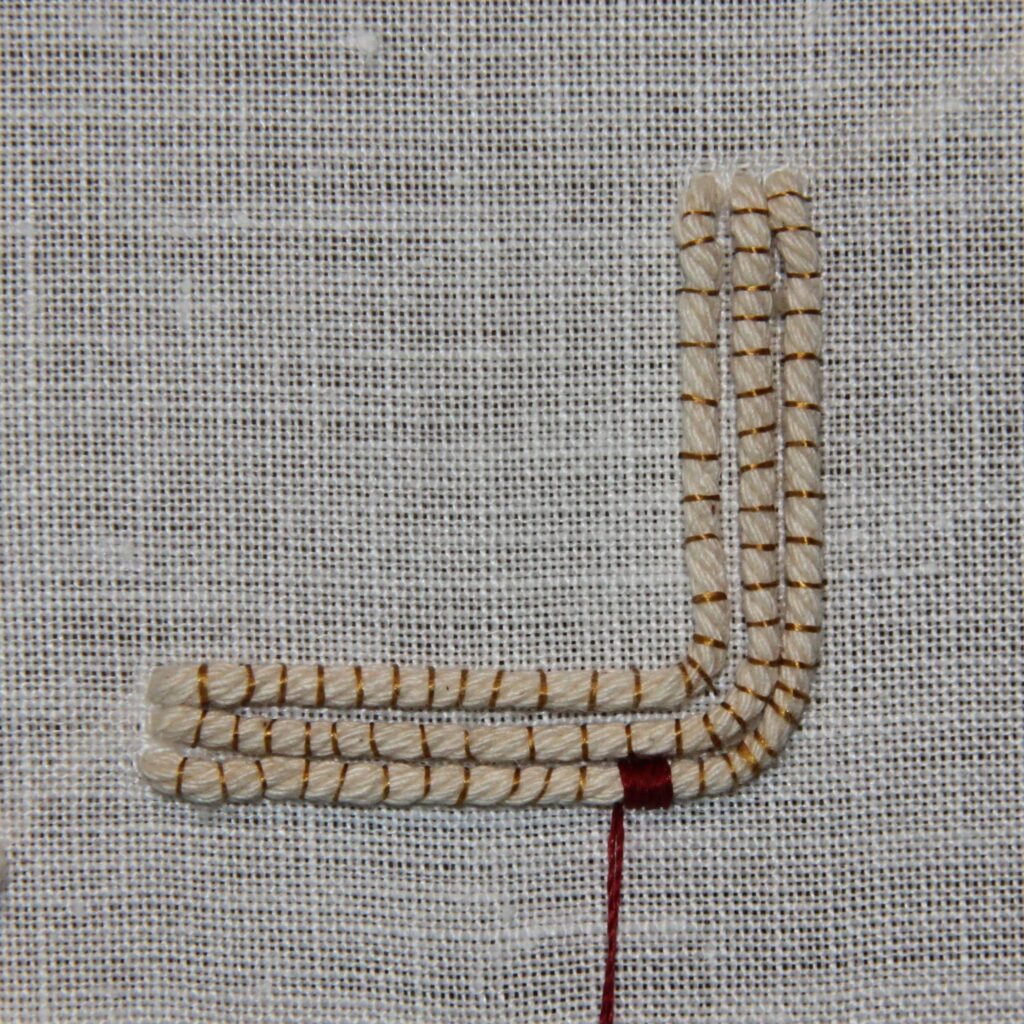
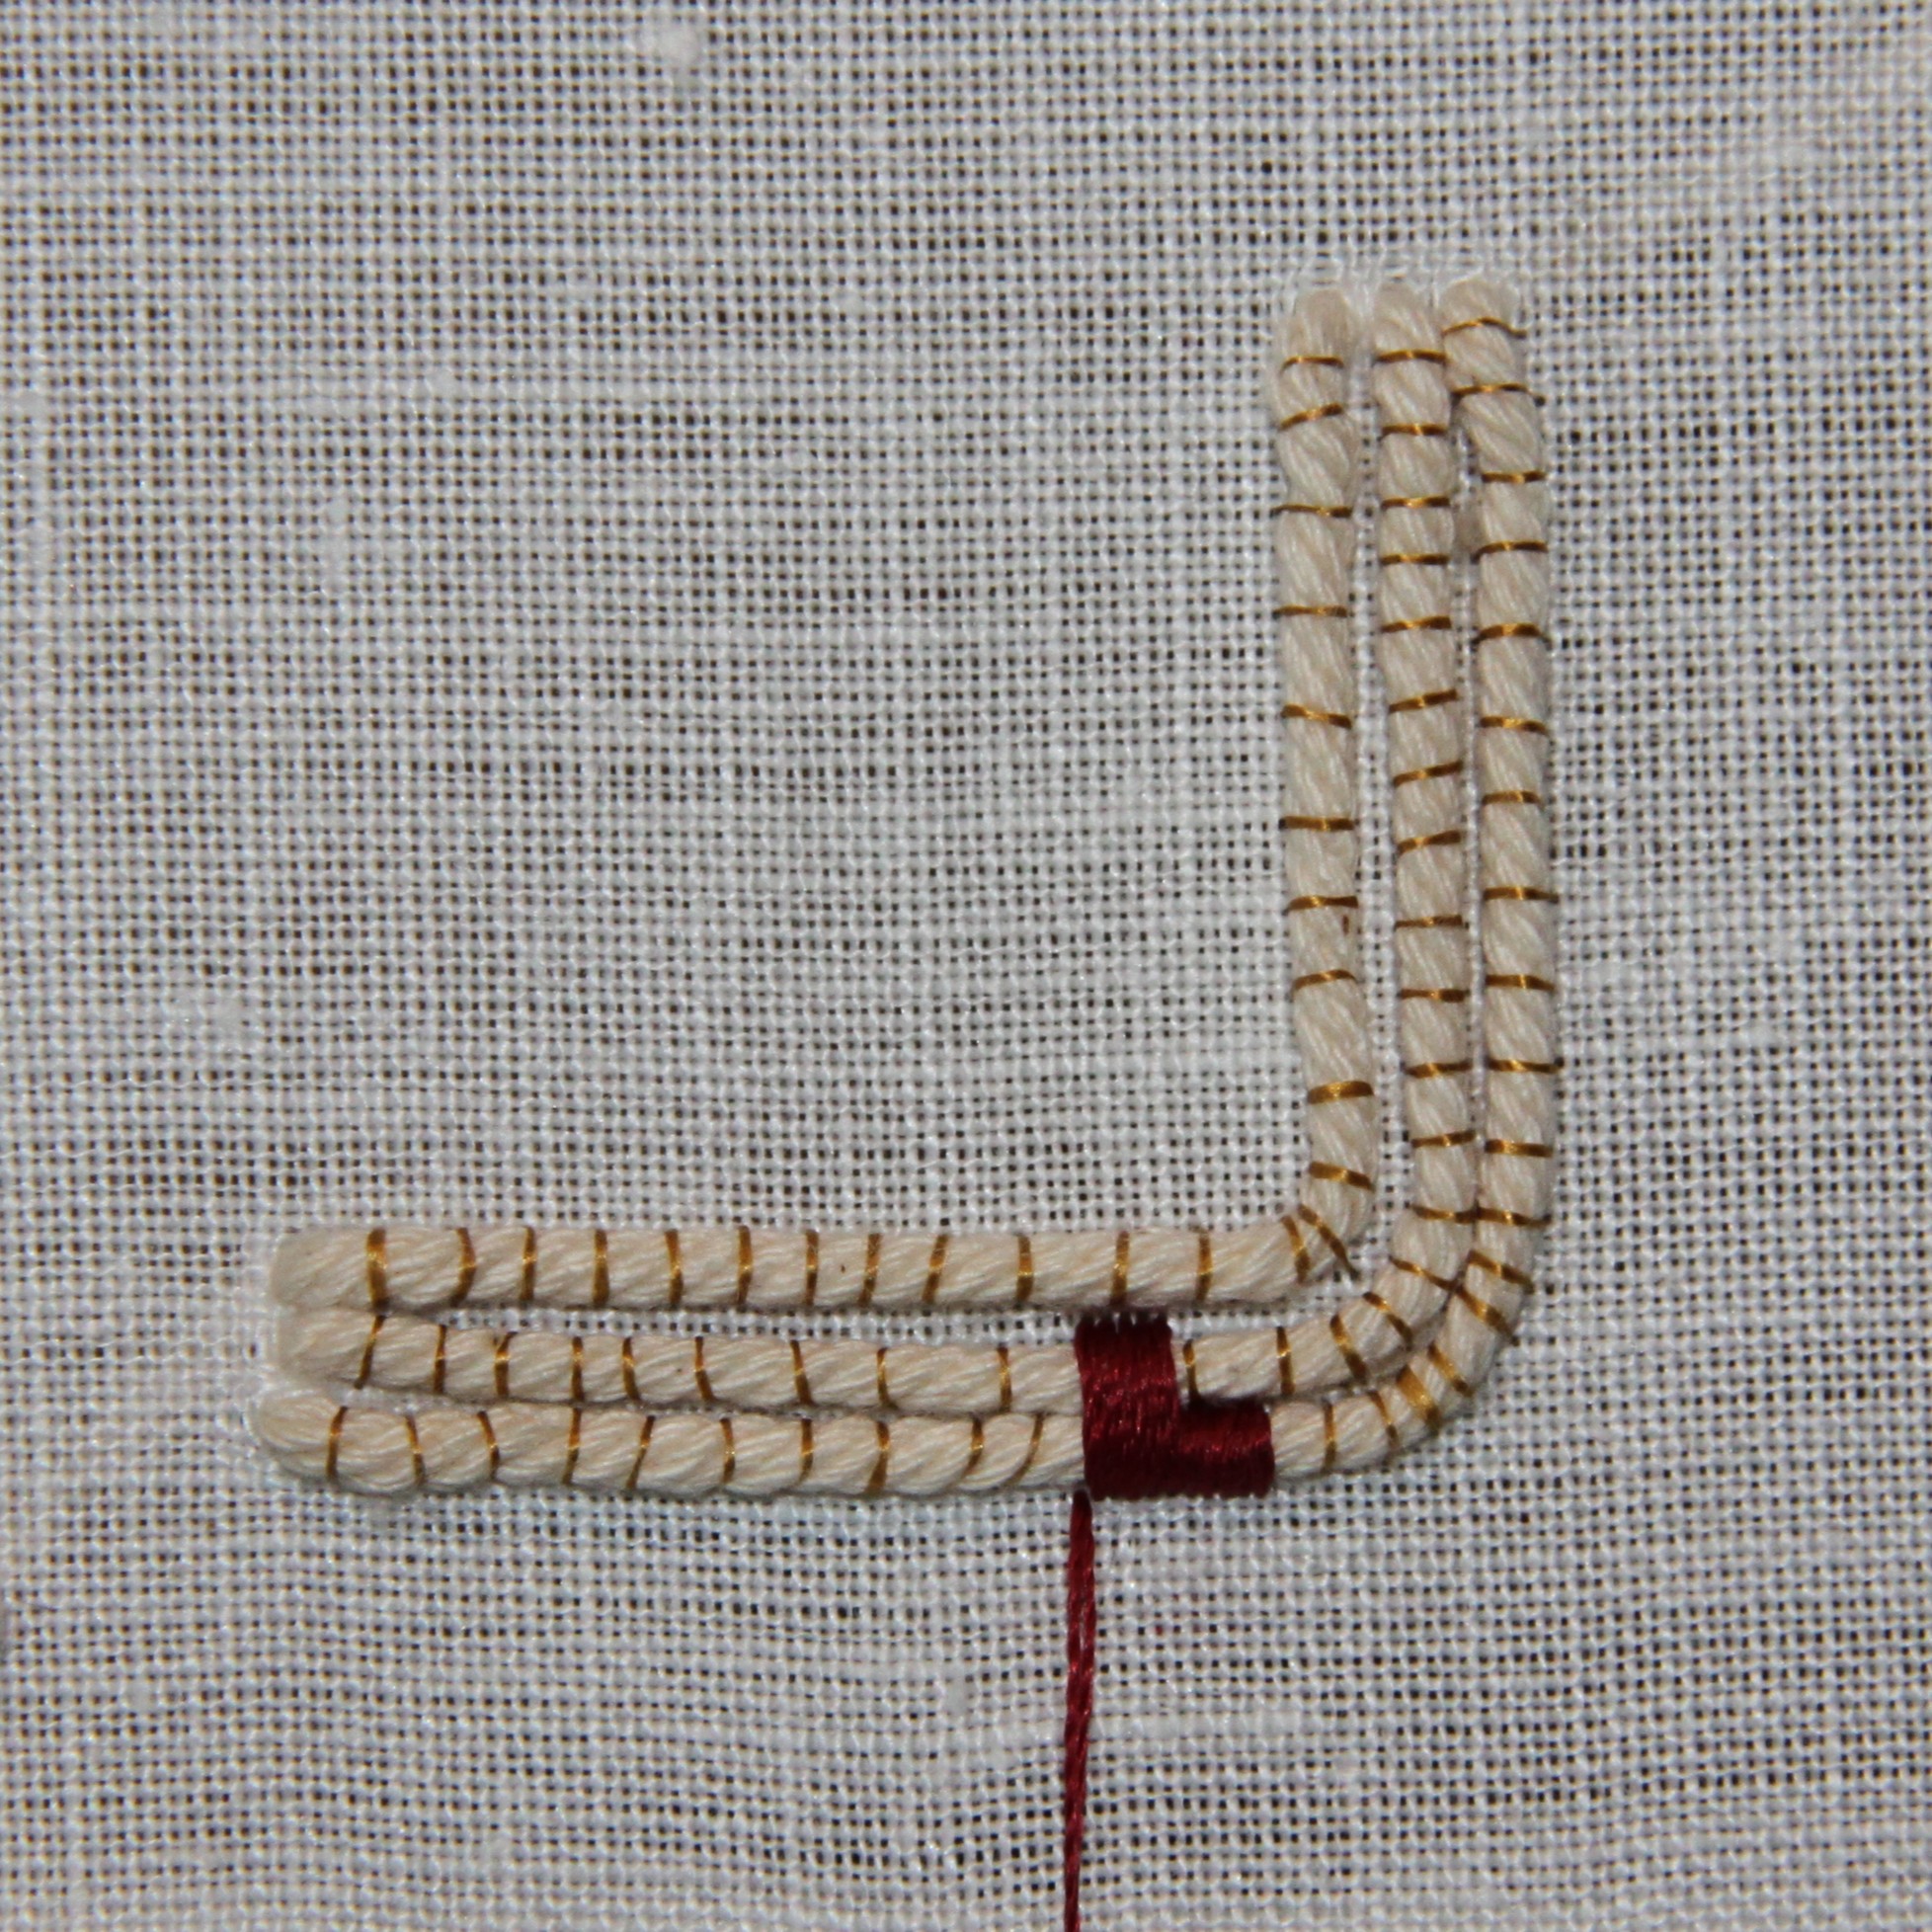
Thread up your fine silk sewing thread and couch down the padding at regular intervals. Start with your top padding thread so that you can pull out access and adjust the tension as you go. Don’t pull your stitches too tight and don’t have them too slack either. You don’t want dents in your padding. Equally, the padding threads are not allowed to move either. Follow the grain of the linen fabric for the placement of your couching stitches. Keeping equal distance between the padding threads, especially at the corner, is not easy. Aim for the best. How you anchor your couching thread is up to you; I use a simple knot on the back.
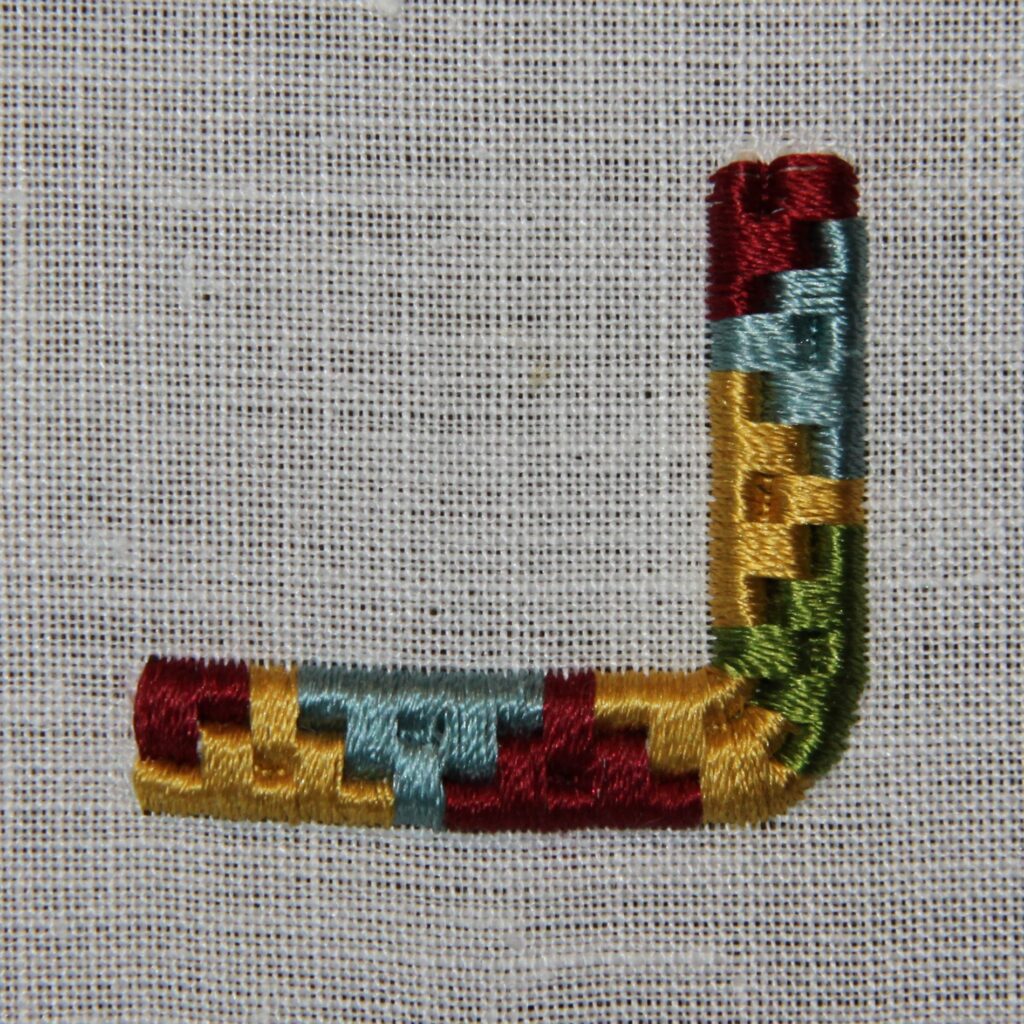
Time to add the silk in this medieval embroidery tutorial. Start close to the corner and work away from it. Thread up two needles, one with a single strand of the Soie de Paris and one with a double strand. Both needles are threaded with the same colour (any one you like). Knot the ends.
You can really only see the grain of your fabric at the bottom and at the top. In between the padding threads you will have to eyeball it. Start by placing five satin stitches over the first padding thread. Work away from the corner). You are welcome to use a laying tool. However, it does not seem that the medieval embroiderer was concerned with how the threads were laying. The second five stitches are placed over two padding threads.
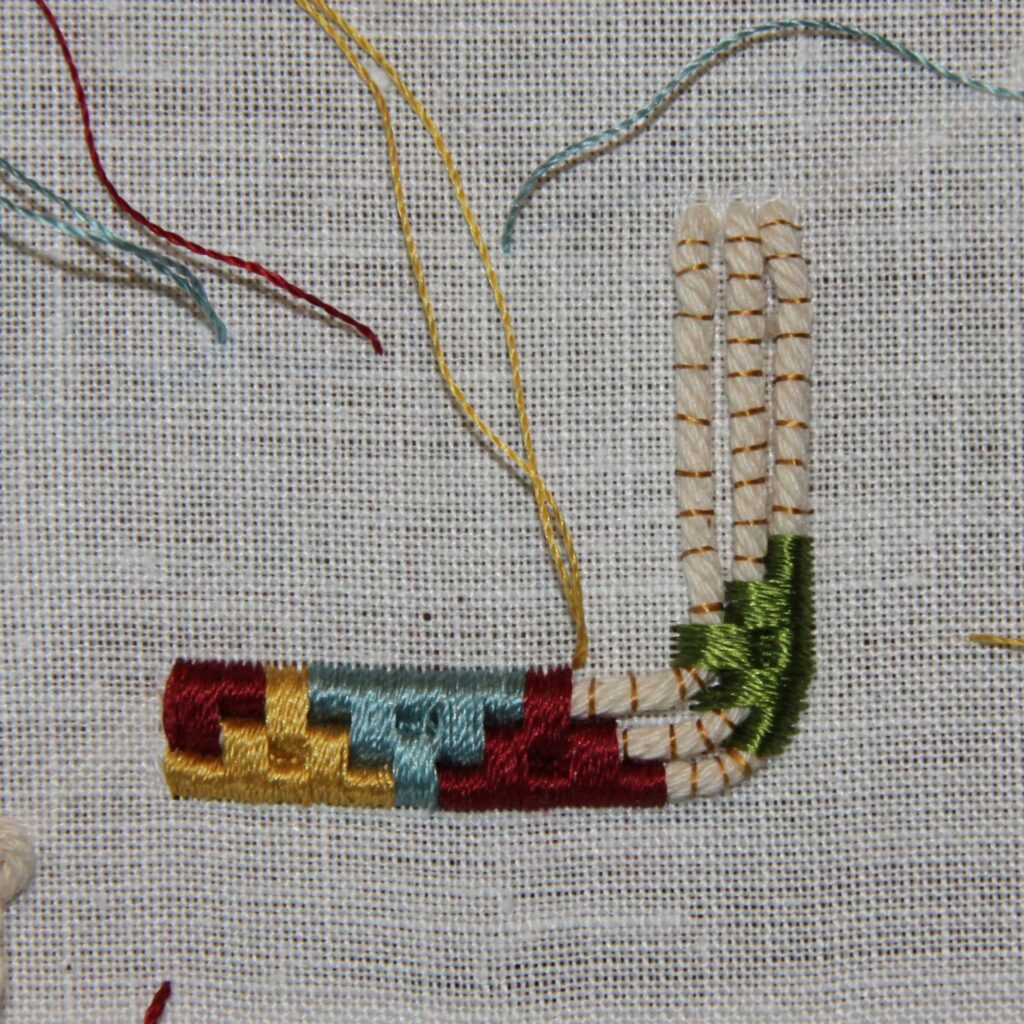
The next five stitches will go over all three padding threads. However, they are couched down with the single strand of silk after the first padding thread. The next five go over two and the last five go over one padding thread. This finishes your first silken triangle.
Park your threads on top for when you next need them. Thread up two needles with the next colour and make your next triangle. Continue to fill your shape this way. Start again away from the corner. And fill the shape you are left with as best as you can. As all such corners are done differently in the original piece, anything goes. Fill the rest of your sample.
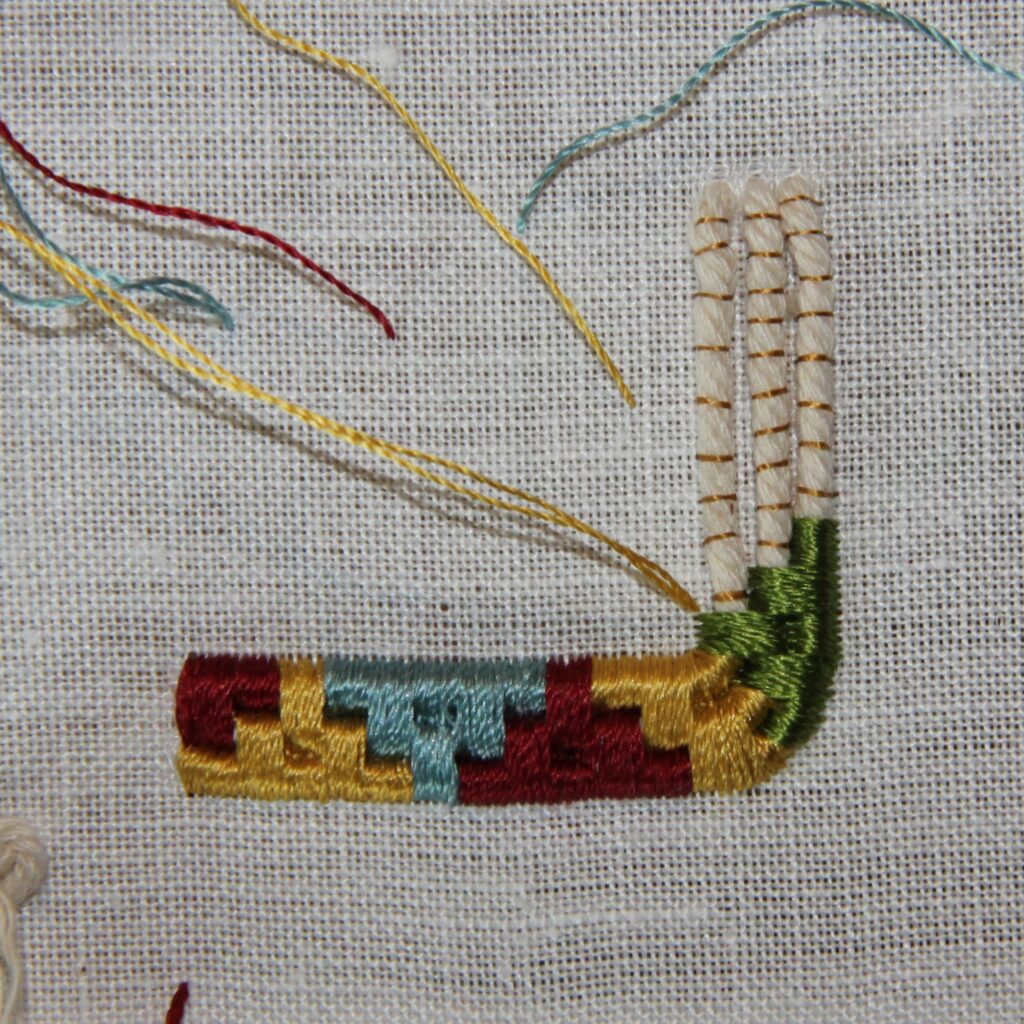
Once all the embroidery has been finished, pull any remaining thread ends to the back. Use them to secure the tails of your padding thread. Weave the silk threads in and cut off the excess.
I hope you have enjoyed this medieval embroidery tutorial. As always, my Journeyman & Master Patrons can find a downloadable PDF of these instructions on my Patreon site.
0 Comments