
In the past, my tutorials have shown you how to layer different layers of
embroidery on top of each other to get a particularly sumptuous result. This
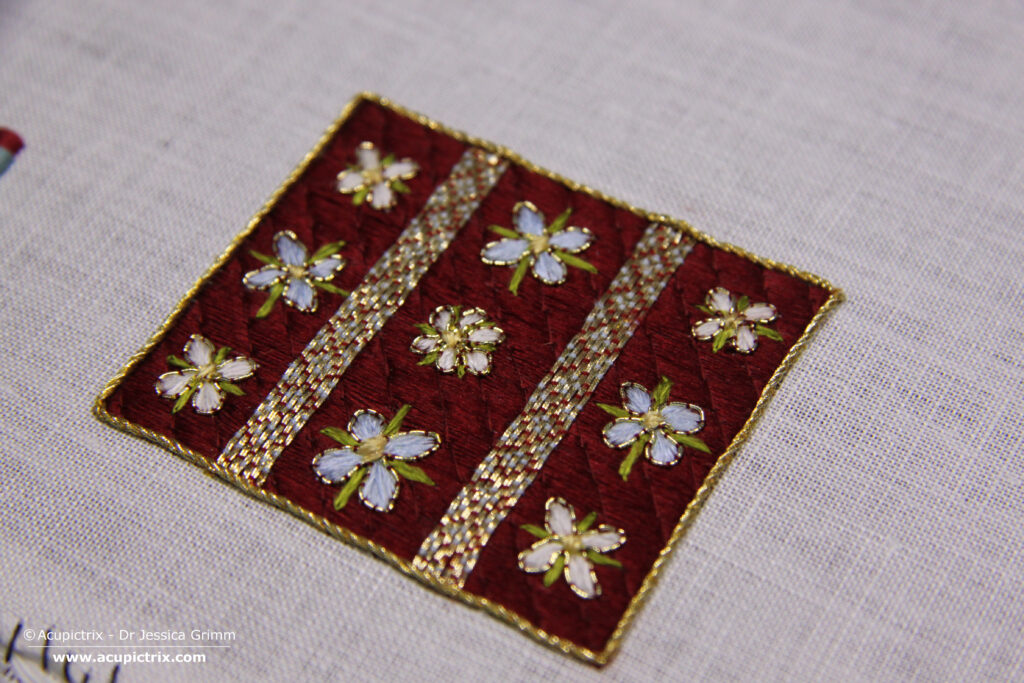
goldwork embroidery tutorial will add to your skills. This time, you will add a beautiful layer of silken flowers freehand. That’s right—no pattern transfer required. This will be really good practice for estimating sizes and aiming for consistency. The sample is based on a blanket seen on a cope from the Cathedral Treasury of Gdańsk /Danzig.
Before we can start the goldwork embroidery tutorial, you will need to set up your embroidery frame with linen. Video instructions on how to dress a professional slate frame can be found here (scroll to the bottom of the page). Where the red silken stitches have shifted, you can see the natural linen underneath. It is 38-43 by 48 count. I therefore choose to work on my standard 48ct Sotema 30L Ricamo linen. I would not opt for a linen below 40ct. Mark your linen with a 6.5 by 5.7 rectangle (on the grain).
Fill the rectangle with laid work. Use an untwisted silk such as Soie ovale by Au ver à Soie. In the next step, you will lay a “half” trellis. These stitches help to keep the laid work in place. The original stitches were placed at a 45-50° angle and are about 0.5 cm apart. You can either split a length of the Soie Ovale or use DeVere Yarns #6 in a matching colour. Start in one of the corners so that you end up with a really long stitch. This way, it is easier to lay parallel stitches with this first very long one as your guide.
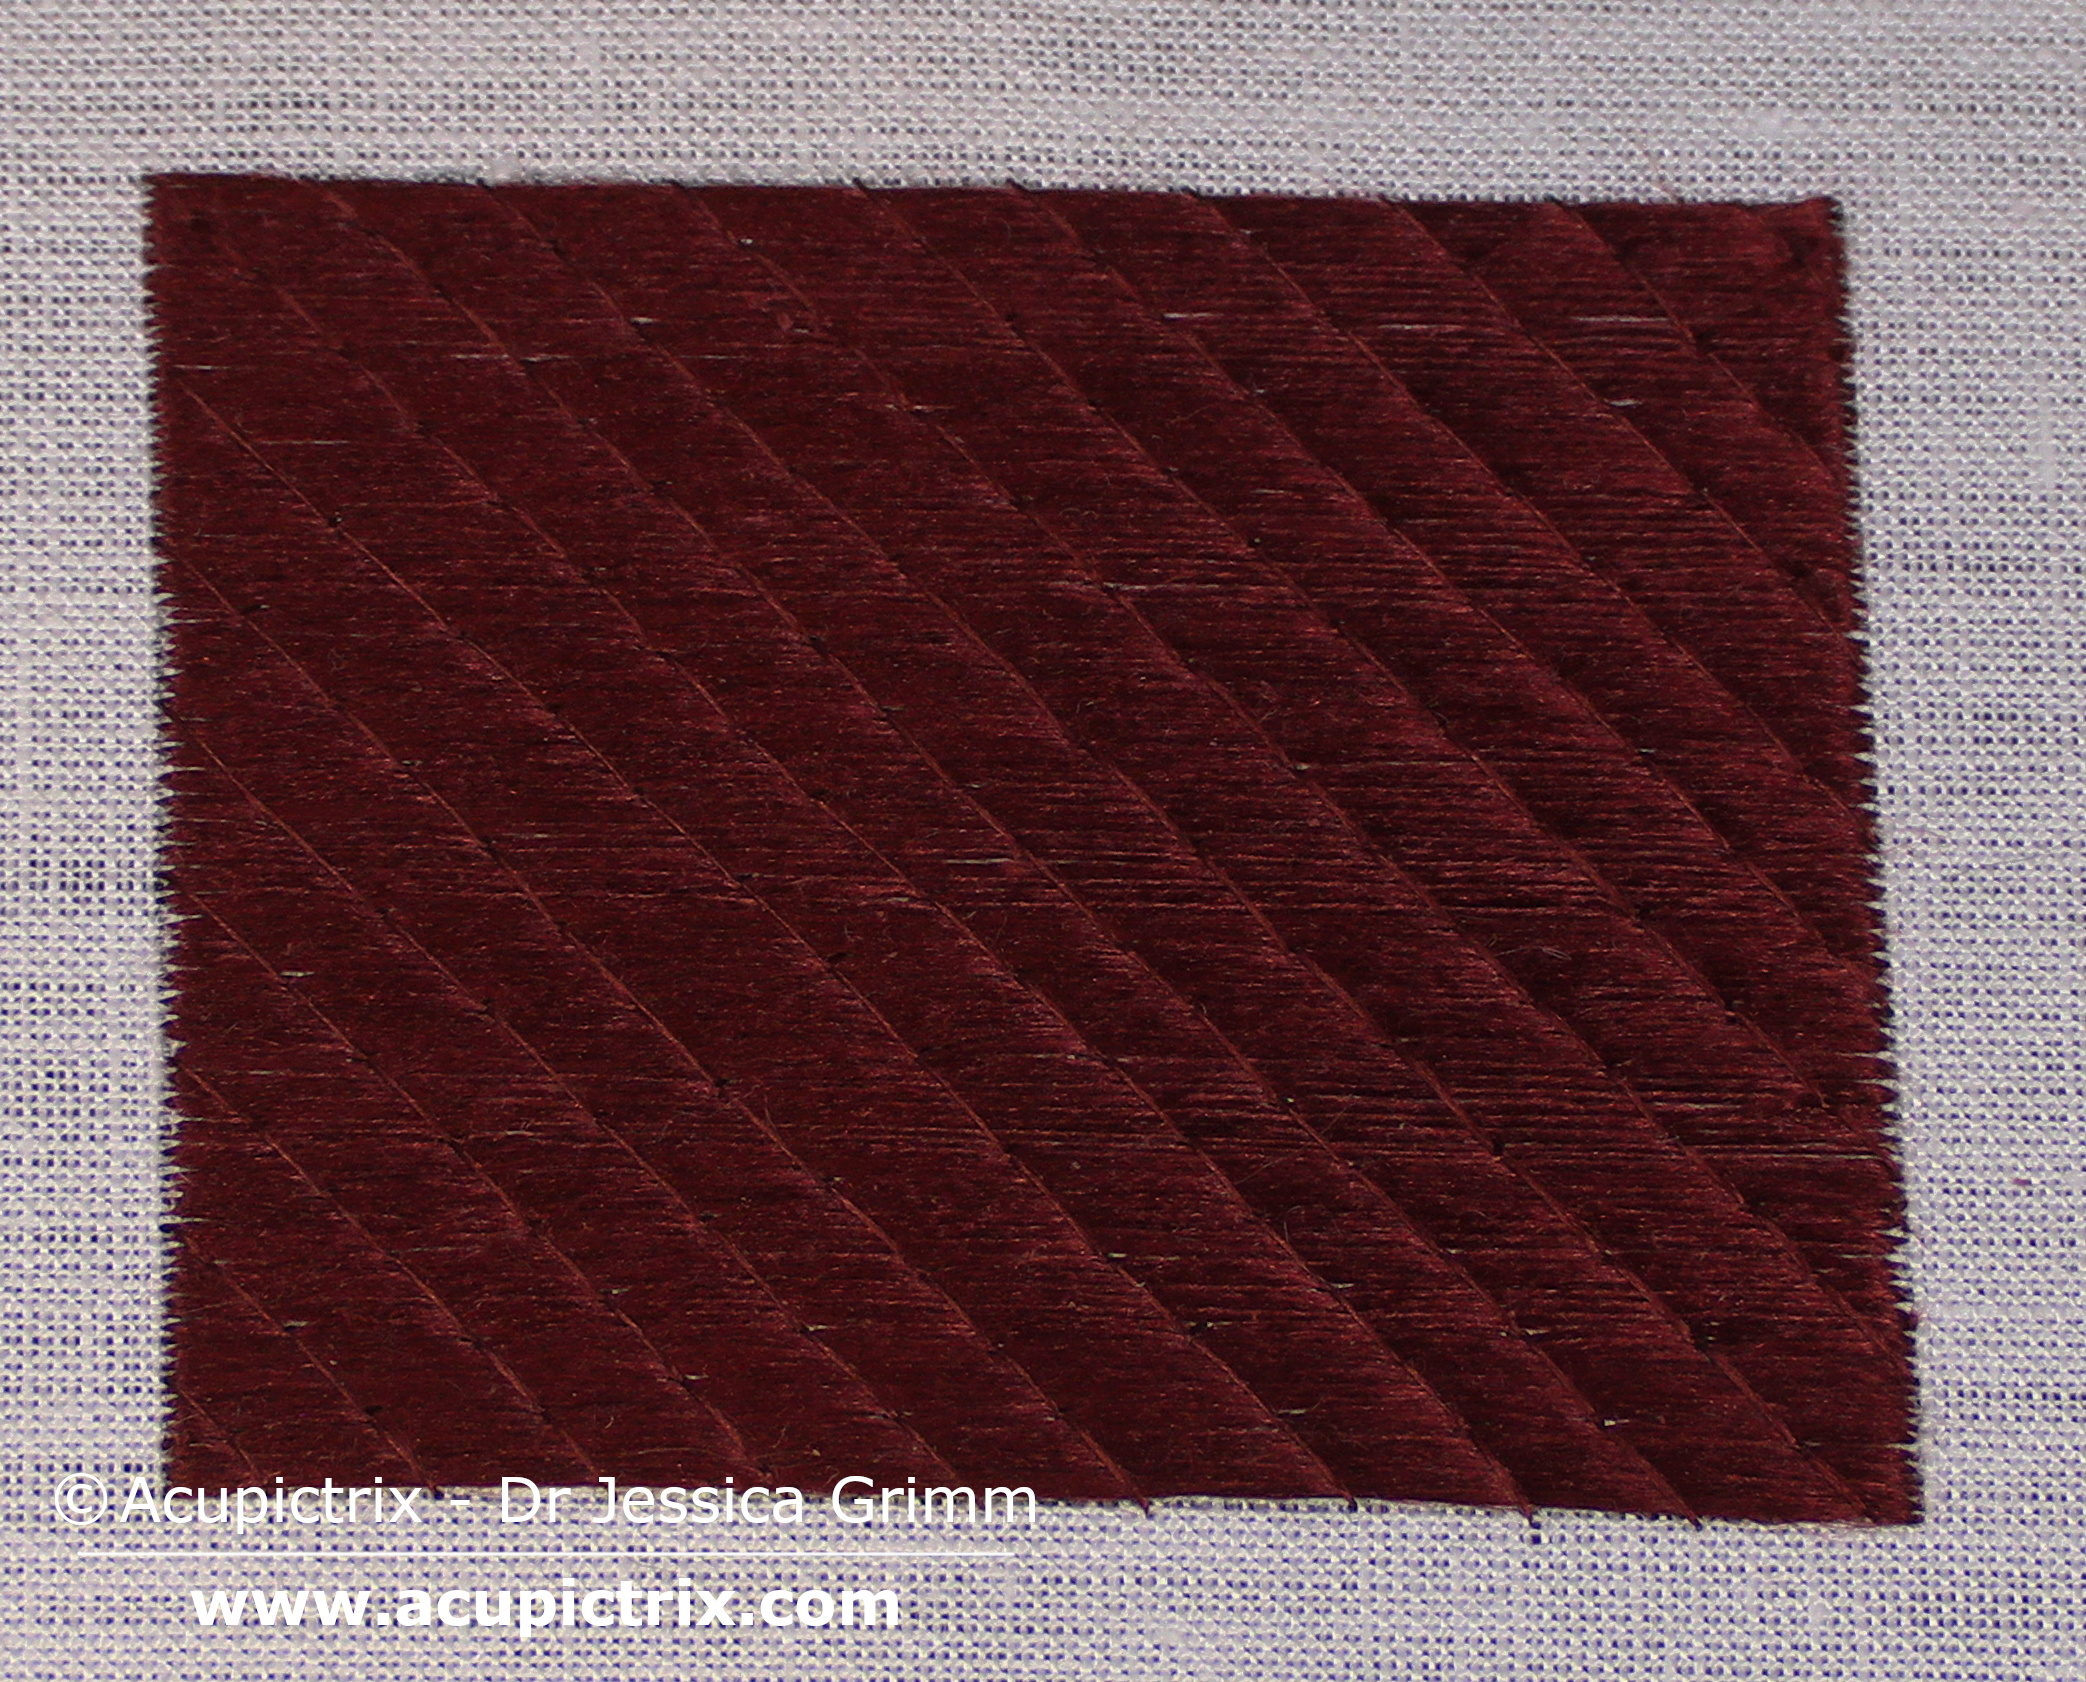
These long stitches need to be couched down. You might need extra light and/or magnification as you are working tone in tone. Use the same thread and start in the middle. Place couching stitches every 3 mm. Make sure not to distort the spacing of the “half” trellis or the laid work. However, since most of it will get covered by the silken flowers and the two golden bands—you have a little wiggle room!
Time to add some gold in this goldwork embroidery tutorial! There are two c. 0.5 cm wide golden bands on the blanket. They start c. 1.7 cm in from either side (mark your fabric on both sides to keep straight). You will need your #4 passing thread and your red Chinese flat silk. Split into two plies and use one for the couching.
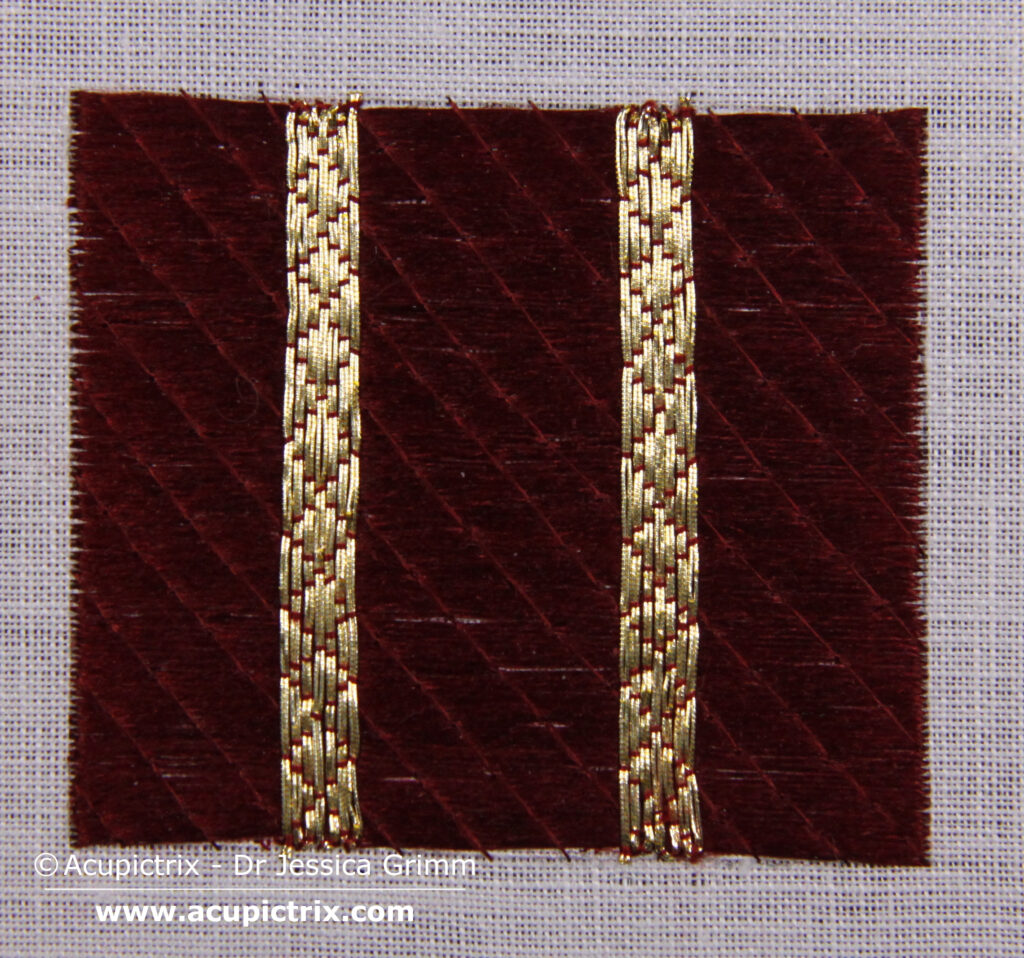
Start by leaving short tails and secure them well with two couching stitches on top of each other. These tails will later simply be cut off—no plunging needed. Your first row of couching stitches should be spaced 5-6 mm apart so that you’ll end up with exactly 10 stitches. These stitches are the outer edge of the
diamond shapes that the diaper pattern is made up of. Turn the corner any way you like.
For the next row, you are going to add couching stitches on either side of the couching stitch in the first row. Make sure you come up outside your gold threads and stitch down towards the previous row. This way, the rows of gold thread will nicely butt up to each other.
The third row will have sets of two couching stitches again in the built-up to the apex of the diamond shape. The fourth row is a single stitch forming the apex of the diamond shape.
The next three rows are a breeze as they are repeats. The fifth row is the same as the third row, the sixth row is the same as the second row, and the seventh row is the same as the first row. Once you have completed the stitching on both bands, secure the gold thread, cut it off and cut off the tails too.

In the original, the diamond diaper pattern is further embellished with light-blue couching stitches. Use your light-blue Chinese flat silk for this. To get between the rows of gold thread, use a thin needle. Add four stitches to each complete diamond and three stitches to each incomplete diamond. Only the incomplete diamonds at the top and the bottom get a single light-blue couching stitch.

In the next step of this goldwork embroidery tutorial, you are going to add the silken flowers. Acupictrix means “she who paints with a needle”, and that’s exactly what you are going to do. Start in the middle of each row of flowers. This makes it easier to space the flowers out correctly. There are four– and six-petaled flowers. Start by putting in either four or six guidelines. Now flesh out the petals with additional stitches. Nothing too formal. Use Chinese flat silk.
Add lazy daisy stitches in green Chinese flat silk for the leaves. Then outline the flowers with a single couched #6 passing thread and your red #6 DeVere yarns silk. Start in the flower heart, work your way around and end in the flower heart, too. Last but not least, stitch in the flower heart with a couple of stitches in yellow Chinese flat silk. These stitches hide your thread ends and any anchoring stitches from the silk embroidery.

The last thing left to do in this goldwork embroidery tutorial is to neaten up the outline by adding #3 Twist. This gold thread consists of three passing threads twisted together. By coming up on the outside and stitching into the Twist, between the strands, you can couch it down almost invisibly. Especially when you are using a thin silken thread in a golden colour that matches the colour of your gold. Ingot by DeVere yarns is often particularly suited.
Plunge the tails of the Twist and tie them back on the reverse. That’s your
Fancy Floral Blanket goldwork embroidery tutorial finished! As always, my Journeyman and Master supporters will find a downloadable PDF, this time with Video instructions, on my Patreon page.